Mahapratisara Vidyavidhi: The Spell-Manual of the Great Amulet — Article Plan
This article details rituals concerning Mahapratisara Devi, focusing on yantra construction, mantras, and worship procedures.
It explores her connection to Pratyangira and amulet creation, offering a comprehensive guide for practitioners seeking protection and spiritual growth.
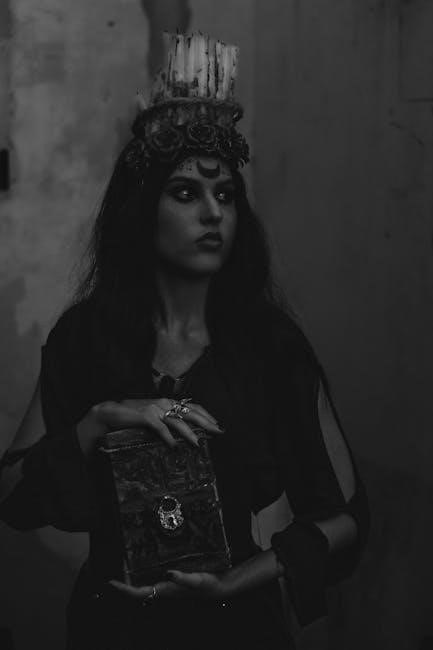
Mahapratisara Devi, a powerful deity within the Hindu tantric tradition, is revered as a fierce protector and remover of obstacles. Her name itself, “Maha-Pratisara,” signifies “Great Defender” or “Great Protector Against Evil;” This deity is particularly associated with safeguarding practitioners during complex tantric rituals and offering potent protection against negative energies, curses, and hostile forces.
The Vidyavidhi, or spell-manual, dedicated to Mahapratisara outlines specific procedures for invoking her blessings and harnessing her protective power. This ancient text details the construction of her yantra, the recitation of specific mantras, and the performance of elaborate pujas (worship ceremonies). Understanding Mahapratisara requires acknowledging her dynamic nature – a force capable of both fierce destruction of negativity and compassionate bestowal of blessings upon sincere devotees. She is often visualized emerging from the third eye of Pratyangira, further emphasizing her potent and formidable energy.
The Historical Context of the Vidyavidhi
Tracing the origins of the Mahapratisara Vidyavidhi proves challenging, as much of its knowledge was transmitted orally within tantric lineages for centuries. While a precise dating remains elusive, textual analysis suggests roots in the later periods of Tantric development, likely between the 8th and 12th centuries CE. The Vidyavidhi itself isn’t a single, monolithic text, but rather a collection of related practices and instructions passed down through various schools.
The emergence of Mahapratisara worship likely coincided with a growing need for potent protective deities amidst periods of social and political upheaval. The detailed instructions within the Vidyavidhi – concerning yantra construction, mantra recitation, and ritual procedures – indicate a sophisticated understanding of tantric cosmology and energetic principles. The document’s survival, primarily through manuscript copies, underscores its importance to practitioners seeking powerful safeguards against adversity and spiritual obstacles.
Mahapratisara as a Protective Deity
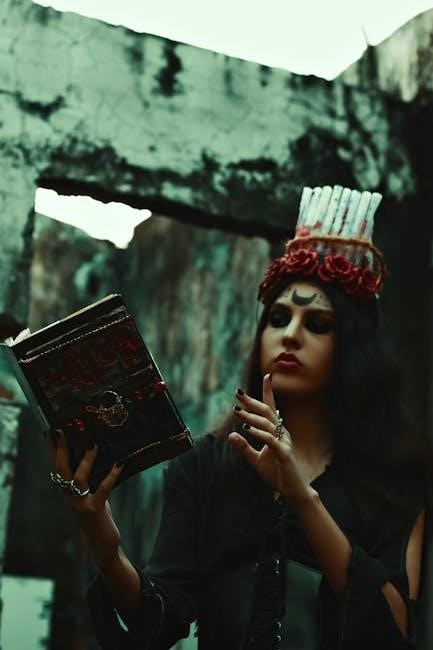
Mahapratisara Devi is fundamentally a protective deity, invoked to ward off negative energies, obstacles, and harmful influences. Her fierce form, often depicted with multiple heads and arms wielding weapons, symbolizes her unwavering power to overcome adversity. Unlike deities focused solely on granting boons, Mahapratisara actively confronts and destroys forces that threaten the practitioner’s well-being – both physical and spiritual.
The Vidyavidhi emphasizes her role in neutralizing curses, black magic, and the malice of enemies. She’s considered particularly effective in situations demanding swift and decisive action. Her protective umbrella extends beyond the individual, safeguarding communities and spaces dedicated to spiritual practice. Through dedicated worship and the utilization of her yantra and mantras, devotees seek to establish an impenetrable shield against all forms of harm, fostering a secure environment for growth.
The Yantra Construction
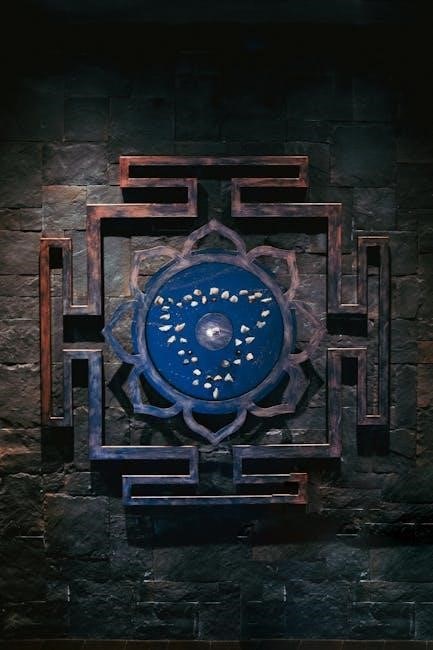
The construction of Mahapratisara’s yantra is a crucial component of the Vidyavidhi, serving as a focal point for invoking the deity’s power. This sacred diagram isn’t merely a symbolic representation; it’s considered a manifestation of the goddess herself. The document details specific instructions for its creation, emphasizing precise geometric arrangements and the correct placement of various deities within its structure.
The yantra’s design incorporates intricate patterns and symbolic elements representing Mahapratisara’s energies and attributes. Careful attention must be paid to the depiction of these deities, as their accurate portrayal is believed to be essential for a successful ritual. The yantra acts as a conduit, channeling divine energy and facilitating a direct connection with Mahapratisara, amplifying the efficacy of mantras and worship practices.
Materials Required for the Yantra
Constructing the Mahapratisara yantra necessitates specific materials chosen for their symbolic resonance and energetic properties. While the source document doesn’t explicitly list all materials, traditional yantra construction generally requires a suitable base – often a copper plate, though wood or cloth can be used. High-quality pigments, traditionally derived from natural sources, are essential for drawing the intricate geometric patterns and deity representations.
These pigments, typically red, yellow, blue, and white, correspond to specific energies and directions. A fine-tipped brush or stylus is needed for precise linework. Furthermore, materials for representing the deities within the yantra – small images or symbolic objects – may be required. The purity and quality of these materials are paramount, as they directly influence the yantra’s potency and effectiveness in ritual practice.
Step-by-Step Guide to Drawing the Yantra
The document details that the Mahapratisara yantra’s construction is intricate, demanding precision and adherence to established guidelines. While a complete, detailed guide isn’t provided, the source indicates the yantra involves a sacred diagram with specific deity placements. The initial step involves establishing the central point and outlining the geometric framework – typically a series of interlocking triangles and squares.
Subsequently, the various deities are depicted within designated areas of the yantra. The precise arrangement and symbolism of these deities are crucial. Careful attention must be paid to proportions and symmetry. The document emphasizes the importance of accurately representing Mahapratisara emerging from Pratyangira’s third eye, with her four heads and eight arms wielding weapons. This requires skilled artistry and a deep understanding of tantric iconography.
Deity Placement within the Yantra
The source material highlights that precise deity placement is fundamental to the yantra’s efficacy. Mahapratisara’s depiction, emerging from Pratyangira’s third eye, is central. She is visualized with four heads and eight arms, each holding specific weapons – a powerful representation of her protective energy. Surrounding deities are arranged according to a specific cosmological order, influencing the yantra’s energetic field.
The document suggests that different areas within the yantra are assigned to various deities, though specifics aren’t fully detailed. These placements aren’t arbitrary; they correspond to the practitioner’s intention and the desired outcome of the ritual. Accurate depiction and placement are vital for establishing a harmonious connection with the deities and harnessing their power. This requires a thorough understanding of tantric symbolism and iconography.
Mantras for Invocation
Central to Mahapratisara worship are specific mantras, acting as vibrational keys to connect with the deity’s energy. The primary Mahapratisara mantra, though not explicitly provided in the source, is essential for establishing a devotional link. Crucially, the document details ‘Nyasa’ mantras – placement mantras – used to ritually assign deities to different parts of the practitioner’s body before worship.
These Nyasa mantras are not merely recitations; they are energetic imprints, preparing the body as a vessel for the deity’s presence. Furthermore, mantras exist for invoking the deities that emerge alongside Mahapratisara, expanding the ritual’s scope and power. Correct pronunciation and focused intention are paramount when chanting these mantras, ensuring their effectiveness in drawing down divine energy.
The Primary Mahapratisara Mantra
Unfortunately, the source document does not explicitly reveal the complete primary Mahapratisara mantra itself. This is a common practice in tantric traditions, where such mantras are often transmitted directly from a guru to a disciple during initiation. However, the text emphasizes the mantra’s fundamental importance as the core vibrational link to the goddess.
Without the precise wording, understanding its function remains crucial. The mantra serves as an invocation, a request for Mahapratisara’s presence and blessings. Practitioners would likely utilize a received mantra, focusing intently on its sound and meaning during ritual practice; The power resides not just in the words, but in the devotion and focused intention channeled through them, establishing a sacred connection.
Nyasa Mantras for Body Placement
The document highlights the significance of nyasa mantras – specific verses used to ritually place deities within the practitioner’s body. This process is a foundational element of the Mahapratisara Vidyavidhi, establishing a microcosmic resonance with the macrocosmic deity. These mantras aren’t explicitly provided in the source, but their purpose is clearly defined: to invoke and situate various divine energies within specific body parts.
Through precise recitation and visualization, the practitioner transforms their body into a sacred vessel, mirroring the yantra’s structure. This internal mapping prepares the devotee for deeper communion with Mahapratisara and the deities emerging from her. The nyasa practice isn’t merely symbolic; it’s believed to activate subtle energy channels, facilitating a powerful spiritual experience.
Mantras for Emerging Deities
The Mahapratisara Vidyavidhi incorporates mantras dedicated to the deities who emanate from Mahapratisara herself. The source material indicates that visualizing Mahapratisara emerging from Pratyangira’s third eye is central to the practice, and specific mantras would accompany this visualization. While the exact mantras aren’t detailed in the provided text, their function is implied: to invoke and stabilize the presence of these emerging energies.
These deities, appearing with four heads and eight arms wielding weapons, represent various aspects of Mahapratisara’s power. Reciting their respective mantras strengthens their manifestation and integrates their qualities into the practitioner’s being. This process amplifies the ritual’s efficacy, fostering protection, overcoming obstacles, and accelerating spiritual advancement.
Ritual Procedures
The Mahapratisara Vidyavidhi outlines a structured ritual process for effective worship. This begins with meticulous preparation of the ritual space, ensuring a clean and consecrated environment conducive to divine presence. Crucially, purification rites precede the core worship (Puja), removing any energetic impurities and establishing a receptive atmosphere.
The Puja itself likely involves offerings, mantra recitation – including the primary Mahapratisara mantra and Nyasa mantras for body placement – and visualization practices. The document suggests a focus on invoking Mahapratisara’s emergence from Pratyangira, requiring precise mantra application. Following these steps correctly is vital for achieving the desired outcomes of protection, obstacle removal, and spiritual progress.
Preparation of the Ritual Space
Creating a sacred and purified space is paramount before commencing Mahapratisara worship. This involves a thorough cleaning of the area, removing all distractions and ensuring a serene atmosphere. Traditionally, the space is often marked with protective boundaries, perhaps using rice flour or a cord, to delineate the sacred zone.
Placement of the Mahapratisara yantra is central, positioned facing east or north, depending on lineage practices. Offerings, such as flowers, incense, and water, are arranged respectfully. The practitioner themselves should bathe and wear clean clothing, symbolizing inner purification. This meticulous preparation demonstrates reverence and establishes a potent energetic foundation for the ritual’s success, inviting the deity’s presence.
Purification Rites Before Worship
Prior to invoking Mahapratisara, rigorous purification rites are essential for both the practitioner and the ritual implements. This begins with achamana – sipping water consecrated with mantras – to cleanse internally; External purification often involves sprinkling the space and oneself with holy water, sometimes infused with sandalwood or other sacred herbs.
Nyasa, the ritual placement of deities onto specific body parts using mantras, is a crucial preparatory step. These mantras, detailed within the Vidyavidhi, establish a connection between the microcosm (the body) and the macrocosm (the deity). Cleansing the yantra with scented water and offering incense further purifies the ritual tools. These practices eliminate negative energies and prepare the devotee to receive Mahapratisara’s blessings.
The Core Worship Procedure (Puja)
The Puja to Mahapratisara follows a structured sequence, beginning with offerings of water, incense, and flowers to the deity. Recitation of the primary Mahapratisara mantra is central, accompanied by visualization of her form – four-headed, eight-armed, and radiant.
Offerings of naivedya (sacred food) are presented, symbolizing nourishment and devotion. Further mantras invoke the emerging deities associated with Mahapratisara, expanding the ritual’s energetic field. Throughout the Puja, the practitioner maintains focused concentration, directing their intention towards protection and spiritual advancement. The concluding stages involve arati (waving of lamps) and seeking the deity’s blessings for fulfillment of desires and removal of obstacles.
Mahapratisara and Pratyangira
A significant aspect of Mahapratisara’s iconography and practice lies in her profound connection to Pratyangira, a fierce goddess known for her protective power. The Vidyavidhi texts describe Mahapratisara as emerging directly from Pratyangira’s third eye, signifying a potent transmission of energy and authority.
This emergence manifests as Mahapratisara’s four heads and eight arms, wielding weapons symbolizing her ability to vanquish negativity. Understanding this relationship is crucial, as invoking Pratyangira can amplify the efficacy of Mahapratisara’s worship. The shared energetic lineage underscores their complementary roles in safeguarding practitioners and overcoming obstacles, establishing a powerful synergistic dynamic within the tantric system.
The Connection Between Mahapratisara and Pratyangira
The link between Mahapratisara and Pratyangira isn’t merely symbolic; it’s a core tenet of the Vidyavidhi. Mahapratisara is visualized as emanating from the third eye of Pratyangira, representing a direct energetic transfer. This isn’t a subordinate relationship, but one of powerful manifestation – Pratyangira’s raw force channeled into a specific protective form.
This connection implies that practices dedicated to Pratyangira can significantly enhance Mahapratisara’s efficacy. Practitioners often invoke Pratyangira before Mahapratisara, preparing the energetic field for the latter’s arrival. The shared lineage suggests a unified source of power, making them allies in combating negative forces and achieving spiritual goals. Recognizing this bond is vital for a complete understanding of Mahapratisara’s power.
Mahapratisara Emerging from Pratyangira’s Third Eye
The visualization of Mahapratisara arising from Pratyangira’s third eye is central to the Vidyavidhi’s practice. This imagery isn’t arbitrary; it signifies a potent energetic birth. Pratyangira, embodying fierce power, concentrates her force into a single point – the third eye – releasing Mahapratisara as a specialized manifestation of protection.
During meditation, practitioners focus intently on this emergence, visualizing the deity forming with four heads and eight arms, wielding powerful weapons. This isn’t simply a mental exercise, but a process of energetic creation, drawing upon Pratyangira’s strength. The act of witnessing this emergence is believed to activate Mahapratisara’s protective energies within the practitioner, fostering a direct connection to the deity’s power.
Significance of the Four Heads and Eight Arms
Mahapratisara’s iconography – four heads and eight arms – is deeply symbolic, representing her all-encompassing power and protective reach. The four heads survey all directions, ensuring vigilance against threats from any quarter. Each face embodies a different aspect of her divine consciousness, granting her complete awareness.
The eight arms wield various weapons, each designed to counter specific negative forces. These aren’t instruments of aggression, but tools for dismantling obstacles and safeguarding devotees; This multi-armed form signifies her ability to simultaneously address multiple challenges. The weapons symbolize her power to destroy negativity and establish dharma. This potent imagery reinforces Mahapratisara’s role as a fierce protector and a powerful ally in spiritual practice;
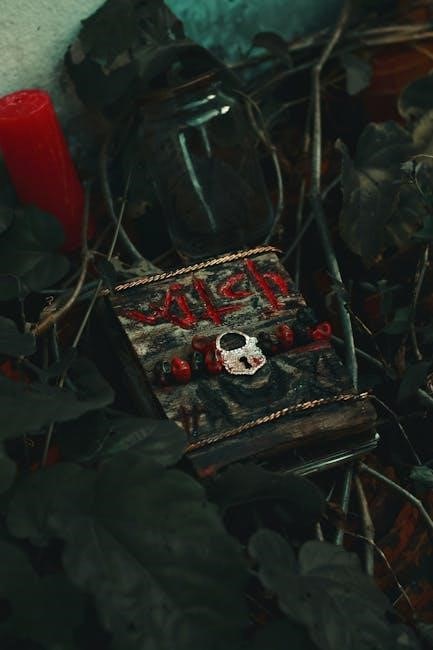
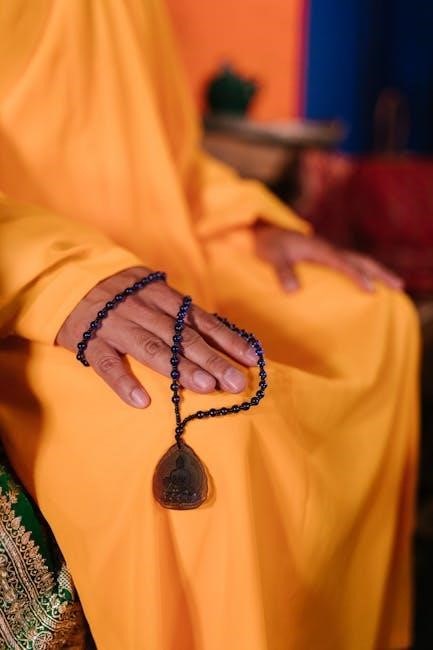
The Amulet Aspect of Mahapratisara
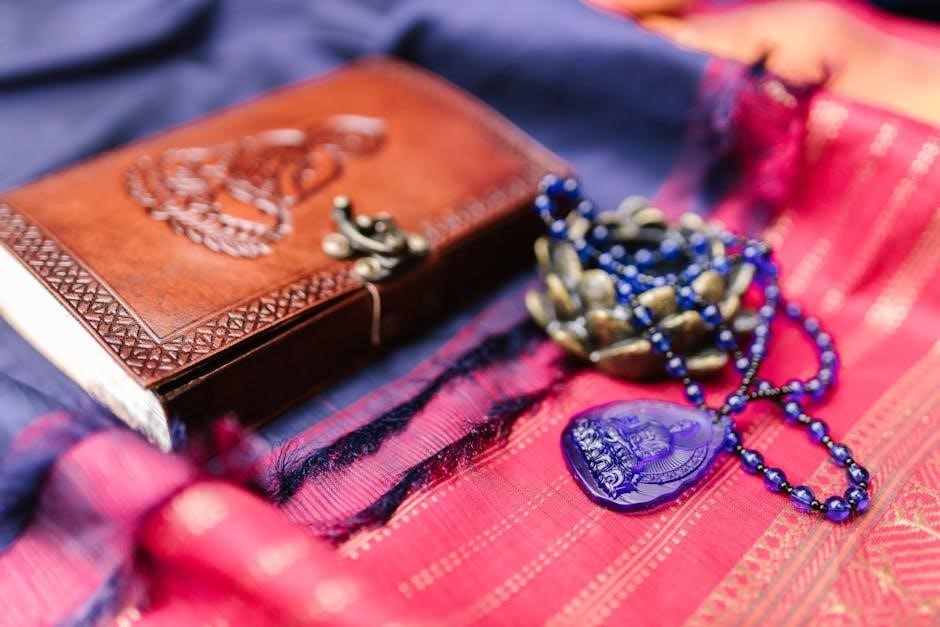
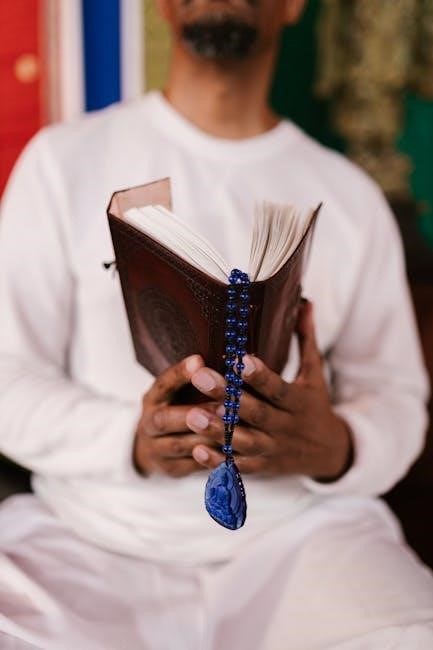
Mahapratisara’s power extends beyond ritual worship into the realm of protective amulets. These consecrated objects serve as potent talismans, offering continuous safeguarding to the wearer. Creating a Mahapratisara amulet involves specific materials and procedures to imbue it with her divine energy.
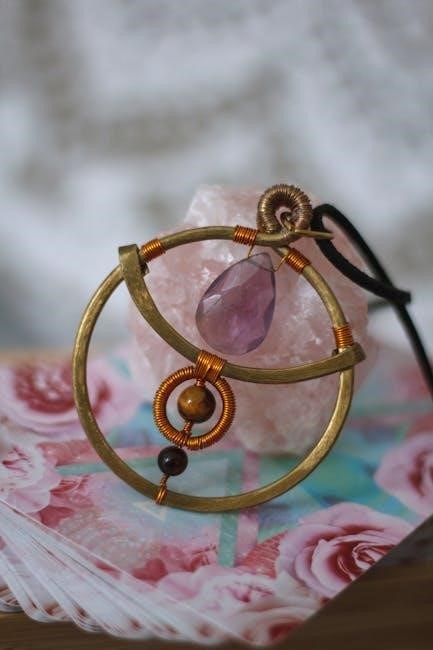
Amulets are often crafted from metals like silver or copper, or even natural materials, inscribed with her yantra or seed syllable (bija mantra). The creation process demands purity and focused intention. Crucially, the amulet requires abhisheka – a ritual empowerment – performed by a qualified practitioner to fully activate its protective qualities. This empowers the amulet to deflect negative energies and bestow blessings upon the devotee, acting as a constant source of strength and security.
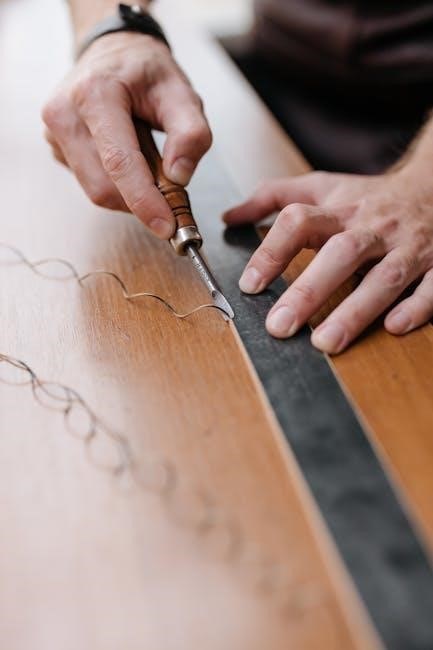
Creating a Mahapratisara Amulet
The creation of a Mahapratisara amulet is a meticulous process demanding reverence and precision. Begin by selecting a suitable material – silver, copper, or even a carefully chosen natural stone – shaped into a pendant or small plate. The yantra of Mahapratisara, or her bija mantra, is then etched or inscribed onto the surface. This requires a steady hand and focused intention, visualizing the deity’s energy flowing into the amulet.
Throughout the crafting, maintain a clean and sacred space. Once the inscription is complete, the amulet is prepared for empowerment. This isn’t merely a physical creation; it’s a conduit for divine energy. The artisan must be initiated and possess a clear understanding of the ritual procedures to successfully channel Mahapratisara’s protective force into the object;
Materials Used in Amulet Creation
The selection of materials for a Mahapratisara amulet is crucial, influencing its potency and resonance. Traditionally, metals like silver and copper are favored due to their conductive properties, believed to effectively channel divine energy. Silver, associated with the moon, offers calming and protective qualities, while copper, linked to the sun, provides strength and vitality.
Certain gemstones are also incorporated, chosen based on their astrological correspondences and energetic properties. Carnelian, for courage and protection, and garnet, for overcoming obstacles, are common choices. The inscription material – ink, paste, or even powdered gemstones – must be of high quality and prepared with sacred intent. Natural materials, ethically sourced, are always preferred, ensuring harmony with the amulet’s purpose.
Empowerment (Abhisheka) of the Amulet
The Abhisheka, or empowerment, is the pivotal stage in creating a potent Mahapratisara amulet, infusing it with the deity’s divine energy. This ritual typically involves a qualified practitioner performing specific mantras and visualizations; The amulet is bathed in a series of sacred substances – milk, yogurt, honey, ghee, and water – each representing purification and nourishment.
Following the bath, the amulet is adorned with sandalwood paste and kumkum (red powder), symbolizing auspiciousness and divine presence. The practitioner then recites the primary Mahapratisara mantra repeatedly, focusing intent on activating the amulet’s protective and benevolent powers. Finally, offerings of flowers, incense, and food are made, solidifying the connection between the amulet and the goddess.
Benefits of Mahapratisara Worship
Devotion to Mahapratisara yields profound benefits, primarily centered around potent protection. Worshippers experience a shield against negative energies, curses, and harmful influences, fostering a secure and harmonious life. This deity excels at removing obstacles – both internal and external – that hinder progress on one’s path.
Furthermore, Mahapratisara assists in overcoming enemies and adversaries, not through malice, but by neutralizing their harmful intent. Beyond protection, consistent worship facilitates significant spiritual advancement. The energy of Mahapratisara purifies the mind, enhances intuition, and accelerates the journey towards enlightenment, ultimately leading to liberation and inner peace.
Protection from Negative Energies
Mahapratisara’s core strength lies in her unparalleled ability to ward off negative energies. This protective power extends to shielding against curses, black magic, and the detrimental influences of malevolent spirits. Her fierce energy acts as an impenetrable barrier, dissolving negativity before it can take root.
Worship creates a sanctuary, safeguarding the devotee’s physical, emotional, and spiritual well-being. This isn’t merely a passive defense; Mahapratisara actively repels harmful forces, transforming them into positive energy. Regular practice establishes a constant shield, ensuring lasting protection and peace of mind, allowing for undisturbed spiritual growth and a life free from undue suffering.

Overcoming Obstacles and Enemies
Mahapratisara’s power isn’t limited to defensive protection; she actively assists in overcoming obstacles and neutralizing enemies. This isn’t about inflicting harm, but about dissolving the sources of conflict and removing impediments to progress. Her energy breaks down barriers – both internal and external – that hinder success and fulfillment.
Through dedicated worship and mantra recitation, devotees can dismantle the schemes of adversaries and navigate challenging situations with clarity and strength. She empowers individuals to confront difficulties head-on, transforming potential setbacks into opportunities for growth. This deity facilitates victory, not through aggression, but through the skillful dismantling of opposition and the establishment of a harmonious path forward.
Spiritual Advancement through Mahapratisara
Beyond worldly benefits, devotion to Mahapratisara fosters profound spiritual advancement. Her energy facilitates the purification of karmic patterns and the dissolution of egoic limitations, paving the way for deeper self-realization. Through consistent practice – mantra recitation, yantra worship, and ritual observance – practitioners can unlock hidden potentials and accelerate their journey towards enlightenment.
Mahapratisara’s fierce compassion cuts through illusion, revealing the true nature of reality. She guides devotees towards inner peace, wisdom, and liberation from the cycle of suffering. This path isn’t merely about attaining spiritual power, but about cultivating a heart filled with unconditional love and unwavering devotion, ultimately leading to union with the Divine.