mi alma se la dejo al diablo pdf gratis

This gripping non-fiction narrative by Germán Castro Caycedo explores the haunting tale of a man who died in the Colombian Amazon, leaving behind a diary. The book’s title, “Mi Alma Se La Dejo Al Diablo”, is the final phrase of this diary, uncovering a tragic story of abandonment and mystery. The author spent four years investigating the events, creating a compelling account that has become a bestseller in Colombia. The book is widely available in print and digital formats, including PDF, making it accessible to readers worldwide.

1.1. Overview of the Book

Mi Alma Se La Dejo Al Diablo is a narrative non-fiction work by Germán Castro Caycedo, centered on the diary of Benjamín Cubillos, a man who died abandoned in the Colombian Amazon. The book’s title, taken from the diary’s final phrase, sets the tone for a haunting tale of isolation and tragedy. After four years of meticulous research, Castro Caycedo reconstructs the story, blending interviews and personal accounts to create a gripping narrative. The book has become a bestseller in Colombia and is widely available in print and digital formats, including PDF, for readers worldwide.

1.2. The Origin of the Title

The title “Mi Alma Se La Dejo Al Diablo” originates from the final phrase of a diary written by Benjamín Cubillos, a man who died abandoned in the Colombian Amazon. This poignant statement encapsulates the despair and isolation of his final moments, becoming the cornerstone of the book’s narrative. The phrase not only sets the tone for the story but also reflects the broader themes of abandonment and existential struggle explored in the text.

1;3. The Author: Germán Castro Caycedo

Germán Castro Caycedo, a renowned Colombian journalist and writer, is the mastermind behind “Mi Alma Se La Dejo Al Diablo”. His meticulous four-year investigation into the diary of Benjamín Cubillos led to this compelling narrative. Castro Caycedo’s work is celebrated for its depth and authenticity, blending journalism with storytelling to create a haunting yet thought-provoking tale that has resonated deeply with readers in Colombia and beyond.

Plot Summary

The story revolves around a diary found in the Colombian Amazon, detailing the final days of a man who died abandoned. The protagonist’s journey unfolds through his writings, revealing a tragic tale of survival, betrayal, and redemption, set against the backdrop of the Amazon’s harsh environment and the complexities of human nature.

2.1. The Diary and Its Significance

The diary, discovered in the Colombian Amazon, chronicles the final days of a man who perished in isolation. Its pages reveal his emotional turmoil, fears, and reflections, serving as a poignant narrative device. The diary’s last phrase, “Mi Alma Se La Dejo Al Diablo”, became the book’s title, symbolizing his despair. This personal account is central to the story, providing a deeply human perspective on survival, abandonment, and the search for meaning in a hostile environment.

2.2. The Death in the Amazon

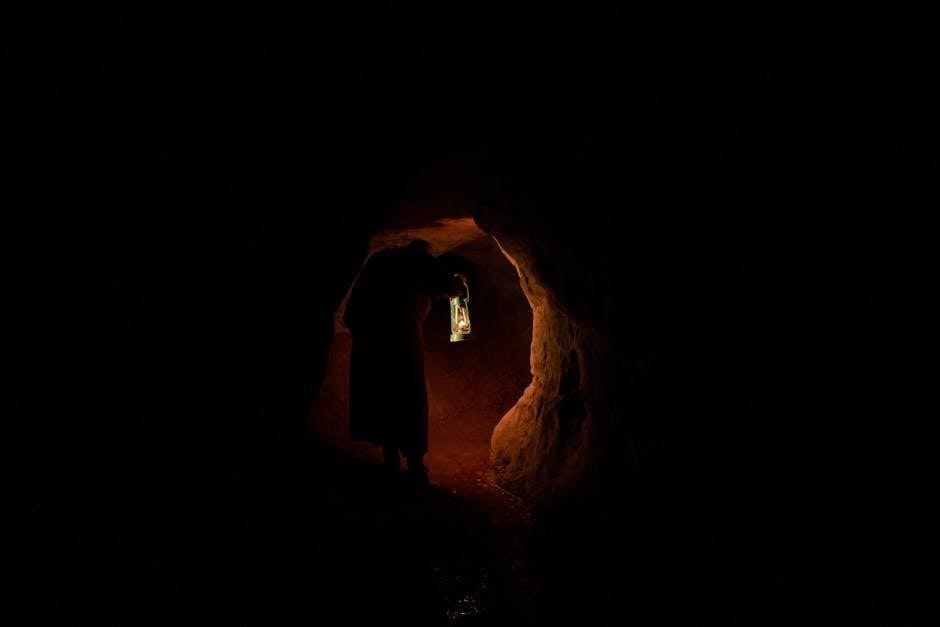
The man’s death in the Colombian Amazon, near El Yarí, is the tragic core of the story. His diary reveals his final days, abandoned and isolated, reflecting his desperation. The author’s four-year investigation uncovered the circumstances of his demise, shedding light on the harsh realities of life in the Amazon. This event serves as a catalyst for the narrative, exploring themes of survival, abandonment, and the human condition in a unforgiving environment.

2.3. The Journey of the Protagonist

The protagonist’s journey is a deeply personal and emotional odyssey, marked by struggle and reflection. Through his diary, readers witness his internal battles, fears, and the harsh realities of survival in the Amazon. His path is defined by isolation, resilience, and a desperate quest for meaning. The diary becomes a window into his soul, revealing the complexities of his character and the choices that led to his tragic fate in the heart of the Colombian wilderness.

Historical Context

Set in the Colombian Amazon, the story reflects the region’s rich yet tumultuous history. The diary highlights social dynamics and the protagonist’s tragic fate, mirroring the book’s title and its profound impact.

3.1. The Colombian Amazon Setting

The story unfolds in the Colombian Amazon, a region of immense natural beauty and harsh conditions. The remote setting isolates the protagonist, emphasizing his abandonment and the tragic circumstances of his death. The Amazon’s vastness and mystery serve as a backdrop for the narrative, highlighting themes of survival and human struggle.

The setting also underscores the book’s exploration of social and environmental issues, blending reality with the haunting tale of a man’s final days in the wilderness.

3.2. Social and Cultural Issues Addressed

The book delves into profound social and cultural issues, such as marginalization, injustice, and the struggles of rural communities. Through the protagonist’s story, Castro Caycedo highlights the harsh realities faced by campesinos in the Amazon, shedding light on systemic inequalities and the exploitation of vulnerable populations. The narrative also explores themes of identity and resilience, offering a poignant critique of societal neglect and the human cost of abandonment.

3.3. The Role of the Diary in Unfolding the Story

The diary serves as the narrative cornerstone, providing intimate insights into the protagonist’s final days. Its last entry, “Mi Alma Se La Dejo Al Diablo”, sets the tone for the story, revealing the emotional and psychological state of the abandoned man. Through its pages, Castro Caycedo reconstructs the events, weaving personal reflections with harsh realities. The diary’s authenticity bridges past and present, offering a hauntingly real account of isolation, despair, and the human condition.

Themes and Symbolism

The diary symbolizes the protagonist’s internal struggle, reflecting themes of isolation, redemption, and the clash between good and evil. Its final phrase underscores existential despair and sacrifice.

4.1. The Struggle Between Good and Evil

The book delves into the profound conflict between good and evil, as evidenced by the diary’s haunting final phrase. The protagonist’s journey through the Amazonian wilderness symbolizes an internal battle, where the forces of light and darkness clash. Castro Caycedo masterfully portrays this struggle, blending the harsh realities of human nature with the moral dilemmas faced by the characters. The diary becomes a testament to the enduring fight between redemption and despair.

4.2. The Power of Language and Expression

Language plays a pivotal role in conveying the emotional depth of the story, with the diary serving as a confessional for the protagonist’s inner turmoil. Castro Caycedo’s vivid narrative transforms words into a mirror of the soul, capturing the essence of human struggle. The diary’s language bridges past and present, creating a poignant connection between the individual’s story and universal human experiences, underscoring the power of expression in preserving memory and emotion.

4.3. The Concept of Redemption and Sacrifice

The diary’s final phrase symbolizes a profound act of surrender and sacrifice, reflecting the protagonist’s internal conflict. The Amazonian setting amplifies the theme of redemption, as the protagonist confronts his fate in isolation. Castro Caycedo’s narrative highlights the struggle for forgiveness, transforming the diary into a testament of personal sacrifice. This emotional journey underscores the universal quest for redemption, even in the face of despair, resonating deeply with readers.

Author’s Approach and Research

Germán Castro Caycedo conducted a four-year investigation, interviewing key witnesses and exploring the Amazon to reconstruct the story. His meticulous research ensures authenticity and depth.

5.1. The Four-Year Investigation

Germán Castro Caycedo dedicated four years to uncovering the truth behind the diary. He immersed himself in the Amazon, tracking down characters and reconstructing events. Over 150 interviews were conducted, and extensive research was done to verify facts. His relentless pursuit of accuracy ensures the story’s authenticity, making the book a landmark in Colombian non-fiction. This meticulous approach highlights his commitment to justice and storytelling.

5.2. Interviews and Witness Accounts

Germán Castro Caycedo conducted extensive interviews with over 150 individuals, including locals and key figures connected to the events. These accounts provided vivid details about the man’s final days and the circumstances surrounding his death. Witness testimonies were cross-referenced with documentary evidence to ensure accuracy. The author’s meticulous approach captured the emotional depth and cultural context, offering a rich tapestry of voices that bring the Amazonian setting to life.

5.3. The Author’s Perspective on Justice

Germán Castro Caycedo’s work reveals a deep concern for justice, particularly in the context of the protagonist’s tragic fate. The author critiques the legal system’s failure to protect the vulnerable, emphasizing the moral imperative to uncover truth. Through the story, he highlights the struggle for justice in remote regions, where isolation and impunity often prevail. The book serves as a call to action, urging readers to reflect on societal responsibility and the need for accountability.

Cultural Impact

Mi Alma Se La Dejo Al Diablo has resonated deeply with Colombian readers, sparking discussions on justice and morality. Its popularity as a PDF highlights its enduring relevance and accessibility, making it a significant work in contemporary Colombian literature.

6.1. Reception in Colombia

Mi Alma Se La Dejo Al Diablo has been a bestseller in Colombia, resonating deeply with readers due to its gripping narrative and exploration of justice and morality. The book’s emotional impact has sparked widespread discussions, particularly about the human condition and societal issues. Its availability as a PDF has further amplified its reach, making it accessible to a broader audience and solidifying its place in Colombian literature.

6.2. International Recognition

Mi Alma Se La Dejo Al Diablo has gained international acclaim for its haunting narrative and profound exploration of human morality. The book’s availability in PDF format has facilitated its global reach, with readers accessing it through platforms like Scribd and Yumpu. Its universal themes of justice and redemption resonate worldwide, making it a significant work in contemporary non-fiction literature and earning it a place in global literary discussions.

6.3. The Book’s Role in Colombian Literature

Mi Alma Se La Dejo Al Diablo stands as a landmark in Colombian literature, blending journalism with storytelling. Its exploration of the Amazon’s depths and human struggles resonates deeply, making it a cultural touchstone. The book’s availability as a PDF has further amplified its reach, ensuring its impact on both local and global readers, solidifying its place in the nation’s literary heritage.

Availability of the Book

The book is widely available in print and digital formats, including PDF. Fans can find it on platforms like Casa del Libro or download it gratis from various sites online.

7.1. Purchase Options

The book “Mi Alma Se La Dejo Al Diablo” can be purchased in various formats, including hardcover and digital versions. Readers can buy it from major bookstores like Casa del Libro or online platforms such as Amazon. Additionally, PDF versions are available for purchase or download through legitimate sources, ensuring access to the original content while supporting the author and publishers. This makes the story widely accessible to readers worldwide.

7.2. Free PDF Downloads

Free PDF downloads of “Mi Alma Se La Dejo Al Diablo” are widely available online, though their legitimacy and quality may vary. Platforms like Scribd and Yumpu offer access to the book in PDF format, often requiring user registration. However, downloading from unofficial sources may pose risks, such as malware or incomplete content. Readers are advised to verify the authenticity of such downloads to ensure they are accessing the original, unaltered work by Germán Castro Caycedo.

7.3. Legitimate Sources for Access

For secure and lawful access to “Mi Alma Se La Dejo Al Diablo”, readers can purchase the book from reputable retailers like Casa del Libro or major online bookstores. Digital platforms offering subscriptions, such as Scribd, also provide legitimate access to the PDF. Additionally, libraries and academic institutions may offer the book through their digital collections, ensuring readers can engage with the work safely and ethically without resorting to unauthorized downloads.

Controversies and Debates

The book sparked debates due to its sensitive themes and the ethical concerns surrounding the diary’s origins. Critics questioned the legitimacy of the free PDF versions circulating online, raising issues about piracy and the author’s rights. Additionally, the graphic portrayal of events in the Amazon rainforest led to discussions about justice and the impact on the affected communities.

8.1. Ethical Concerns About the Story

Readers and critics have raised ethical concerns regarding the book’s depiction of sensitive events. The use of a real diary from a man who died in the Amazon has sparked debates about privacy and exploitation. Some question whether the author obtained proper consent to share such personal and tragic details. This has led to discussions about the balance between storytelling and respecting the deceased and their loved ones.

8.2. Criticisms of the Author’s Methodology

Some critics argue that Germán Castro Caycedo’s approach raises questions about journalistic ethics. His reliance on personal accounts and dramatic storytelling has led to accusations of sensationalism. Detractors claim the book blurs the line between fact and fiction, potentially exploiting the tragedy for narrative impact. Additionally, the four-year investigation’s methods have been scrutinized, with concerns about source credibility and the representation of events. These criticisms highlight tensions between storytelling and journalistic integrity.

8.3. The Book’s Depiction of Sensitive Topics

The book delves into sensitive topics such as death, abandonment, and the ethical implications of documenting tragedy. Critics argue that the narrative, while compelling, may exploit the suffering of real individuals for storytelling purposes. The portrayal of the Amazonian setting and its people has also sparked debates about representation and cultural sensitivity. These criticisms highlight the fine line between shedding light on important issues and respecting the privacy and dignity of those involved.

Educational Value

Mi Alma Se La Dejo Al Diablo serves as a powerful educational tool, offering lessons on ethics, morality, and social awareness. Its narrative enriches academic discussions on justice and human struggles.

9.1. Use in Academic Settings

Mi Alma Se La Dejo Al Diablo is widely used in academic settings to explore themes of justice, morality, and societal issues. Its narrative structure and real-world connections make it a valuable resource for students, fostering critical thinking and ethical discussions. The book is often incorporated into courses on Latin American literature, ethics, and social studies, providing a compelling case study for understanding human struggles and cultural contexts.

9.2. Lessons on Ethics and Morality

Mi Alma Se La Dejo Al Diablo offers profound lessons on ethics and morality through its narrative of betrayal, sacrifice, and justice. The diary’s haunting final phrase underscores the moral dilemmas faced by the protagonist, inviting readers to reflect on the consequences of human actions. The book challenges readers to question societal norms and personal values, making it a powerful tool for exploring ethical decision-making and the complexities of human nature.

9.3. The Book’s Contribution to Social Awareness

Mi Alma Se La Dejo Al Diablo significantly contributes to social awareness by shedding light on the exploitation of the Amazon and its impact on marginalized communities. The book highlights the harsh realities faced by locals and outsiders in the region, fostering empathy and reflection. Through its gripping narrative, it challenges societal indifference, encouraging readers to engage with critical issues. The author’s meticulous research underscores the importance of justice and human dignity.

Mi Alma Se La Dejo Al Diablo is a haunting narrative that leaves a profound impact, blending real events with emotional depth. A must-read for those seeking insight into the human condition and justice.

10.1. Final Thoughts on the Book’s Significance

Mi Alma Se La Dejo Al Diablo stands as a profound narrative that captivates readers with its emotional depth and historical context. Its bestseller status in Colombia underscores its cultural relevance, while its availability in PDF ensures accessibility worldwide. The book’s ability to blend real events with literary mastery makes it a must-read, offering insights into justice, morality, and the human condition. Its impact lingers long after the final page, leaving readers reflective and moved.

10.2. The Lasting Legacy of “Mi Alma Se La Dejo Al Diablo”

Germán Castro Caycedo’s book has left an indelible mark on Colombian literature, captivating readers with its raw storytelling. Its exploration of justice, morality, and human struggle resonates deeply, making it a cultural milestone. The availability of PDF versions has broadened its reach, ensuring its message endures. The book’s legacy lies in its ability to provoke reflection and spark conversations about life’s most profound questions, solidifying its place in literary history.

10.3. Encouragement for Further Reading

Readers captivated by the haunting narrative of “Mi Alma Se La Dejo Al Diablo” are encouraged to delve deeper into its themes of justice, redemption, and human resilience. The book’s emotional depth and historical context make it a compelling read for those interested in Colombia’s cultural landscape. With its availability in PDF and other formats, the story remains accessible to a global audience, inviting readers to explore its profound and lasting impact.

hole saw guide

A hole saw is a specialized drilling tool designed for cutting large holes in metal‚ wood‚ and plastic. It consists of a cylindrical blade with sharp teeth‚ typically used in construction‚ woodworking‚ and DIY projects. Known for their efficiency‚ hole saws are popular among professionals and hobbyists alike.

What is a Hole Saw?

A hole saw is a cylindrical drilling tool with sharp teeth‚ designed to cut precise‚ large-diameter holes in various materials like metal‚ wood‚ and plastic; It typically consists of a circular blade attached to a central arbor with a pilot bit for alignment. Unlike standard drill bits‚ hole saws remove material around the perimeter‚ creating clean edges. They are widely used in construction‚ woodworking‚ and DIY projects for their efficiency and versatility.

History and Evolution of Hole Saws

The hole saw has evolved significantly since its inception in the late 19th century. Initially‚ it was a basic tool with limited cutting efficiency. Over the years‚ advancements in materials and design led to improved durability and precision. The mid-20th century saw the introduction of high-speed steel and adjustable hole saws‚ expanding their versatility. Modern innovations include carbide-tipped and diamond-coated blades‚ enabling cutting in tough materials like tile and metal. Continuous advancements have made hole saws indispensable in various industries.

Basic Components of a Hole Saw

A hole saw consists of a cylindrical blade with sharp teeth‚ an arbor for attaching to a drill‚ and a pilot bit for guiding. The blade is typically made of high-speed steel or carbide for durability. Some models feature an adjustable ring for varying hole sizes. The arbor often includes a securing screw to hold the blade in place. These components work together to ensure precise and efficient cutting in various materials‚ making the tool versatile for different applications.

Types of Hole Saws

Hole saws are categorized into standard‚ adjustable‚ and specialized types‚ each designed for specific materials and applications‚ ensuring versatility in various drilling tasks.

Standard Hole Saws

Standard hole saws are the most common type‚ designed for general-purpose drilling in materials like wood‚ plastic‚ and thin metal. They are available in various fixed diameters‚ making them ideal for common DIY and professional tasks. These saws typically feature a cylindrical shape with sharp teeth for clean cuts. Their simplicity and versatility make them a favorite among both professionals and hobbyists for everyday projects requiring precise hole drilling.

Adjustable Hole Saws

Adjustable hole saws are versatile tools designed to drill holes within a range of diameters‚ offering flexibility for various projects. They feature a unique mechanism‚ such as sliding components or interchangeable rings‚ allowing users to modify the cutting diameter. Ideal for applications requiring precise sizing‚ these saws are efficient for cutting through metal‚ wood‚ and plastic. Their adaptability makes them a cost-effective solution for professionals and DIY enthusiasts‚ reducing the need for multiple fixed-size hole saws.

Specialized Hole Saws

Specialized hole saws are designed for unique applications‚ offering tailored solutions for specific materials or cutting needs. These saws often feature unique geometries‚ such as curved or angled designs‚ for intricate cuts. Examples include tile and glass hole saws with diamond-coated edges for smooth cuts in brittle materials. Some models are optimized for thick metals or composites‚ ensuring precision and durability. These tools are invaluable in industries like automotive‚ aerospace‚ and construction‚ where precise‚ customized holes are essential for professional results.

Choosing the Right Hole Saw

Selecting the right hole saw ensures precise cuts and optimal performance. Consider material type‚ hole size‚ and tool durability to match your project needs effectively.

Factors to Consider When Selecting a Hole Saw

When choosing a hole saw‚ consider the material you’re cutting‚ as different blades are optimized for metal‚ wood‚ or plastic. The diameter of the hole needed is crucial‚ so select a saw that matches your project’s requirements. Additionally‚ think about the type of hole saw—standard‚ adjustable‚ or specialized—and the durability of its construction. The number and quality of teeth also impact performance‚ with higher-quality teeth lasting longer and cutting more smoothly. These factors ensure efficiency and precision in your work.

Material Types and Their Applications

Hole saws are designed to cut through various materials‚ including metal‚ wood‚ and plastic. For metal‚ carbide-tipped or bi-metal blades are ideal‚ offering durability and precision. Wood often requires high-speed steel blades for smooth cuts. Plastic and softer materials can be cut with standard steel or bi-metal blades. Diamond-coated saws are best for glass‚ ceramic‚ or tile. Understanding the material type ensures the right blade is chosen for efficient and accurate results‚ enhancing the overall drilling experience.

Size and Diameter Selection Guide

Selecting the right hole saw size is crucial for precise cuts. Measure the workpiece to determine the exact diameter needed. Choose a saw slightly larger than the desired hole for clean edges. Consider the material thickness and type‚ as this affects the blade’s performance. Use a pilot drill bit to guide the saw and ensure accuracy. Always check the arbor compatibility to secure the saw properly. Proper sizing enhances safety‚ reduces vibration‚ and ensures a professional finish in various projects.

Safety Precautions

Always wear safety glasses and gloves when using a hole saw. Ensure the workpiece is securely clamped to prevent movement. Keep loose clothing tied back and avoid overreaching.

General Safety Tips for Using a Hole Saw

Always wear safety glasses and gloves to protect against flying debris. Ensure the workpiece is clamped securely to prevent slipping. Avoid loose clothing or jewelry that could get caught. Maintain a firm grip on the drill and keep your hands away from the blade. Never overreach or apply excessive pressure‚ as this can cause loss of control. Keep children and pets away from the workspace. Regularly inspect the hole saw for damage or dullness to ensure safe operation.

Personal Protective Equipment (PPE)

Wearing appropriate PPE is crucial when using a hole saw. Safety glasses or goggles protect eyes from debris‚ while a dust mask prevents inhalation of particles. Gloves provide grip and protect hands from cuts. A long-sleeved shirt and closed-toe shoes minimize skin exposure. Hearing protection is recommended for loud drills. Ensuring all PPE is worn correctly helps prevent injuries and ensures a safer working environment. Regularly check PPE for damage to maintain effectiveness.

Workpiece Preparation and Setup

Proper workpiece preparation is essential for safe and accurate hole saw use. Begin by marking the center of the hole with a pencil or marker. Secure the material firmly using clamps or a vise to prevent movement during drilling. Ensure the workpiece is flat and stable‚ and remove any debris or obstructions. Double-check the material thickness to avoid over-drilling. Always use a pilot bit for guided drilling and maintain consistent drill speed to prevent overheating or damage to the saw.

Using a Hole Saw

Attach the hole saw to your drill‚ align it with your marked hole‚ apply steady pressure‚ and drill at a consistent speed for precise‚ clean cuts.

Step-by-Step Guide to Drilling Perfect Holes

Start by marking the center of the hole on your workpiece. Attach the hole saw to your drill‚ ensuring it’s securely fitted. Align the pilot bit with your mark and maintain steady‚ consistent pressure. Drill at a moderate speed to avoid overheating. Use a lubricant like water or cutting oil for metal to prevent wear. For wood‚ apply gentle‚ steady force. After breaking through‚ stop the drill and let the bit cool. Inspect the hole for cleanliness and accuracy.

Drilling Techniques for Different Materials

Drilling techniques vary based on the material. For metal‚ use moderate speed and apply lubricant to prevent overheating. Wood requires steady‚ gentle pressure to avoid splintering. Plastic demands lower speeds to prevent melting. Always match the hole saw’s teeth type to the material for optimal results. Maintain consistent pressure and avoid applying excessive force‚ which can damage the workpiece or the tool. These techniques ensure clean‚ precise cuts and extend the life of your hole saw.

Tips for Smooth and Accurate Cuts

Ensure smooth cuts by using the right hole saw for your material. Keep the tool sharp and well-maintained to prevent tearing or uneven edges. Secure the workpiece firmly to avoid movement during drilling. Use a steady‚ consistent motion and apply gentle to moderate pressure‚ depending on the material. Pilot drills can help guide the hole saw for accuracy. Regularly clean debris from the teeth to maintain efficiency and prevent overheating. These practices ensure precise‚ professional-looking results every time.

Maintenance and Storage

Regularly clean hole saws to prevent rust and debris buildup. Store them in a dry‚ secure location to maintain sharpness and prevent damage‚ ensuring longevity and reliability.

How to Clean and Maintain Your Hole Saw

To ensure optimal performance‚ clean your hole saw after each use with a solvent or mild detergent to remove debris and prevent rust. Use a soft cloth or brush to wipe down the blade‚ focusing on the teeth and arbor area. Avoid using harsh chemicals or abrasive materials that could damage the tool. Regularly inspect for dull or damaged teeth and store the saw in a dry‚ secure location to maintain sharpness and prevent corrosion. Proper maintenance extends the tool’s lifespan and ensures precise cuts.

Sharpening and Replacing Teeth

Sharpening hole saw teeth requires precision to maintain cutting efficiency. Use a diamond file or sharpening grinder‚ focusing on the cutting edge at the correct angle. Inspect teeth regularly for dullness or damage. If teeth are severely worn or damaged‚ replace them with compatible parts. Proper sharpening and timely replacement ensure consistent performance‚ reduce vibration‚ and extend the tool’s lifespan. Always follow manufacturer guidelines for sharpening and replacement to maintain optimal functionality and safety during use.

Proper Storage to Extend Tool Life

Store hole saws in a dry‚ clean environment to prevent rust and damage. Use a protective case or hang them on hooks to avoid contact with other tools. Regularly clean and dry the saws before storage to remove debris and moisture. Organize them by size for easy access and maintain their cutting efficiency. Proper storage extends the tool’s lifespan‚ ensuring optimal performance and reducing the need for frequent replacements. Always follow manufacturer guidelines for storage conditions to preserve quality and functionality.

Troubleshooting Common Issues

Identify common problems like improper cutting or jamming by checking blade sharpness and alignment. Address issues promptly to maintain efficiency and prevent tool damage.

Why Your Hole Saw Might Not Be Cutting Properly

A dull or worn blade is a common issue‚ reducing cutting efficiency. Improper alignment or insufficient pilot bit engagement can also cause poor performance. Additionally‚ using the wrong blade for the material type may lead to ineffective cutting. Regular maintenance and proper material matching are essential for optimal results. Always ensure the tool is sharp and correctly matched to the workpiece material to avoid such issues.

Fixing a Jammed Hole Saw

If your hole saw becomes jammed‚ stop the drill immediately to avoid damage. Turn the drill in reverse to gently back out the saw. Apply penetrating oil to loosen any stuck parts. If still jammed‚ use a breaker bar to carefully rock the saw back and forth while pulling outward. Avoid excessive force to prevent tool breakage. Inspect for debris or dullness‚ as these can cause jams. Regular cleaning and maintenance can help prevent such issues and ensure smooth operation.

Addressing Vibration and Noise

To minimize vibration and noise when using a hole saw‚ ensure the tool is securely attached to the drill and the workpiece is firmly clamped. Use the correct RPM for the material to avoid excessive noise. Dull teeth can increase vibration‚ so maintain sharp edges. Proper alignment and balanced drilling also reduce noise. Wearing safety gear like ear protection is recommended. Regular tool maintenance and using the right size for the job further helps in controlling vibration and ensuring smoother operation.

Accessories and Attachments

Hole saws often require specific accessories like drill bits‚ arbors‚ and stabilizers to enhance functionality. Guide rails and additional attachments improve precision and extend tool longevity for various projects.

Drill Bits and Arbors

Drill bits and arbors are essential components for hole saw operation. Arbors attach the hole saw to the drill‚ ensuring proper alignment and stability. Pilot drill bits guide the saw‚ preventing wandering and improving accuracy. Various arbor types‚ such as quick-change or threaded‚ offer convenience. Drill bits come in different materials and sizes‚ catering to specific applications. Together‚ they ensure precise‚ clean cuts in metal‚ wood‚ or plastic‚ making them indispensable for efficient and professional results in drilling projects.

Guide Rails and Stabilizers

Guide rails and stabilizers are crucial for maintaining alignment and stability during drilling. Rails provide a straight path for the tool‚ ensuring precise cuts‚ while stabilizers minimize vibration and wobble. Adjustable guide systems allow for accurate positioning‚ reducing errors. These accessories are particularly useful for large or thick materials‚ enhancing control and preventing misalignment. Durable and versatile‚ they are essential for professionals and DIYers aiming for clean‚ professional-grade results in various drilling applications.

Other Useful Accessories

Other useful accessories for hole saws include carbide-tipped pilot drills‚ dust extraction kits‚ and tool organizers. Carbide-tipped drills enhance precision and durability‚ while dust extraction kits minimize debris‚ improving visibility. Tool organizers keep accessories tidy‚ reducing downtime. Additional items like depth stops ensure consistent drilling depths‚ preventing over-drilling. These accessories optimize efficiency‚ safety‚ and tool longevity‚ making them indispensable for professionals and DIYers seeking precise‚ professional-grade results in various drilling applications.

Applications Beyond Drilling

Hole saws are versatile tools with uses beyond drilling‚ such as cutting circular openings for pipes‚ creating decorative patterns in metal or wood‚ and crafting custom shapes for artistic projects.

Using Hole Saws for Various Projects

Hole saws are incredibly versatile tools‚ extending beyond basic drilling tasks. They excel in cutting clean‚ precise openings in metal‚ wood‚ plastic‚ and drywall‚ making them ideal for installing lighting fixtures‚ pipes‚ or doorknobs. Additionally‚ they are perfect for crafting decorative designs‚ such as circular patterns in metalwork or creating smooth edges for woodworking projects. Their ability to cut large diameters efficiently makes them a go-to choice for both professionals and DIY enthusiasts tackling a wide range of creative and functional tasks.

Hole Saws in Carpentry and Woodworking

Hole saws are an invaluable asset in carpentry and woodworking‚ enabling precise and efficient cutting of large‚ clean holes in wood and other materials. Ideal for tasks like installing doorknobs or creating decorative cutouts‚ they minimize splintering and ensure smooth edges. With various sizes available‚ hole saws are perfect for projects requiring custom diameters‚ making them an essential tool for achieving professional-grade results in woodworking and furniture-making applications.

Industrial and Professional Use Cases

Hole saws are widely used in industrial and professional settings for cutting precise‚ large-diameter holes in materials like steel‚ aluminum‚ and thick plastics. They are essential in manufacturing‚ construction‚ and automotive industries for tasks such as pipe installations‚ electrical system setups‚ and machinery maintenance. Professionals rely on their durability and efficiency to handle tough materials and minimize downtime‚ ensuring accurate and clean cuts that meet high industrial standards.

Frequently Asked Questions

Common questions about hole saws include their best uses‚ maintenance tips‚ and troubleshooting. Users often ask about material compatibility‚ size selection‚ and optimizing performance for precise cuts.

Common Questions About Hole Saws

Users often ask about the best materials for hole saws‚ how to maintain sharpness‚ and troubleshooting common issues like jamming or uneven cuts. Many wonder about size selection‚ optimal drilling speeds‚ and compatibility with various power tools. Additionally‚ questions arise about the difference between hole saws and spade bits‚ as well as tips for drilling through tough materials like stainless steel or thick plastic. These queries highlight the importance of proper technique and tool maintenance for achieving professional results.

Myths and Misconceptions

Many believe hole saws are only for professionals or that they can’t cut through metal‚ but this isn’t true. Another myth is that hole saws are too expensive or require special drills. In reality‚ they are versatile‚ cost-effective tools for various materials. Some think they can’t handle small holes‚ but mini hole saws exist for precise cuts. Debunking these myths highlights their practicality and wide-ranging applications for both professionals and DIY enthusiasts.

Expert Tips and Tricks

Experts recommend using a pilot drill bit to guide the hole saw for precise cuts. Lubricate the teeth with oil or water to reduce friction and prevent overheating. For smoother edges‚ apply steady‚ consistent pressure without applying too much force. Regularly sharpening the teeth ensures optimal performance. Use a low RPM setting for metal and high RPM for wood. Store the hole saw in a dry place to prevent rust. These tips enhance efficiency and extend the tool’s lifespan.

Mastering the hole saw unlocks efficient‚ precise cutting across various materials. With proper techniques and maintenance‚ this versatile tool ensures professional results‚ making it an essential asset for any project.

Final Thoughts on Mastering the Hole Saw

Mastering the hole saw requires practice‚ patience‚ and understanding of its capabilities. By selecting the right blade for your material and maintaining proper technique‚ you can achieve clean‚ precise cuts. Regular maintenance‚ such as sharpening and storing correctly‚ extends tool life. Always prioritize safety and efficiency‚ ensuring smooth‚ accurate results. With time and experience‚ you’ll become proficient in using this versatile tool for various projects‚ from woodworking to metalwork‚ delivering professional-quality outcomes every time.

Future Trends in Hole Saw Technology

Future trends in hole saw technology are expected to focus on advanced materials‚ such as diamond-coated blades for increased durability. Adjustable hole saws may become more prevalent‚ offering versatility across various projects. Additionally‚ ergonomic designs and smart integration with power tools could enhance user experience. Sustainability efforts may drive the development of eco-friendly materials‚ balancing performance with environmental consciousness. These innovations aim to improve efficiency‚ precision‚ and accessibility for both professionals and DIY enthusiasts‚ shaping the future of hole saw applications.

db power jump starter manual

Welcome to the DB Power Jump Starter Manual! This guide provides essential information for safe and effective use of your portable jump starter. Discover its features‚ charging instructions‚ and troubleshooting tips to ensure optimal performance and longevity of your device.

Overview of the DB Power Jump Starter

The DB Power Jump Starter is a portable‚ powerful device designed to jump-start vehicles; Models like the DJS50 and DJS90 offer high peak currents and capacities‚ supporting petrol and diesel engines up to specific liters. Equipped with USB charging ports and LED lights‚ it’s ideal for emergencies and everyday use‚ providing a reliable solution for car owners.

Importance of Reading the Manual

Reading the manual is crucial for safe and effective use of the DB Power Jump Starter. It provides essential safety precautions‚ proper charging instructions‚ and troubleshooting guidance. Understanding the device’s limitations and compatible engine types ensures optimal performance. Additionally‚ the manual explains warranty terms and activation processes‚ helping users maintain their device’s longevity and resolve issues efficiently.

Key Features of the DB Power Jump Starter

The DB Power Jump Starter boasts high peak current capacities‚ ranging from 800A to 2000A‚ and large battery capacities of up to 19200mAh. It supports various petrol and diesel engines‚ depending on the model. Additional features include USB charging ports for accessories‚ emergency LED lights‚ and multiple safety protections. These features make it a versatile and reliable emergency power solution for vehicles and other devices.

Safety Precautions and Warnings

Always follow safety guidelines to avoid accidents. Ensure correct polarity when connecting cables‚ and never exceed the recommended engine displacement. Keep the device away from flammable materials;

General Safety Guidelines

Always read the manual before use. Ensure the jump starter is fully charged and free from damage. Avoid using it near open flames or sparks. Keep it away from children and pets. Never modify the device or use it for purposes other than jump-starting vehicles. Properly store the unit in a cool‚ dry place when not in use to maintain its performance and safety.

Proper Handling of the Device

Handle the DB Power Jump Starter with care to ensure longevity. Always use the provided jumper cables and avoid connecting them to damaged or loose terminals. Keep the device away from extreme temperatures and moisture. Regularly inspect the clamps and cables for wear. Store the jump starter in its original case when not in use. Clean the terminals with a soft cloth to maintain conductivity. Never drop or subject the unit to physical stress‚ as this could damage the internal battery or circuits.

Warnings for Specific Situations

Never use the jump starter near open flames or sparks‚ as hydrogen gas from batteries can ignite. Avoid connecting the device to damaged or loose terminals‚ as this may cause electrical shock. Do not use the jump starter if the battery level is below 50%‚ as this could damage the unit. Ensure proper ventilation in enclosed spaces to prevent hydrogen gas buildup. Never connect the jumper cables to non-battery terminals‚ such as fuel lines or brake cables‚ as this could cause serious damage or injury. Always disconnect the jump starter immediately after use to prevent overcharging. If the device overheats‚ discontinue use and allow it to cool down. Never attempt to jump-start a frozen battery‚ as it may explode. Keep the device out of reach of children and pets to avoid accidental activation. Regularly inspect the cables and clamps for damage before each use. If the jump starter fails to turn on‚ do not attempt to disassemble or repair it yourself‚ as this could void the warranty or cause further damage. Always follow the manufacturer’s guidelines for engine size compatibility to ensure safe and effective use. If you notice any unusual odors‚ sounds‚ or lights during operation‚ stop using the device immediately and contact customer support. Never use the jump starter in extreme weather conditions‚ such as heavy rain or snow‚ as this could compromise its electrical components. Always ensure the jump starter is fully charged before storing it for extended periods to maintain battery health. If you are unsure about any aspect of using the device‚ refer to the troubleshooting section or contact the manufacturer for assistance. By adhering to these warnings‚ you can ensure safe and effective use of your DB Power Jump Starter. For further details‚ consult the safety precautions section in the manual.

Getting Started with the DB Power Jump Starter

Unpack and inventory all components‚ including jumper cables‚ USB ports‚ and the user manual. Familiarize yourself with the control panel and LED indicators for charge status and errors. Charge the device fully before first use and ensure all safety precautions are understood. Properly connect the jumper cables to the vehicle’s battery terminals to ensure a safe and effective jump-starting process. Always refer to the manual for specific instructions tailored to your model. By following these initial steps‚ you can ensure a smooth and trouble-free experience with your DB Power Jump Starter. For detailed instructions‚ review the sections on unpacking‚ control panels‚ and charging procedures. This will help you maximize the performance and longevity of your device. Always prioritize safety when handling electrical equipment‚ and never skip the initial charging step to avoid any potential issues during use. If you encounter any problems‚ consult the troubleshooting section for guidance. Remember‚ proper preparation is key to getting the most out of your jump starter. Start by reading the manual thoroughly and understanding each component’s function. This will empower you to use the device confidently and effectively in emergency situations. Keep the manual handy for quick reference whenever you need it. By taking these steps‚ you can ensure that your DB Power Jump Starter is always ready to provide reliable power when you need it most. For additional tips and best practices‚ explore the sections on maintenance and storage to keep your device in optimal condition. Regular checks and proper storage will extend the lifespan of your jump starter and ensure it remains a trusted tool in your emergency kit. Stay informed and stay prepared with the DB Power Jump Starter.

Unpacking and Inventory of Components

Carefully unpack the DB Power Jump Starter and verify all components. Typically included are the jump starter unit‚ jumper cables‚ USB charging cable‚ user manual‚ and carrying case. Ensure no items are missing or damaged. Check for additional accessories like LED lights or adapters‚ depending on the model. Familiarize yourself with each item’s purpose before use. If any component is missing‚ contact customer support immediately. Proper inventory ensures readiness for emergencies. Always store components securely after use to maintain functionality and longevity. If unsure about any item‚ refer to the manual for clarification. This step is crucial for safe and effective operation. Make sure to handle all components with care to avoid damage. Keep the carrying case organized for easy access when needed. If you notice any defects‚ contact the manufacturer promptly. A complete and well-maintained set ensures reliability in critical situations. Always verify the contents match the manual’s inventory list. This helps prevent issues during use. By taking the time to unpack and inspect‚ you ensure your DB Power Jump Starter is ready to perform when needed. For detailed descriptions‚ consult the manual or contact support. Proper organization and care are key to maximizing your device’s performance and lifespan. If any questions arise‚ refer to the provided resources for guidance. This initial step sets the foundation for safe and effective use. Always prioritize thorough inspection to avoid future complications. Your DB Power Jump Starter is designed to be reliable‚ but proper handling and inventory are essential. Take the time to understand each component’s role and ensure everything is in working order. This attention to detail will enhance your experience and ensure the device serves you well in emergencies. If any discrepancies are found‚ address them immediately to maintain functionality. Your safety and satisfaction depend on it. Keep all components clean and dry to prevent damage. Regular checks will help identify any potential issues early. By following these steps‚ you can trust your DB Power Jump Starter to deliver when you need it most. Always remember‚ a well-maintained device is a reliable one.

Understanding the Control Panel and Indicators

The control panel features an LCD display‚ power button‚ and LED indicators. The LCD shows battery level‚ mode‚ and error codes. LED indicators display charging status‚ low battery‚ or malfunction alerts. The power button switches modes‚ such as jump start or USB charging. Understand each indicator’s meaning to monitor the device’s status. Refer to the manual for detailed descriptions of symbols and lights. Familiarize yourself with these features to ensure safe and effective operation. If an indicator flashes or shows an error‚ consult the troubleshooting section. Proper understanding of the control panel enhances user experience and safety. Always check the indicators before use to confirm the device is ready. This ensures reliable performance in emergencies. If unsure about any symbol‚ refer to the manual for clarification. The control panel is designed for intuitive operation‚ but knowledge of its indicators is crucial. By monitoring these‚ you can maintain the device’s health and functionality. Keep the control panel clean and free from obstructions for accurate readings. Understanding these elements is key to maximizing the jump starter’s potential. If any indicator behaves unexpectedly‚ address it promptly to avoid issues. Safe operation begins with a clear understanding of the control panel and its indicators. Always prioritize this knowledge for optimal use. The control panel is your interface to the device’s functions‚ so familiarize yourself with its features. This ensures you can respond appropriately to any situation; By staying informed‚ you can trust the DB Power Jump Starter to perform reliably. Always monitor the indicators to stay aware of the device’s status. This proactive approach enhances safety and effectiveness. If any indicator suggests a problem‚ take action immediately to prevent further issues. Your understanding of the control panel and indicators is vital for safe and efficient use. Never ignore unusual indicator behavior‚ as it may signal a need for maintenance or repair. By staying attentive‚ you can extend the lifespan of your DB Power Jump Starter. The control panel and indicators are essential tools for users‚ providing critical information at a glance. Always use this information to guide your actions and ensure the device operates correctly. Familiarity with these features is the first step toward mastering the jump starter’s capabilities. If you notice any discrepancies or malfunctions‚ contact support for assistance. Your attention to these details ensures the device remains a reliable tool in emergencies. Always prioritize understanding the control panel and indicators for the best experience. This knowledge empowers you to use the DB Power Jump Starter confidently and safely. By monitoring and interpreting the indicators‚ you can address issues before they escalate; Keep the control panel clean and check indicators regularly to maintain optimal performance. Understanding these elements is fundamental to getting the most out of your jump starter. If any questions arise‚ the manual provides comprehensive guidance. Stay informed and ensure your DB Power Jump Starter is always ready to assist. The control panel and indicators are designed to keep you informed‚ so use them to your advantage. Familiarize yourself with their functions to enhance your experience. Always refer to the manual if you need clarification on any indicator or feature. This ensures you can use the device with confidence and safety. By understanding the control panel and indicators‚ you can troubleshoot issues and maintain the device effectively. Keep this knowledge in mind for every use to ensure reliability and performance. The control panel and indicators are your gateway to the jump starter’s functionality‚ so take the time to learn their roles. This understanding will prove invaluable in real-world applications. Always stay vigilant and monitor the indicators to keep your DB Power Jump Starter in top condition. Your attention to these details ensures the device remains a trustworthy emergency tool. Understanding the control panel and indicators is the first step toward mastering the DB Power Jump Starter. Use this knowledge to enhance safety‚ efficiency‚ and overall performance. If any indicator signals an issue‚ act promptly to resolve it. Your proactive approach ensures the device continues to serve you well. The control panel and indicators are essential for safe and effective operation‚ so never overlook their importance. Familiarize yourself with their functions to get the most out of your DB Power Jump Starter. Always monitor the indicators to stay informed and address any concerns immediately. This ensures the device remains reliable and ready for use. Understanding the control panel and indicators is crucial for optimal performance and safety. Take the time to learn their meanings and functions. If any indicator behaves unusually‚ consult the manual or contact support. Your vigilance ensures the device operates smoothly and efficiently. The control panel and indicators are designed to provide clear feedback‚ so use them to your advantage; Stay informed and proactive to maintain the health and functionality of your DB Power Jump Starter. Always refer to the manual for detailed explanations of each indicator and feature. This knowledge empowers you to use the device confidently and safely. By understanding the control panel and indicators‚ you can troubleshoot issues and extend the device’s lifespan. Keep these elements in mind for every use to ensure reliability and performance. The control panel and indicators are your tools for monitoring and controlling the jump starter‚ so use them wisely. Familiarize yourself with their functions to enhance your experience and ensure safe operation. If any questions arise‚ the manual is your guide. Stay informed and proactive to get the most out of your DB Power Jump Starter. Understanding the control panel and indicators is key to unlocking the device’s full potential. Use this knowledge to maintain safety‚ efficiency‚ and effectiveness in every situation. Always monitor the indicators and address any issues promptly. Your attention ensures the device remains a reliable emergency tool. The control panel and indicators are essential for optimal use‚ so take the time to understand their roles. This knowledge will enhance your experience and ensure the DB Power Jump Starter serves you well. If any indicator signals a problem‚ take action immediately to prevent further complications. Your understanding of the control panel and indicators is vital for safe and effective operation. Always stay informed and proactive to maintain the device’s performance and longevity. The control panel and indicators are designed to keep you in control‚ so use them to your advantage. Familiarize yourself with their functions to ensure you can respond appropriately in any situation. If any questions arise‚ consult the manual for guidance. This ensures you can use the DB Power Jump Starter with confidence and safety. By understanding the control panel and indicators‚ you can maximize the device’s potential and reliability. Always monitor these elements to stay informed and address any issues promptly. Your attention ensures the jump starter remains a trustworthy tool in emergencies. Understanding the control panel and indicators is the foundation for safe and effective use. Use this knowledge to enhance your experience and maintain the device’s performance. If any indicator behaves unexpectedly‚ consult the manual or contact support. Your proactive approach ensures the DB Power Jump Starter continues to serve you well. The control panel and indicators are your interface to the device’s functions‚ so take the time to learn their meanings. This understanding will prove invaluable in real-world applications. Always stay vigilant and monitor the indicators to keep your DB Power Jump Starter in top condition. Your attention to these details ensures the device remains a reliable emergency tool. Understanding the control panel and indicators is crucial for optimal performance and safety. Use this knowledge to troubleshoot issues and maintain the device effectively. If any indicator signals a problem‚ address it promptly to avoid further issues. The control panel and indicators are designed to provide clear feedback‚ so use them to your advantage. Stay informed and proactive to ensure the DB Power Jump Starter operates smoothly and efficiently. Always refer to the manual for detailed explanations of each indicator and feature. This knowledge empowers you to use the device confidently and safely. By understanding the control panel and indicators‚ you can troubleshoot issues and extend the device’s lifespan. Keep these elements in mind for every use to ensure reliability and performance. The control panel and indicators are essential for safe and effective operation‚ so never overlook their importance. Familiarize yourself with their functions to get the most out of your DB Power Jump Starter. Always monitor the indicators to stay informed and address any concerns immediately. This ensures the device remains reliable and ready for use. Understanding the control panel and indicators is key to unlocking the device’s full potential. Use this knowledge to maintain safety‚ efficiency‚ and effectiveness in every situation. Always monitor the indicators and address any issues promptly. Your attention ensures the device remains a reliable emergency tool. The control panel and indicators are your tools for monitoring and controlling the jump starter‚ so use them wisely. Familiarize yourself with their functions to enhance your experience and ensure safe operation. If any questions arise‚ the manual is your guide. Stay informed and proactive to get the most out of your DB Power Jump Starter. Understanding the control panel and indicators is key to unlocking the device’s full potential. Use this knowledge to maintain safety‚ efficiency‚ and effectiveness

Initial Charging Instructions

Before first use‚ charge the DB Power Jump Starter for at least 8 hours using the provided USB cable. Ensure the battery level reaches at least 50% to activate the device. Connect the charger to a power source and wait until the indicator shows a full charge. Always refer to the manual for detailed charging instructions and safety precautions. Proper initial charging ensures optimal performance and extends the battery’s lifespan. Follow these steps carefully for reliable use. The device is ready for operation once fully charged. If the battery level is below 50%‚ it may not function properly. Charge the device in a cool‚ dry place to avoid overheating. Do not interrupt the charging process to ensure a complete charge cycle. Once charged‚ the DB Power Jump Starter is ready to provide emergency power for vehicles and accessories. Always monitor the charging process to prevent overcharging‚ which can damage the battery. By following these initial charging instructions‚ you ensure the device is prepared for safe and effective use. If you have any doubts‚ consult the manual for additional guidance. Proper charging is essential for the device’s functionality and longevity. After charging‚ store the jump starter in a cool‚ dry place to maintain its efficiency. Always check the battery level before storing it for an extended period. If the device will not be used for a long time‚ charge it every 3 months to maintain optimal battery health. By adhering to these instructions‚ you ensure the DB Power Jump Starter remains a reliable emergency tool. Initial charging sets the foundation for safe and effective operation‚ so follow these steps carefully. If any issues arise during charging‚ refer to the troubleshooting section in the manual. Always prioritize proper charging to ensure the device performs when needed. The DB Power Jump Starter is designed for durability‚ but proper care during charging is essential. Follow these guidelines to enjoy years of reliable service from your jump starter. Initial charging is a critical step in preparing your device for use‚ so do not skip it. Charge the device fully before the first use to ensure it operates at peak performance. If the battery level is low‚ recharge it promptly to maintain its capacity. Always use the provided charger to avoid compatibility issues. If you lose the charger‚ contact customer support for a replacement. The DB Power Jump Starter is a valuable tool‚ and proper charging ensures it remains ready to assist in emergencies; By following these initial charging instructions‚ you can trust the device to perform when needed. Always keep the charging cable in a safe place to avoid damage or loss. If the cable is damaged‚ do not use it‚ as this could pose a safety risk. Instead‚ obtain a replacement from the manufacturer. Initial charging is just the first step in maintaining your DB Power Jump Starter. Regular charging and maintenance will ensure it remains a dependable emergency solution. If you have any questions about the charging process‚ consult the manual or contact customer support. The DB Power Jump Starter is designed to be user-friendly‚ but proper charging is essential for its functionality. By following these initial charging instructions‚ you can enjoy the full benefits of your device. Always prioritize safety when charging and using the jump starter. If you notice any unusual behavior during charging‚ unplug the device and refer to the manual for troubleshooting steps. Initial charging is a straightforward process‚ but it requires attention to detail to ensure the device operates correctly. Follow these steps carefully to prepare your DB Power Jump Starter for use. If you are unsure about any part of the process‚ consult the manual for clear instructions. The DB Power Jump Starter is a powerful tool‚ and proper charging ensures it is always ready to help. By adhering to these initial charging instructions‚ you can trust the device to perform reliably in emergencies. Always monitor the charging process and store the device properly to maintain its efficiency. Initial charging is the first step toward enjoying the benefits of your DB Power Jump Starter. Follow these guidelines to ensure the device serves you well for years to come. If you encounter any issues during charging‚ do not hesitate to contact customer support for assistance. The DB Power Jump Starter is designed to be durable‚ but proper care during charging is essential for its longevity. By following these initial charging instructions‚ you can enjoy the full potential of your device. Always keep the charging cable in good condition to ensure safe and efficient charging. If you need a replacement‚ contact the manufacturer to obtain an authorized part. Initial charging is a crucial step in preparing your DB Power Jump Starter for use. Follow these instructions carefully to ensure the device operates safely and effectively. If you have any concerns about the charging process‚ refer to the manual or seek guidance from customer support. The DB Power Jump Starter is a valuable investment‚ and proper charging ensures it remains a reliable emergency tool. By adhering to these initial charging instructions‚ you can trust the device to perform when needed. Always prioritize safety and follow the recommended charging procedures to maintain the device’s efficiency and longevity. Initial charging sets the foundation for the device’s performance‚ so it is essential to follow these steps carefully. If you have any questions or concerns‚ the manual provides comprehensive guidance. The DB Power Jump Starter is designed to be easy to use‚ but proper charging is vital for its functionality. By following these initial charging instructions‚ you can enjoy the full benefits of your device. Always keep the charging cable in a safe place and avoid using damaged accessories to ensure safe operation. If you need further assistance‚ contact customer support for help. The DB Power Jump Starter is a powerful tool‚ and proper charging ensures it is always ready to assist in emergencies. By adhering to these initial charging instructions‚ you can trust the device to perform reliably. Always monitor the charging process and store the device properly to maintain its efficiency. Initial charging is the first step toward enjoying the benefits of your DB Power Jump Starter. Follow these guidelines to ensure the device serves you well for years to come. If you encounter any issues during charging‚ do not hesitate to contact customer support for assistance. The DB Power Jump Starter is designed to be durable‚ but proper care during charging is essential for its longevity. By following these initial charging instructions‚ you can enjoy the full potential of your device. Always keep the charging cable in good condition to ensure safe and efficient charging. If you need a replacement‚ contact the manufacturer to obtain an authorized part. Initial charging is a crucial step in preparing your DB Power Jump Starter for use. Follow these instructions carefully to ensure the device operates safely and effectively. If you have any concerns about the charging process‚ refer to the manual or seek guidance from customer support. The DB Power Jump Starter is a valuable investment‚ and proper charging ensures it remains a reliable emergency tool. By adhering to these initial charging instructions‚ you can trust the device to perform when needed. Always prioritize safety and follow the recommended charging procedures to maintain the device’s efficiency and longevity. Initial charging sets the foundation for the device’s performance‚ so it is essential to follow these steps carefully. If you have any questions or concerns‚ the manual provides comprehensive guidance. The DB Power Jump Starter is designed to be easy to use‚ but proper charging is vital for its functionality. By following these initial charging instructions‚ you can enjoy the full benefits of your device. Always keep the charging cable in a safe place and avoid using damaged accessories to ensure safe operation. If you need further assistance‚ contact customer support for help. The DB Power Jump Starter is a powerful tool‚ and proper charging ensures it is always ready to assist in emergencies. By adhering to these initial charging instructions‚ you can trust the device to perform reliably. Always monitor the charging process and store the device properly to maintain its efficiency. Initial charging is the first step toward enjoying the benefits of your DB Power Jump Starter. Follow these guidelines to ensure the device serves you well for years to come. If you encounter any issues during charging‚ do not hesitate to contact customer support for assistance. The DB Power Jump Starter is designed to be durable‚ but proper care during charging is essential for its longevity. By following these initial charging instructions‚ you can enjoy the full potential of your device. Always keep the charging cable in good condition to ensure safe and efficient charging. If you need a replacement‚ contact the manufacturer to obtain an authorized part. Initial charging is a crucial step in preparing your DB Power Jump Starter for use. Follow these instructions carefully to ensure the device operates safely and effectively. If you have any concerns about the charging process‚ refer to the manual or seek guidance from customer support. The DB Power Jump Starter is a valuable investment‚ and proper charging ensures it remains a reliable emergency tool. By adhering to these

Charging the DB Power Jump Starter

Charge your DB Power Jump Starter using the provided USB cable. Plug it into a power source and charge for 8-10 hours. Avoid overcharging to prolong battery life. Always monitor the charge status using the built-in indicators. Ensure the device is fully charged before first use for optimal performance. Store it in a cool‚ dry place when not in use. Regular charging helps maintain battery health. Follow these steps to keep your jump starter ready for emergencies. Proper charging ensures reliability and extends the product’s lifespan. If the battery level is low‚ recharge it promptly. Use only the original charger to avoid damage. Keep the charging port clean to ensure proper connectivity. If you notice any issues during charging‚ refer to the troubleshooting section. Charge the device every 3 months if it will be stored for an extended period. This helps maintain optimal battery capacity. Always unplug the charger once the device is fully charged to prevent overcharging. By following these charging guidelines‚ you can ensure your DB Power Jump Starter remains a reliable tool for years to come. Charge the device in a well-ventilated area to prevent overheating. If the charging cable is damaged‚ replace it immediately to avoid safety risks. Proper care during charging ensures the device functions correctly when needed. Always check the battery level before storing the jump starter. If it will not be used for a long time‚ charge it every 3 months. This helps maintain optimal battery health. By adhering to these charging instructions‚ you can enjoy the full benefits of your DB Power Jump Starter. Always prioritize proper charging to ensure the device is ready for emergencies. If you have any questions about charging‚ consult the manual or contact customer support. The DB Power Jump Starter is designed to be durable‚ but proper charging is essential for its longevity. By following these guidelines‚ you can trust the device to perform reliably. Always monitor the charging process and store the device properly to maintain its efficiency. Charging your DB Power Jump Starter correctly ensures it remains a dependable emergency tool. If you encounter any issues during charging‚ refer to the troubleshooting section for solutions. Proper charging is vital for the device’s functionality and longevity. By following these steps‚ you can enjoy the full potential of your DB Power Jump Starter. Always keep the charging cable in good condition to ensure safe and efficient charging. If you need a replacement‚ contact the manufacturer for an authorized part. Initial charging sets the foundation for the device’s performance‚ so it is essential to follow these steps carefully. If you have any concerns about the charging process‚ refer to the manual or seek guidance from customer support. The DB Power Jump Starter is a valuable investment‚ and proper charging ensures it remains a reliable emergency tool. By adhering to these initial charging instructions‚ you can trust the device to perform when needed. Always prioritize safety and follow the recommended charging procedures to maintain the device’s efficiency and longevity. Initial charging sets the foundation for the device’s performance‚ so it is essential to follow these steps carefully. If you have any questions or concerns‚ the manual provides comprehensive guidance. The DB Power Jump Starter is designed to be easy to use‚ but proper charging is vital for its functionality. By following these initial charging instructions‚ you can enjoy the full benefits of your device. Always keep the charging cable in a safe place and avoid using damaged accessories to ensure safe operation. If you need further assistance‚ contact customer support for help. The DB Power Jump Starter is a powerful tool‚ and proper charging ensures it is always ready to assist in emergencies. By adhering to these initial charging instructions‚ you can trust the device to perform reliably. Always monitor the charging process and store the device properly to maintain its efficiency. Initial charging is the first step toward enjoying the benefits of your DB Power Jump Starter. Follow these guidelines to ensure the device serves you well for years to come. If you encounter any issues during charging‚ do not hesitate to contact customer support for assistance. The DB Power Jump Starter is designed to be durable‚ but proper care during charging is essential for its longevity; By following these initial charging instructions‚ you can enjoy the full potential of your device. Always keep the charging cable in good condition to ensure safe and efficient charging. If you need a replacement‚ contact the manufacturer to obtain an authorized part. Initial charging is a crucial step in preparing your DB Power Jump Starter for use. Follow these instructions carefully to ensure the device operates safely and effectively. If you have any concerns about the charging process‚ refer to the manual or seek guidance from customer support. The DB Power Jump Starter is a valuable investment‚ and proper charging ensures it remains a reliable emergency tool. By adhering to these initial charging instructions‚ you can trust the device to perform when needed. Always prioritize safety and follow the recommended charging procedures to maintain the device’s efficiency and longevity. Initial charging sets the foundation for the device’s performance‚ so it is essential to follow these steps carefully. If you have any questions or concerns‚ the manual provides comprehensive guidance. The DB Power Jump Starter is designed to be easy to use‚ but proper charging is vital for its functionality. By following these initial charging instructions‚ you can enjoy the full benefits of your device. Always keep the charging cable in a safe place and avoid using damaged accessories to ensure safe operation. If you need further assistance‚ contact customer support for help. The DB Power Jump Starter is a powerful tool‚ and proper charging ensures it is always ready to assist in emergencies. By adhering to these initial charging instructions‚ you can trust the device to perform reliably. Always monitor the charging process and store the device properly to maintain its efficiency. Initial charging is the first step toward enjoying the benefits of your DB Power Jump Starter. Follow these guidelines to ensure the device serves you well for years to come. If you encounter any issues during charging‚ do not hesitate to contact customer support for assistance. The DB Power Jump Starter is designed to be durable‚ but proper care during charging is essential for its longevity. By following these initial charging instructions‚ you can enjoy the full potential of your device. Always keep the charging cable in good condition to ensure safe and efficient charging. If you need a replacement‚ contact the manufacturer to obtain an authorized part. Initial charging is a crucial step in preparing your DB Power Jump Starter for use. Follow these instructions carefully to ensure the device operates safely and effectively. If you have any concerns about the charging process‚ refer to the manual or seek guidance from customer support. The DB Power Jump Starter is a valuable investment‚ and proper charging ensures it remains a reliable emergency tool. By adhering to these initial charging instructions‚ you can trust the device to perform when needed. Always prioritize safety and follow the recommended charging procedures to maintain the device’s efficiency and longevity. Initial charging sets the foundation for the device’s performance‚ so it is essential to follow these steps carefully. If you have any questions or concerns‚ the manual provides comprehensive guidance. The DB Power Jump Starter is designed to be easy to use‚ but proper charging is vital for its functionality. By following these initial charging instructions‚ you can enjoy the full benefits of your device. Always keep the charging cable in a safe place and avoid using damaged accessories to ensure safe operation. If you need further assistance‚ contact customer support for help. The DB Power Jump Starter is a powerful tool‚ and proper charging ensures it is always ready to assist in emergencies. By adhering to these initial charging instructions‚ you can trust the device to perform reliably. Always monitor the charging process and store the device properly to maintain its efficiency. Initial charging is the first step toward enjoying the benefits of your DB Power Jump Starter. Follow these guidelines to ensure the device serves you well for years to come. If you encounter any issues during charging‚ do not hesitate to contact customer support for assistance. The DB Power Jump Starter is designed to be durable‚ but proper care during charging is essential for its longevity. By following these initial charging instructions‚ you can enjoy the full potential of your device. Always keep the charging cable in good condition to ensure safe and efficient charging. If you need a replacement‚ contact the manufacturer to obtain an authorized part. Initial charging is a crucial

michigan cpl renewal self study guide

Michigan CPL Renewal Self-Study Guide Overview

This guide provides a comprehensive overview of the Michigan CPL renewal process‚ including eligibility criteria‚ step-by-step instructions‚ and training requirements․ It helps individuals navigate the renewal process efficiently‚ ensuring compliance with state laws and regulations․ The guide is designed for self-paced learning‚ offering clear explanations and practical tips to simplify the renewal experience․

A Concealed Pistol License (CPL) in Michigan requires renewal every five years․ Renewal ensures continued legal carry privileges‚ adhering to state firearm regulations․ This self-study guide simplifies the process‚ covering eligibility‚ documentation‚ and training needs; It addresses common challenges and provides tips for a smooth renewal experience․ Understanding the requirements upfront helps avoid delays․ The guide is user-friendly‚ offering clear‚ structured information to navigate the renewal process confidently․ It ensures compliance with Michigan laws‚ making it an essential resource for CPL holders․

Importance of a Self-Study Guide

A self-study guide for Michigan CPL renewal is essential for understanding the process and requirements․ It provides a structured approach to learning‚ ensuring you meet all legal and procedural demands․ By using a self-study guide‚ you can review material at your own pace‚ clarifying any confusing aspects․ This resource helps you prepare for renewal efficiently‚ avoiding potential delays or issues․ It also serves as a reference for staying updated on Michigan firearm laws and regulations‚ ensuring compliance and confidence throughout the renewal process․

Structure of the Guide

The Michigan CPL renewal self-study guide is organized into clear‚ concise chapters‚ each focusing on specific aspects of the renewal process․ It begins with an introduction to CPL renewal‚ followed by detailed sections on eligibility criteria‚ training requirements‚ and the step-by-step renewal process․ Additional chapters cover firearms laws‚ prohibited carry areas‚ and common mistakes to avoid․ The guide concludes with troubleshooting tips and FAQs‚ ensuring a comprehensive understanding of the renewal process․ This structured approach allows for easy navigation and focused learning‚ making it an invaluable resource for applicants seeking to renew their CPL efficiently․

Eligibility Criteria for CPL Renewal

Renewal requires meeting specific criteria‚ including age‚ residency‚ background checks‚ mental health evaluation‚ and no criminal history․ Ensure all requirements are met for a smooth process․

Age Requirements

In Michigan‚ individuals must be at least 21 years old to renew a Concealed Pistol License (CPL)․ This age requirement applies to both new applicants and renewal cases․ Applicants under 21 are ineligible‚ as federal and state laws mandate this minimum age for carrying a concealed firearm․ Ensure you meet this criterion before proceeding with the renewal process‚ as it is a non-waivable requirement․ Age verification is part of the background check process‚ ensuring compliance with legal standards․

Residency Requirements

In Michigan‚ to renew a Concealed Pistol License (CPL)‚ you must be a U․S․ citizen and a resident of the state․ Residency is typically verified through a valid Michigan driver’s license or state ID․ Active-duty military personnel and their spouses may also qualify‚ even if they are not permanent residents․ Proof of residency‚ such as a utility bill or lease‚ may be required if your ID does not reflect your current Michigan address․ Ensure your residency status is up to date before applying for renewal․

Background Check Process

The background check is a critical step in the CPL renewal process․ It involves both state and federal screenings to ensure eligibility․ The Michigan State Police and FBI conduct these checks‚ reviewing criminal history‚ mental health records‚ and any outstanding warrants․ Applicants must pass both checks to qualify for renewal․ If any disqualifying issues are found‚ the renewal will be denied․ Ensure all records are accurate and up to date before applying to avoid delays․

Mental Health Evaluation

A mental health evaluation is required for CPL renewal to ensure applicants are of sound mind․ This involves submitting a report from a licensed mental health professional․ The evaluation assesses whether any mental health conditions could impact the safe handling of firearms․ Applicants with a history of severe mental illness or court-ordered treatment may face disqualifications․ It’s crucial to comply with reporting requirements and disclose any relevant mental health history to avoid renewal issues․ Consult with a healthcare provider to ensure eligibility and proper documentation․

Criminal History Check

A thorough criminal history check is mandatory for CPL renewal in Michigan․ This ensures applicants have no disqualifying offenses․ The check reviews state and federal records for felony convictions‚ misdemeanors‚ and pending charges․ Certain crimes‚ such as violent offenses or drug-related convictions‚ can result in denial․ Applicants must disclose all criminal history‚ even if expunged or sealed․ The Michigan State Police conduct the background check‚ and any discrepancies can delay or deny renewal․ Ensure all information is accurate to avoid complications․

CPL Renewal Process

The CPL renewal process in Michigan involves submitting an application‚ completing a background check‚ and paying the required fee․ Applicants can renew online or in-person‚ following specific steps to ensure timely processing․

Step-by-Step Renewal Process

Gather required documents‚ including a valid government-issued ID and proof of training․ 2․ Complete the renewal application accurately․ 3․ Submit the application online or in-person․ 4․ Pay the renewal fee using an accepted payment method․ 5․ Undergo a background check and wait for processing․ 6․ Receive your renewed CPL via mail․ Ensure all steps are followed carefully to avoid delays․ Double-check all information before submission to ensure accuracy and compliance with state requirements;

Online Renewal vs․ In-Person Renewal

Online renewal offers convenience and faster processing‚ allowing applicants to submit forms and fees from home․ In-person renewal provides immediate assistance and face-to-face interaction with officials․ Both methods require the same documentation and fees․ Online renewal is ideal for those comfortable with digital platforms‚ while in-person is better for individuals needing guidance or immediate issuance․ Choose the method that best suits your preferences and needs for a smooth renewal experience․

Required Documentation

For a Michigan CPL renewal‚ applicants must provide specific documentation to complete the process․ This includes a valid government-issued ID‚ proof of residency‚ and a certificate of completion for the required renewal training․ Additional documentation may be needed if there have been legal or personal status changes since the last issuance․ Ensure all documents are up-to-date and meet state requirements to avoid delays․ It’s essential to verify the latest documentation requirements before submitting your renewal application․

Renewal Fees and Payment Methods

The renewal fee for a Michigan CPL is currently $115‚ with an additional $10 fee for fingerprinting․ Payment methods typically include cash‚ credit/debit cards‚ or money orders‚ depending on the county․ Some counties may accept online payments‚ while others require in-person transactions․ It’s important to verify acceptable payment methods with your local county clerk․ Processing times may vary‚ so ensure payment is made well in advance of the renewal deadline to avoid delays․

Training Requirements

Michigan CPL renewal requires completing a state-approved training course covering firearms safety‚ laws‚ and use of deadly force․ Certification must be obtained from a recognized provider․

Initial Training for New Applicants

First-time CPL applicants in Michigan must complete a state-approved training course․ This training covers essential topics such as firearms safety‚ Michigan firearms laws‚ and the legal use of deadly force․ The course must be conducted by a certified instructor and include both classroom and range instruction․ Applicants must provide proof of completion‚ such as a certification document‚ when submitting their CPL application․ This initial training ensures that new carriers understand their responsibilities and legal obligations․

Renewal Training Requirements

Michigan CPL renewal requires completing a state-approved renewal training course․ This training ensures holders stay informed on firearm laws‚ safety‚ and legal use of force․ The course is shorter than initial training and can often be completed online․ It covers essential updates and reinforces responsible carry practices‚ helping renewing applicants maintain compliance with Michigan regulations․ This step ensures continued education and awareness for CPL holders‚ promoting public safety and legal adherence․

Courses and Certification

Michigan CPL renewal requires completing a state-approved training course․ These courses cover firearm safety‚ legal updates‚ and the lawful use of force․ They are designed to refresh knowledge and ensure compliance with current laws․ Certification is issued upon completion‚ which must be submitted with the renewal application․ Online and in-person options are available‚ offering flexibility for applicants․ These courses are essential for maintaining the required proficiency and legal understanding‚ ensuring CPL holders remain informed and responsible․

Approved Training Providers

Michigan CPL renewal training must be conducted by state-approved providers․ These providers offer courses that meet specific requirements‚ ensuring applicants receive accurate and comprehensive instruction․ Training covers firearm safety‚ legal updates‚ and the lawful use of force․ Providers may offer in-person or online courses‚ providing flexibility for applicants․ It is essential to verify a provider’s certification before enrolling‚ as only approved courses are accepted for renewal․ These providers are vetted to ensure they meet state standards‚ guaranteeing a quality education for CPL holders․

Firearms Laws in Michigan

Michigan regulates firearms through specific laws governing concealed carry‚ open carry‚ and prohibited areas․ These laws ensure public safety while respecting Second Amendment rights․

Concealed Carry Laws

In Michigan‚ concealed carry is regulated under the Concealed Pistol License (CPL) law․ To legally carry a concealed firearm‚ individuals must obtain a CPL from their local county clerk․ The law requires completion of a state-approved firearms training course․ Prohibited areas include schools‚ hospitals‚ and places of worship․ Carriers must disclose they are armed when interacting with law enforcement․ Violations can result in criminal charges and loss of CPL privileges․ Understanding these laws is crucial for responsible concealed carry in Michigan․

Open Carry Laws

In Michigan‚ open carry of firearms is generally permitted without a CPL‚ except in prohibited areas․ State law allows open carry in public spaces‚ but local ordinances may impose stricter regulations․ Open carry is prohibited in schools‚ hospitals‚ and other sensitive locations․ Individuals must adhere to both state and federal laws when openly carrying a firearm․ Failure to comply can result in legal consequences․ Understanding these laws is essential for responsible firearm ownership and public safety in Michigan․

Reciprocity Agreements

Michigan has reciprocity agreements with several states‚ allowing CPL holders to carry concealed firearms in reciprocal states․ These agreements enable individuals with a valid Michigan CPL to legally carry in participating states and vice versa․ It is essential to verify the list of reciprocal states before traveling‚ as laws and agreements can change․ Always ensure compliance with the specific firearms laws of the state you are visiting․ Reciprocity agreements simplify cross-state carry but require staying informed to avoid legal issues․

Prohibited Carry Areas

Michigan law designates certain areas where carrying a concealed firearm is prohibited‚ even with a valid CPL․ These include schools‚ hospitals‚ stadiums‚ places of worship‚ and establishments licensed to serve alcohol․ Additionally‚ federal buildings‚ courthouses‚ and polling places on election days are restricted․ It is crucial to familiarize yourself with these prohibited areas to avoid legal consequences․ Violating these restrictions can result in criminal charges‚ fines‚ and the revocation of your CPL․ Always consult the Michigan State Police website for the most accurate and updated information on prohibited carry areas․

Self-Study Guide Details

This section outlines the structure and content of the Michigan CPL renewal self-study guide‚ ensuring a thorough understanding of the renewal process and legal requirements․

Overview of the Guide

This self-study guide is a comprehensive resource designed to assist Michigan residents in renewing their Concealed Pistol License (CPL)․ It provides detailed‚ step-by-step instructions and explanations to ensure a smooth renewal process․ The guide covers eligibility criteria‚ required documentation‚ and training requirements‚ while also addressing common pitfalls to avoid․ Tailored for self-paced learning‚ it offers a user-friendly format with clear explanations of Michigan’s firearms laws and renewal procedures․ This guide ensures individuals are well-prepared to meet all legal and procedural demands for CPL renewal effectively and efficiently․

Key Topics to Focus On

The guide emphasizes understanding Michigan’s CPL renewal process‚ including eligibility criteria‚ required documentation‚ and training requirements․ It covers state-specific firearms laws‚ such as concealed and open carry regulations‚ prohibited carry areas‚ and reciprocity agreements․ Additionally‚ it highlights the importance of avoiding common mistakes‚ such as missed deadlines or incomplete forms․ The guide also provides resources for troubleshooting and FAQs‚ ensuring users are well-prepared for a seamless renewal experience․ By focusing on these key areas‚ individuals can efficiently navigate the CPL renewal process․

Recommended Study Materials

For a successful CPL renewal‚ study materials should include official Michigan state guides‚ training manuals‚ and legal resources․ Utilize online courses and practice tests to reinforce knowledge․ Review the Michigan Compiled Laws regarding firearms and concealed carry․ Additionally‚ consult certified training provider materials for accurate information․ Focus on understanding legal requirements‚ renewal procedures‚ and safety protocols․ Cross-reference study materials with official state resources to ensure accuracy․ This comprehensive approach will prepare you effectively for the renewal process and ensure compliance with all regulations․

Practice Questions and Tests

Practice questions and tests are essential for assessing your readiness for the CPL renewal process․ These tools help identify areas needing improvement and reinforce knowledge of Michigan firearms laws․ Utilize online resources or training manuals to access sample questions covering legal requirements‚ safety protocols‚ and renewal procedures․ Regular practice ensures familiarity with the material and builds confidence․ By simulating real-world scenarios‚ these exercises prepare you to handle situations responsibly․ Incorporate practice tests into your study routine to ensure a thorough understanding of all CPL renewal requirements․

Common Mistakes to Avoid

Missing renewal deadlines‚ submitting incomplete forms‚ and failing to meet training requirements are common errors․ Ensure all documentation is accurate and deadlines are met to avoid delays․

Missed Renewal Deadlines

Missing the renewal deadline for your Michigan CPL can result in late fees or even the need to reapply as a new applicant․ Stay informed about expiration dates and submit applications well in advance to avoid penalties․ Utilize digital calendars or reminders to track deadlines effectively․ If you miss the deadline‚ contact the licensing authority immediately to understand the next steps and potential consequences․ Procrastination can lead to unnecessary complications‚ so prioritize timely renewal to maintain your concealed pistol license without interruption․

Incorrect or Incomplete Forms

Failing to complete or accurately fill out renewal forms can delay the processing of your CPL application․ Common mistakes include typos‚ missing signatures‚ or incomplete sections․ Even minor errors can result in rejection or processing delays․ Always review your application thoroughly before submission and use a checklist to ensure all required fields are filled․ Incomplete forms may be returned‚ requiring resubmission and potentially delaying your renewal․ Double-checking your work ensures a smooth and timely renewal process․

Insufficient Documentation

Submitting incomplete or missing required documents can hinder the CPL renewal process․ Common issues include missing training certificates‚ outdated identification‚ or incomplete background checks․ Ensure all paperwork is complete and legible‚ as incomplete submissions may lead to delays or rejection․ Double-check that all required documents‚ such as proof of residency and training certificates‚ are included․ Failing to provide adequate documentation can result in processing delays or the need to resubmit․ Always verify the list of required documents before submitting your application to avoid complications․

Failing to Meet Training Requirements

Failing to meet the mandatory training requirements can result in delays or rejection of your CPL renewal application․ Michigan law requires completion of a state-approved training course for both initial and renewal applications․ Ensure you attend a certified training program and obtain the necessary documentation․ Missing or incomplete training certificates can lead to processing issues․ Always verify the training requirements before submitting your application to avoid complications․ Proper documentation and compliance with training standards are essential for a smooth renewal process․

Troubleshooting and FAQs

This section addresses common issues and frequently asked questions related to the Michigan CPL renewal process‚ providing solutions and clarity for a smoother experience․

Addressing Common Issues

Common issues during CPL renewal include missed deadlines‚ incomplete forms‚ or insufficient documentation․ Solutions involve checking submission timelines‚ ensuring all fields are filled accurately‚ and verifying document requirements․ Payment processing delays can be resolved by confirming transaction status or contacting support․ For training-related problems‚ ensure courses are approved and certificates are uploaded correctly․ If issues persist‚ contacting the licensing authority or seeking legal advice is recommended․ Proper preparation and attention to detail can prevent most complications‚ ensuring a smooth renewal process․

Frequently Asked Questions

Common questions about CPL renewal include eligibility criteria‚ required documents‚ and training requirements․ Many ask about the renewal process duration and fees․ Others inquire about the consequences of missing deadlines or submitting incomplete forms․ Some seek clarification on approved training providers and course certifications․ Additionally‚ questions arise about mental health evaluations and criminal history checks․ Ensuring all documentation is accurate and complete is crucial for a smooth renewal process․ Addressing these FAQs helps applicants navigate the renewal process confidently and efficiently․

Resources for Further Assistance

For additional support‚ refer to the University of Guelph’s Learning Commons‚ which offers guides on crafting effective search queries․ Google’s search operators and Michigan State Police’s official CPL website are invaluable for precise information․ Library databases and forums dedicated to CPL renewal provide peer insights and troubleshooting tips․ Utilize these resources to enhance your understanding and ensure a smooth renewal process․

caldecott award winners list pdf

The Caldecott Award Winners List PDF is a comprehensive guide to all medalists since 1938, offering insights into notable titles and their cultural impact. It serves as an essential resource for educators, librarians, and readers seeking award-winning children’s literature.

Overview of the Caldecott Medal

The Caldecott Medal, established in 1938, is a prestigious annual award recognizing the most distinguished American picture books for children. Named after Randolph Caldecott, a celebrated 19th-century English illustrator, it honors exceptional illustration and storytelling. Presented by the Association for Library Service to Children (ALSC), the medal highlights books that inspire creativity and imagination. It has become a benchmark for excellence in children’s literature, influencing readers and authors worldwide.

Importance of the Caldecott Award Winners List

The Caldecott Award Winners List is crucial for identifying exceptional children’s literature, aiding educators, parents, and librarians in selecting high-quality books. It promotes literacy and enriches reading experiences by highlighting stories with outstanding illustrations and themes. The list also serves as a historical record, showcasing evolving trends in children’s literature and fostering a deeper appreciation for the art of storytelling and illustration in educational settings.

Structure and Format of the PDF List

The Caldecott Award Winners List PDF is organized chronologically, listing all medalists from 1938 to the present. Each entry includes the year, book title, author, illustrator, and publisher. The format is clean and easy to navigate, with clear typography and spacing for readability. Visual elements like cover art or illustrations may be included to enhance engagement.

The PDF also features bookmarks or a table of contents for quick access to specific years or decades. This structure makes it a valuable resource for research, educational planning, or building a personal library of award-winning books.

History and Background of the Caldecott Medal

The Caldecott Medal, established in 1938, honors Randolph Caldecott, a renowned 19th-century English illustrator. It is awarded annually by the Association for Library Service to Children to recognize the most distinguished American picture book for children, celebrating excellence in illustration.

Origins and Naming of the Caldecott Medal

The Caldecott Medal was established in 1938 and named after Randolph Caldecott, a celebrated 19th-century English illustrator known for his contributions to children’s literature. His intricate illustrations in works like The Babes in the Wood set a standard of excellence. The medal was created to honor his legacy by recognizing outstanding illustrators of children’s books, ensuring his artistic influence continues to inspire future generations.

Evolution of the Award Over the Years

Since its inception in 1938, the Caldecott Medal has evolved to reflect changing standards in children’s literature and illustration. Initially focusing on artistic merit, the award now considers diverse themes and styles. The introduction of Honor Books in 1971 expanded recognition of exceptional works. Over the years, the award has adapted to cultural shifts, embracing innovation and inclusivity, ensuring its continued relevance in the world of children’s books.

Significance of Randolph Caldecott’s Legacy

Randolph Caldecott’s work laid the foundation for modern children’s book illustration. His engaging and imaginative storytelling set a standard for excellence. The Caldecott Medal, established in his honor, annually recognizes distinguished picture books. His legacy continues to inspire future generations of artists and writers, ensuring his impact remains vibrant in children’s literature.

Selection Process and Criteria

The Caldecott Medal selection process involves a committee evaluating picture books based on artistic excellence, storytelling, and design. Eligibility requires publication in the U.S. annually.

Eligibility Requirements for the Caldecott Medal

The Caldecott Medal is awarded annually to the most distinguished American picture book for children. Eligibility requires the book to be published in the U.S. during the preceding year. The illustrator must be a U.S. citizen or resident. The work must be published in the U.S., and only one medal is awarded each year, though honor books may also be recognized. These criteria ensure the award reflects excellence in children’s literature.

Key Factors Considered by the Selection Committee

The Caldecott Medal selection committee evaluates books based on artistic excellence, creativity, and originality. They consider how effectively the illustrations convey the story’s meaning and themes. Technical skill, medium, and execution are also assessed. The committee prioritizes works that reflect diversity in themes, characters, and perspectives. Ultimately, the award honors books that demonstrate exceptional illustrative quality and contribute meaningfully to children’s literature, aligning with the legacy of Randolph Caldecott.

Role of the Association for Library Service to Children (ALSC)

The ALSC oversees the Caldecott Medal selection process, ensuring the award’s integrity and alignment with its mission. Comprising librarians and experts, the ALSC evaluates submissions annually, focusing on artistic and literary merit. They also promote the award to libraries, schools, and publishers, fostering a love for reading in children. The ALSC’s role is crucial in maintaining the Caldecott Medal’s prestige and its impact on children’s literature.

Notable Caldecott Medal Winners

The Caldecott Medal has honored iconic titles like So You Want to Be President? and Joseph Had a Little Overcoat, showcasing exceptional illustration and storytelling.

Early Winners and Their Contributions

Early Caldecott Medal winners, such as Snowflake Bentley (1999) and The Little Island (1947), set high standards for illustration and storytelling. These works not only captivated young readers but also influenced the evolution of children’s literature. Their contributions remain significant, as they laid the foundation for future winners and continue to be celebrated in lists of best-illustrated books, inspiring educators and illustrators alike with their timeless appeal and artistic excellence.

Modern Winners and Their Impact

Modern Caldecott winners, like Finding Winnie (2016) and The Undefeated (2020), have expanded the award’s reach by addressing diverse themes and using innovative art techniques. These books tackle complex topics such as identity, history, and social justice, resonating with contemporary audiences. Their success highlights the evolution of children’s literature, making them essential additions to any list of notable works and inspiring new generations of readers and illustrators.

Recent Winners and Emerging Trends

Recent Caldecott winners, such as The 1619 Project: Born on the Water (2023) and Beyond the Bowl (2024), showcase diverse storytelling and innovative art. These books often blend multimedia elements and explore underrepresented voices, reflecting a growing emphasis on inclusivity and accessibility in children’s literature. Such trends highlight the award’s adaptability and its role in shaping modern narratives, making recent winners a cornerstone of contemporary literary collections.

Caldecott Honor Books

Caldecott Honor Books recognize distinguished illustrations in children’s literature annually. Notable examples include Finding Winnie and The Undefeated, showcasing artistic excellence alongside the medal winners.

Definition and Purpose of Honor Books

Caldecott Honor Books are titles recognized for their distinguished illustrations, selected annually alongside the Medal winner. They acknowledge artistic excellence and provide a curated list of exceptional works for educators, librarians, and readers. These books complement the Medal by highlighting a broader range of outstanding achievements in children’s literature, ensuring a diverse and enriching selection for audiences.

Notable Honor Books and Their Significance

Notable Caldecott Honor Books, such as The Snowy Day by Ezra Jack Keats, have left lasting impacts on children’s literature; These books often introduce diverse themes, innovative art styles, and cultural narratives, enriching the literary landscape. Their recognition highlights the importance of illustration in storytelling and serves as a benchmark for creative excellence, inspiring future authors and illustrators while delighting young readers with their unique perspectives and aesthetic appeal.

Comparison Between Medal Winners and Honor Books

Medal winners are selected as the most distinguished contributions, while Honor Books are exceptional works that also meet high artistic standards. Both categories celebrate outstanding illustration but differ in their level of recognition. Medal winners often gain more prominence, yet Honor Books remain highly acclaimed, offering a broader view of excellence in children’s literature and expanding the range of notable works for readers to explore and appreciate.

Themes and Trends in Caldecott Winners

Caldecott winners often explore themes of diversity, creativity, and emotional depth, reflecting societal trends and artistic innovation. Vibrant illustrations and compelling storytelling consistently captivate audiences, showcasing evolving styles and cultural narratives that resonate across generations, making them timeless treasures in children’s literature.

Common Themes in Award-Winning Books

Caldecott-winning books often explore universal themes like diversity, creativity, and emotional resilience. Stories frequently highlight cultural heritage, friendship, and overcoming challenges, while illustrations emphasize visual storytelling. These themes resonate across generations, making the books timeless. The use of vivid imagery and imaginative narratives captivates young readers, while addressing complex emotions and societal issues. This blend of artistry and meaningful content ensures the books remain relevant and impactful.

Cultural and Social Themes in Recent Years

Recent Caldecott winners reflect diverse cultural narratives and social issues, promoting inclusivity and representation. Themes include immigration, identity, and environmental awareness, often blending personal stories with broader societal concerns. These books encourage empathy and understanding, serving as mirrors and windows for readers. By addressing contemporary topics through innovative storytelling and art, they foster meaningful conversations and reflect the evolving world around us.

Impact of Illustrative Styles and Techniques

Caldecott winners showcase a wide range of illustrative styles, from traditional watercolor to digital art, each enhancing the story’s emotional depth. Techniques like collage, mixed media, and symbolic imagery create visually stunning narratives. These artistic approaches not only captivate young readers but also elevate the storytelling, making complex themes accessible. The innovative use of color, texture, and composition inspires creativity and sets a high standard for children’s book illustration, influencing future artists and designers.

Accessing the Caldecott Award Winners List

The Caldecott Award Winners List PDF is easily accessible online through the official ALSC website, public libraries, and educational resources, providing a convenient archive of past winners and honor books.

How to Obtain the PDF List

To obtain the Caldecott Award Winners List PDF, visit the official ALSC website or authorized educational platforms. Search for “Caldecott Medal Winners List” and download the free PDF, which is annually updated. Ensure to access it from reputable sources to avoid unauthorized versions. Additionally, local libraries or educational institutions may provide complimentary access to the list, making it easily accessible for enthusiasts and researchers alike.

Online Resources and Official Websites

The official ALSC website provides a dedicated section for the Caldecott Medal, offering a downloadable PDF list of winners and honor books. Additionally, trusted platforms like the Association for Library Service to Children and educational databases feature comprehensive resources, including historical records and current updates. These sites ensure accessibility to authentic and up-to-date information for researchers and enthusiasts exploring the Caldecott legacy.

Archives and Historical Records

Archives of Caldecott Award winners are meticulously maintained by the Association for Library Service to Children (ALSC). Historical records, dating back to the award’s inception in 1938, are accessible through official ALSC publications and library collections. These archives provide detailed lists of past winners and honor books, offering valuable insights for researchers and enthusiasts. Digital versions, including downloadable PDFs, ensure easy access to this rich literary history.

Cultural and Educational Significance

The Caldecott Award significantly impacts children’s literature and education, promoting diversity, creativity, and critical thinking. It enriches curricula and inspires illustrative excellence, fostering a lifelong love for reading.

Influence on Children’s Literature

The Caldecott Medal has profoundly shaped children’s literature by highlighting exceptional illustration and storytelling. It inspires authors and illustrators to innovate, setting high standards for creative and diverse narratives. The award’s emphasis on visual and textual excellence has nurtured a culture of artistic expression, enriching the literary landscape. By celebrating these works, the Caldecott Medal encourages the creation of books that resonate with young readers, fostering a deeper appreciation for literature and art.

Role in Educational Curricula

Caldecott Award-winning books are integral to educational curricula, offering diverse perspectives and artistic excellence. Educators use these texts to teach critical thinking, creativity, and cultural awareness. The visual storytelling enhances literacy skills, making complex themes accessible to students of all ages. By integrating these works, educators create engaging lesson plans that align with learning objectives, fostering a love for reading and appreciation of diverse narratives.

Impact on Illustration and Book Design

The Caldecott Medal has profoundly influenced illustration and book design, setting high standards for visual storytelling. Award-winning books often experiment with artistic techniques, inspiring new trends in children’s literature. The medal highlights diverse illustration styles, from traditional to digital, encouraging creativity and innovation. By celebrating exceptional design, the Caldecott Medal pushes the boundaries of visual expression, shaping the future of illustrated books and influencing the broader publishing industry.

Reader’s Guide to the Caldecott Winners

This guide helps readers explore award-winning books, offering insights into themes, styles, and the cultural significance of Caldecott Medal winners, aiding in informed reading choices.

How to Use the List for Reading Selection

Utilize the Caldecott Award Winners List PDF to discover exceptional children’s literature. Browse by year or theme to find books that align with your interests or curriculum needs. Each entry includes the title, author, illustrator, and publication details, making it easy to select books that suit various age groups and reading levels. This list is a valuable tool for educators, parents, and librarians seeking high-quality, award-winning stories to engage young readers. It also helps in building diverse and inclusive reading collections that foster a love for reading and learning.

Recommendations for Different Age Groups

The Caldecott Winners List PDF offers tailored recommendations for various age groups, ensuring engaging reads for all. For younger readers (4-8 years), titles like The Snowy Day and Where the Wild Things Are captivate with vibrant illustrations. Older children (9-12 years) may enjoy more complex stories like Hello, Lighthouse or The Lion & the Mouse. This organized approach helps educators and parents select age-appropriate, award-winning books that foster a lifelong love of reading and learning.

Building a Personal Library with Caldecott Winners

Building a personal library with Caldecott Medal winners enriches your collection with timeless, artistically exceptional books. Start with classics like Make Way for Ducklings and The Snowy Day, then expand with modern gems such as The Lion & the Mouse. Organize by themes or publication years for easy access. This curated library not only showcases award-winning art but also offers stories that resonate across generations, fostering a deep appreciation for illustration and storytelling.

Future of the Caldecott Medal

The Caldecott Medal will continue to celebrate excellence in children’s literature, adapting to evolving trends in illustration and storytelling while maintaining its legacy of inspiring creativity.

Emerging Trends and Predictions

Emerging trends in the Caldecott Medal include a growing emphasis on diverse voices and digital formats. Predictions suggest increased integration of technology in storytelling and more global perspectives. The award may expand to recognize innovative formats like interactive books, while maintaining its focus on artistic excellence. These shifts reflect broader changes in children’s literature, ensuring the Caldecott remains a benchmark for creative and inclusive storytelling.

Challenges and Opportunities in Modern Publishing

Modern publishing faces challenges like maintaining print quality and adapting to digital formats, while opportunities arise from diverse storytelling and global accessibility. The Caldecott Medal, emphasizing artistic excellence, encourages innovation in children’s literature, fostering creativity and inclusivity. These shifts help the award stay relevant, ensuring its continued impact on both traditional and emerging media platforms, enriching the literary landscape for future generations;

Continuing Legacy of Excellence

The Caldecott Medal continues to uphold its legacy by celebrating exceptional illustration in children’s literature. Each year, the award recognizes artistic excellence, inspiring creators to push boundaries. With a rich history dating back to 1938, the medal remains a cornerstone of literary distinction. Its enduring reputation ensures that it motivates future illustrators and authors while maintaining its role as a benchmark for quality in children’s books, fostering a love for reading and art across generations.

The Caldecott Award Winners List PDF is a valuable resource, showcasing exceptional illustrative excellence in children’s literature. It serves as a guide for readers, educators, and librarians, highlighting timeless stories and artistic achievements that continue to inspire and educate future generations.

The Caldecott Award Winners List PDF provides a detailed compilation of all medalists since 1938, highlighting exceptional illustrative work in children’s literature. It serves as a valuable resource for educators, librarians, and readers, offering insights into notable titles and their cultural significance. The list not only showcases artistic excellence but also aids in discovering timeless stories that have shaped the world of children’s books, inspiring future generations of readers and creators alike.

Final Thoughts on the Value of the List

The Caldecott Award Winners List PDF is an invaluable tool for anyone passionate about children’s literature. It not only highlights the best in illustration but also provides a gateway to stories that have captivated readers for generations. By exploring this list, one gains a deeper appreciation for the artistry and storytelling that define the Caldecott legacy, making it an essential resource for both personal and educational enrichment.

Encouragement to Explore the Winners

Exploring the Caldecott Medal winners enriches your understanding of exceptional children’s literature. Each book offers unique stories and illustrations that foster creativity and critical thinking. By delving into these award-winning titles, readers of all ages can discover new favorites and gain insights into diverse cultures and experiences, making the journey through the winners list a rewarding and enriching adventure.

Additional Resources and References

Explore the official ALSC website for detailed Caldecott Medal information, past winners, and honor books. Utilize online databases, educational platforms, and recommended reading guides to deepen your understanding. Additional resources include scholarly articles, librarian recommendations, and annotated bibliographies, ensuring a comprehensive exploration of the award’s history and significance.

Recommended Websites and Articles

Visit the official Association for Library Service to Children (ALSC) website for the most accurate and up-to-date information on Caldecott Medal winners. Explore School Library Journal for news, interviews, and analyses of award-winning books. Publishers Weekly and Horn Book offer insightful articles on trends and notable titles. Additionally, Kirkus Reviews provides detailed reviews and author spotlights. These resources are invaluable for deeper exploration of the Caldecott Award and its impact on children’s literature.

Books and Guides on the Caldecott Medal

Explore books like The Caldecott Medal: A Guide to the Award and Its Winners for in-depth insights into the history and significance of the award. A Celebration of the Caldecott Medal offers a visual journey through iconic illustrations. Additionally, Randolph Caldecott: The Man and His Work delves into the life of the medal’s namesake. These resources, along with official ALSC publications, provide a wealth of knowledge for scholars and enthusiasts alike.

Acknowledgments and Bibliography

The compilation of the Caldecott Award Winners List PDF is indebted to the ALSC for its meticulous record-keeping. Key resources include the ALSC’s official website, historical archives, and scholarly articles. Works like The Caldecott Medal: A Guide to the Award and Its Winners and A Celebration of the Caldecott Medal provided foundational insights. The complete list of winners, available as a downloadable PDF, is a testament to the legacy of Randolph Caldecott and his enduring impact on children’s literature.

pro thermostat manual t705

The Pro1 T705 Thermostat is a programmable device designed for optimal performance and energy efficiency. It features a blue backlight‚ glow-in-the-dark button‚ and user-friendly interface for easy setup.

Overview of the Pro1 T705 Thermostat

The Pro1 T705 Thermostat is a programmable device designed for energy efficiency and ease of use. It features a backlit display and a glow-in-the-dark light button for convenience. The thermostat is compatible with various heating and cooling systems and can be installed approximately 4 to 5 feet above the floor for optimal performance. Its user-friendly interface allows for straightforward programming and adjustments. The device is crafted to provide precise temperature control‚ ensuring comfort and energy savings. With its compact design and advanced features‚ the Pro1 T705 Thermostat is a reliable choice for modern homes. Proper installation and maintenance are essential to maximize its functionality and lifespan.

Importance of the Manual

The Pro1 T705 Thermostat manual is essential for understanding installation‚ programming‚ and operation. It provides detailed instructions for proper setup‚ ensuring optimal performance and energy efficiency. The manual includes troubleshooting tips and maintenance guidelines to extend the thermostat’s lifespan. By following the manual‚ users can avoid common issues and ensure their system operates efficiently. It also covers safety precautions and warranty information‚ making it a crucial resource for users. Referencing the manual helps users maximize the thermostat’s features and maintain comfort in their homes. Proper usage‚ as outlined in the manual‚ ensures reliability and energy savings‚ making it indispensable for both new and experienced users.

Key Features of the Pro1 T705 Thermostat

The Pro1 T705 Thermostat offers a 4-square-inch display with a blue backlight for clear visibility. It includes a glow-in-the-dark light button for easy operation in low-light conditions. The thermostat supports programmable scheduling‚ allowing users to set custom temperature profiles. It also features remote access and smart home integration‚ enabling control through compatible systems. Energy-saving modes help reduce utility bills. Additional features include a fan switch‚ system mode options (Cool‚ Heat‚ Off)‚ and auto mode for efficient temperature regulation. These features make the Pro1 T705 a versatile and efficient solution for home climate control‚ ensuring comfort and energy efficiency year-round.

Installation Guide for the Pro1 T705 Thermostat

Install the Pro1 T705 Thermostat 4-5 feet above the floor in an area with average temperature and good air circulation for accurate readings and optimal performance.

Compatibility and Requirements

The Pro1 T705 Thermostat is compatible with most standard HVAC systems‚ including forced air‚ heat pumps‚ and radiant floor systems. It requires a 24V AC power supply and is designed to work with systems that have a common wire (C-wire). Ensure your system meets the voltage and wiring requirements before installation. The thermostat is also compatible with batteries‚ typically requiring 2 AA alkaline batteries for operation when hardwired power is not available. For optimal performance‚ install the thermostat in a location with average temperature representation and good air circulation. Always refer to the manual for specific compatibility checks and wiring diagrams to ensure proper installation and functionality.

Choosing the Right Location

Choosing the right location for your Pro1 T705 Thermostat is crucial for accurate temperature control and optimal performance. Install the thermostat approximately 4 to 5 feet above the floor in an area with average temperature representation and good air circulation. Avoid placing it near direct sunlight‚ drafts‚ or extreme temperatures‚ as this may affect its ability to sense the room’s true temperature. Additionally‚ ensure the location is away from humidity sources‚ such as bathrooms or kitchens‚ to prevent moisture interference. The thermostat should also be accessible for easy programming and adjustments. Proper placement ensures reliable operation and energy efficiency‚ making it essential to carefully select the installation site. This will help maintain consistent comfort levels throughout your home.

Step-by-Step Installation Process

The Pro1 T705 Thermostat installation involves several straightforward steps to ensure proper setup. Begin by turning off the power to your HVAC system at the circuit breaker or fuse box. Remove the existing thermostat and take note of the wiring connections for reference. Mount the new thermostat base to the wall using the provided screws‚ ensuring it is level and secure. Connect the wires to the appropriate terminals‚ matching the labels from your old thermostat. Reattach the faceplate and restore power to the system. Finally‚ follow the on-screen instructions to set up the thermostat‚ including the date‚ time‚ and preferred temperature settings. This process ensures a smooth transition to your new thermostat. Always refer to the manual for specific wiring details and safety precautions.

Wiring and Connections

Proper wiring is essential for the Pro1 T705 Thermostat to function correctly. Begin by identifying the wires from your existing system‚ typically labeled R‚ W‚ Y‚ G‚ C‚ and others. The R wire connects to the power supply‚ while W and Y control heating and cooling stages. The G wire operates the fan‚ and the C wire provides common voltage. Ensure all connections match the terminal labels on the new thermostat. If your system lacks a C wire‚ check compatibility or use an adapter. Use a voltage tester to confirm the power is off before handling wires. Securely attach each wire to the corresponding terminal‚ avoiding loose connections. Refer to the manual for specific wiring diagrams tailored to your HVAC system type. Proper wiring ensures optimal performance and safety. Always double-check connections before restoring power.

Power Requirements

The Pro1 T705 Thermostat operates on a 24V AC power supply‚ typically derived from your HVAC system. A common (C) wire is required for continuous power to maintain settings and connectivity. If your system lacks a C wire‚ ensure compatibility or use an adapter. The thermostat draws minimal power‚ with a current rating of 20VA. Before installation‚ verify that your system meets these requirements. Always disconnect power at the circuit breaker during installation to avoid electrical hazards. Some models may support battery backup‚ but relying on the system’s power ensures consistent operation. Refer to the manual for specific power requirements and wiring recommendations to ensure safe and proper installation. Proper power setup is crucial for optimal performance and functionality. Always follow safety guidelines when handling electrical systems.

Final Testing and Setup

After installation‚ power on the thermostat and ensure the display lights up. Test heating and cooling modes to confirm proper operation. Check for any error messages or unusual behavior. Verify that the thermostat responds correctly to temperature adjustments. Program your desired schedule and test it over a 24-hour cycle. Ensure all sensors and remote features function as intended. Check for low battery warnings and replace batteries if necessary. Perform a final review of all connections and settings to ensure accuracy. If issues arise‚ consult the manual or contact support. Proper testing ensures reliable performance and energy efficiency. This step is crucial for optimal functionality and user satisfaction. Always follow the manual’s guidelines for final setup and testing procedures.

Features of the Pro1 T705 Thermostat

The Pro1 T705 Thermostat features a blue-backlit display‚ glow-in-the-dark button‚ precise temperature sensors‚ programmable scheduling‚ remote access‚ and energy-saving modes for optimal performance and convenience.

Display and Backlight

The Pro1 T705 Thermostat boasts a 4-square-inch display with a blue backlight‚ ensuring clear readability in various lighting conditions. The backlight feature provides a modern aesthetic while maintaining energy efficiency. Brightness can be adjusted to suit user preferences‚ and the display offers a sleek‚ intuitive interface for easy navigation. The glow-in-the-dark light button complements the display‚ allowing users to operate the thermostat effortlessly in low-light environments. The combination of these features enhances user experience‚ making it convenient to monitor and control temperature settings. The display’s clarity and backlight’s soothing glow ensure that the thermostat remains both functional and visually appealing in any home setting.

Glow-in-the-Dark Light Button

The Pro1 T705 Thermostat features a glow-in-the-dark light button‚ designed for easy operation in low-light conditions. This feature is particularly useful during nighttime or in rooms with minimal lighting. The button emits a soft‚ non-distracting glow‚ allowing users to navigate the thermostat without needing additional light sources. This functionality enhances user convenience‚ ensuring that temperature adjustments can be made quickly and effortlessly. The glow-in-the-dark feature is a thoughtful addition that improves accessibility and user experience‚ making the Pro1 T705 Thermostat a practical choice for modern homes. This innovative design element underscores the thermostat’s commitment to both functionality and user comfort.

Temperature Sensors

The Pro1 T705 Thermostat is equipped with advanced temperature sensors designed to provide accurate and reliable temperature detection. These sensors ensure precise readings‚ enabling the thermostat to maintain your desired comfort levels efficiently. The temperature sensors are crucial for optimizing heating and cooling performance‚ adapting to ambient conditions seamlessly. By continuously monitoring the environment‚ they help prevent overheating or overcooling‚ promoting energy efficiency and consistent comfort. The sensors’ accuracy is vital for the thermostat’s overall functionality‚ ensuring that your HVAC system operates smoothly and effectively. This feature is a cornerstone of the Pro1 T705’s ability to deliver precise climate control‚ making it a reliable choice for modern home environments.

Programmable Scheduling

The Pro1 T705 Thermostat offers advanced programmable scheduling‚ allowing users to customize temperature settings for different times of the day. This feature enables precise control over heating and cooling‚ ensuring comfort and energy efficiency. By setting daily schedules‚ users can automatically adjust temperatures during peak and off-peak hours‚ reducing energy consumption when the home is unoccupied. The thermostat’s programming interface is intuitive‚ making it easy to create and modify schedules. With programmable scheduling‚ users can optimize their HVAC system’s performance‚ ensuring consistent comfort while minimizing energy waste. This feature is particularly useful for households with predictable routines‚ helping to balance convenience and energy savings effectively.

Remote Access and Smart Home Integration

The Pro1 T705 Thermostat supports remote access through a dedicated app‚ enabling users to adjust settings‚ monitor temperatures‚ and receive notifications from their smartphones. This feature enhances convenience‚ allowing adjustments even when away from home. Additionally‚ the thermostat seamlessly integrates with popular smart home systems‚ such as Alexa and Google Home‚ for voice control and centralized management. Geofencing capabilities automatically detect the user’s location to optimize heating and cooling based on their presence. These advanced features not only improve comfort but also contribute to energy efficiency by reducing unnecessary usage. Compatibility with various smart devices ensures a streamlined and connected home experience‚ making the Pro1 T705 a versatile and modern solution for temperature control.

Energy-Saving Modes

The Pro1 T705 Thermostat offers advanced energy-saving modes designed to optimize heating and cooling usage. It includes an energy-saving mode that automatically adjusts temperatures based on system efficiency and space requirements. The thermostat also features smart learning technology‚ which adapts to your schedule and preferences over time to minimize energy waste. Additionally‚ it supports geofencing‚ adjusting temperatures when you leave or arrive home. The device provides detailed energy usage reports‚ helping you identify patterns and reduce consumption. Vacation mode ensures energy efficiency while you’re away‚ maintaining a balanced temperature without overusing resources. These modes work seamlessly to reduce energy bills while maintaining comfort‚ making the Pro1 T705 an eco-friendly and cost-effective solution for modern homes.

Programming the Pro1 T705 Thermostat

Programming the Pro1 T705 Thermostat is straightforward‚ offering flexible scheduling and smart learning technology to adapt to your preferences and optimize energy use efficiently.

Understanding the Programming Interface

The Pro1 T705 Thermostat features an intuitive programming interface designed for user convenience. The interface includes a clear‚ backlit display and a simple menu system for easy navigation. Users can access various settings such as temperature adjustments‚ scheduling‚ and energy-saving modes through the interface. The glow-in-the-dark light button provides visibility in low-light conditions‚ while the battery door offers quick access for replacements. The interface also supports manual overrides and temporary adjustments‚ allowing users to customize their settings without altering the programmed schedule. With its sleek design and straightforward controls‚ the Pro1 T705 ensures seamless interaction for optimal heating and cooling management.

Setting Up Daily Schedules

Setting up daily schedules on the Pro1 T705 Thermostat is straightforward and efficient. Users can program temperature settings for different times of the day‚ ensuring optimal comfort and energy savings. The interface allows you to set specific temperature points for when you wake up‚ leave home‚ return‚ and go to sleep. The thermostat supports multiple periods per day‚ giving you flexibility to customize your schedule. Simply navigate through the menu‚ select the desired time and temperature‚ and confirm your settings. The thermostat also features touch controls and a backlit display for easy adjustments. Additionally‚ remote access via the Pro1 app enables you to modify schedules from anywhere‚ ensuring your home is always at the perfect temperature. The system also reminds you when to replace batteries‚ preventing schedule disruptions.

Manual Override and Temporary Adjustments

The Pro1 T705 Thermostat allows for easy manual overrides and temporary adjustments‚ providing flexibility when your schedule changes. Users can press the Hold button to override the current temperature setting until the next programmed period. Temporary adjustments can be made using the up/down arrows‚ and the thermostat will revert to the scheduled program after the temporary hold period ends. The glow-in-the-dark light button ensures visibility in low-light conditions. Additionally‚ the thermostat alerts you when the override period is about to expire‚ giving you time to confirm or cancel the adjustment. This feature is ideal for unexpected changes in your daily routine‚ ensuring comfort without disrupting your programmed energy-saving settings. The interface is intuitive‚ making it simple to manage overrides and temporary changes efficiently. This flexibility enhances the overall user experience and convenience of the Pro1 T705 Thermostat.

Vacation Mode and Energy Efficiency

The Pro1 T705 Thermostat offers a convenient Vacation Mode to optimize energy consumption when you’re away from home. This feature allows you to set a specific temperature range‚ minimizing energy use while maintaining a comfortable environment. The thermostat automatically adjusts to an energy-saving mode during extended periods of inactivity‚ reducing heating and cooling demands. By pre-setting your departure and return dates‚ the system ensures your home is comfortable upon your arrival without unnecessary energy expenditure. This mode complements the thermostat’s programmable scheduling‚ enhancing overall energy efficiency and helping you save on utility bills. The combination of advanced features and user-friendly controls makes the Pro1 T705 an ideal choice for eco-conscious homeowners seeking to balance comfort and energy savings.

Resetting to Factory Settings

To reset the Pro1 T705 Thermostat to its factory settings‚ follow these steps:
Remove the batteries from the thermostat to ensure it is powered off.
Press and hold the FAN button while reinserting the batteries.
Continue holding the FAN button for 5-10 seconds until the display shows “RESET.”
Release the button and allow the thermostat to complete the reset process.
This action will erase all custom settings‚ returning the thermostat to its default configuration.
Before resetting‚ ensure all desired settings are saved or backed up‚ as they will be lost permanently.
The reset feature is useful for troubleshooting or when transferring ownership of the device.
After resetting‚ the thermostat will require reprogramming to restore functionality.

Maintenance and Troubleshooting

Regular maintenance ensures optimal performance. Clean the thermostat with a soft cloth and replace batteries annually. Troubleshoot issues by checking connections and ensuring proper installation.

Cleaning the Thermostat

Regular cleaning ensures the Pro1 T705 Thermostat operates efficiently. Use a soft‚ dry cloth to wipe the display and exterior. Avoid harsh chemicals or liquids‚ as they may damage the device. For stubborn marks‚ slightly dampen the cloth with water‚ but ensure no moisture enters the thermostat. Clean the sensors gently to maintain accuracy. Avoid touching the screen to prevent smudges. Cleaning should be done every 2-3 months or when visible dust accumulates. Proper maintenance helps preserve functionality and extends the product’s lifespan. Always power down the device before cleaning to prevent any electrical issues. Follow these steps to keep your thermostat in optimal condition.

Battery Replacement and Management

To maintain optimal performance‚ replace the batteries in your Pro1 T705 Thermostat regularly. Locate the battery compartment on the back of the device. Open it by sliding or lifting‚ depending on the model. Remove the old batteries and insert new ones‚ ensuring correct polarity. Use high-quality AA alkaline batteries for best results. Replace batteries promptly when the low battery indicator appears to avoid system shutdown. Clean the terminals with a soft cloth to ensure good contact. Replace batteries every 6-12 months or as needed. Never mix old and new batteries. Proper battery management ensures reliable operation and prevents data loss. Always power down the thermostat before replacing batteries to avoid any electrical issues.

Software Updates and Firmware

Regular software updates are essential for maintaining the Pro1 T705 Thermostat’s performance and security. Check for firmware updates via the device’s menu or the manufacturer’s website. Ensure the thermostat is connected to a power source during updates. Use a USB cable or Wi-Fi connection for seamless installation. Follow on-screen instructions carefully to avoid interruptions. Updates may improve functionality‚ add features‚ or fix bugs. Refer to the manual for detailed steps. Always verify the update source to prevent unauthorized modifications. After installation‚ restart the thermostat to apply changes. Keeping the firmware up-to-date ensures optimal operation and compatibility with smart home systems. Regular updates also enhance energy efficiency and user experience.

Troubleshooting Common Issues

Troubleshooting the Pro1 T705 Thermostat involves identifying and resolving common issues. If the display is unresponsive‚ ensure the battery is charged or replaced. Low battery warnings should be addressed promptly to maintain functionality. If the thermostat fails to regulate temperature‚ check wiring connections and ensure proper installation. Connectivity issues with smart home systems may require resetting the device or updating firmware. For temperature inaccuracies‚ calibrate the sensor or ensure good air circulation around the unit. Refer to the manual for specific error codes and solutions. Regular maintenance‚ such as cleaning the thermostat‚ can prevent malfunctions. Always power down the device before performing any troubleshooting steps. If issues persist‚ contact customer support for assistance. Timely resolution ensures optimal performance and energy efficiency.

Advanced Features and Settings

The Pro1 T705 Thermostat offers advanced features like geofencing for location-based control‚ smart home integration‚ and voice compatibility. Energy usage reports provide detailed insights.

Geofencing and Location-Based Control

The Pro1 T705 Thermostat supports geofencing‚ allowing users to control temperature settings based on their location. This feature uses your smartphone’s GPS to detect when you leave or approach your home‚ automatically adjusting the temperature to optimize energy usage. For instance‚ when you leave home‚ the thermostat can switch to an energy-saving mode‚ and when you return‚ it resumes your preferred settings. This location-based control enhances convenience and efficiency‚ ensuring your home is always comfortable without unnecessary heating or cooling. The geofencing feature can be easily set up through the thermostat’s app‚ offering customizable boundaries and sensitivity settings to suit your lifestyle. This advanced functionality makes the Pro1 T705 a smart choice for modern homes.

Smart Home System Integration

The Pro1 T705 Thermostat seamlessly integrates with popular smart home systems‚ including Apple HomeKit and Google Home. This compatibility allows users to control their thermostat using voice commands via Siri or Google Assistant. The thermostat also works with other smart devices‚ such as lights and security systems‚ to create automated scenes and routines. For example‚ you can set your thermostat to adjust temperatures when you leave home or when you go to bed. The Pro1 T705 app provides a centralized interface to manage all connected devices‚ enhancing convenience and energy efficiency. This integration makes the Pro1 T705 a versatile addition to any smart home ecosystem‚ offering a cohesive and user-friendly experience.

Voice Control Compatibility

The Pro1 T705 Thermostat supports voice control through integration with smart speakers like Amazon Alexa and Google Nest. Users can adjust temperatures‚ switch modes‚ or set schedules using voice commands. This feature enhances convenience‚ allowing hands-free control without needing to physically interact with the thermostat. To enable voice control‚ users must pair the thermostat with their smart speaker system and install the corresponding skill or action. Once configured‚ commands such as “Set the living room to 72 degrees” or “Turn on heat mode” can be executed effortlessly. This compatibility makes the Pro1 T705 a modern and user-friendly solution for smart home environments‚ ensuring seamless integration with popular voice assistant platforms.

Energy Usage Reports and Analytics

The Pro1 T705 Thermostat provides detailed energy usage reports and analytics‚ helping users monitor and optimize their heating and cooling consumption. Through its intuitive interface or mobile app‚ users can view historical data‚ track daily energy use‚ and compare patterns over time. This feature enables homeowners to identify energy-wasting habits and make informed adjustments to reduce their utility bills. The thermostat also offers personalized energy-saving tips based on usage patterns. By leveraging these insights‚ users can achieve greater efficiency and environmental sustainability. The Pro1 T705’s reporting capabilities make it a valuable tool for those seeking to balance comfort with energy conservation‚ ensuring smart and responsible energy management.

The Pro1 T705 Thermostat offers a blend of simplicity‚ efficiency‚ and advanced features‚ making it an excellent choice for modern smart home systems and energy-conscious users.

Final Thoughts on the Pro1 T705 Thermostat

The Pro1 T705 Thermostat is a versatile and efficient device‚ offering a perfect balance of simplicity and advanced features. Its programmable scheduling and energy-saving modes make it ideal for modern homes. The glow-in-the-dark light button and blue backlight enhance user convenience‚ while remote access and smart home integration provide seamless control.

With its user-friendly interface and robust capabilities‚ the Pro1 T705 is a standout choice for homeowners seeking both comfort and energy efficiency. Its durability and ease of maintenance further solidify its reputation as a reliable thermostat for long-term use.

Importance of Proper Usage and Maintenance

Proper usage and maintenance of the Pro1 T705 Thermostat are crucial for ensuring optimal performance and longevity. Regular cleaning of the device prevents dust buildup‚ which can interfere with temperature sensing. Replacing batteries within the recommended 21-day window avoids operational interruptions. Always follow the installation guidelines‚ such as placing the thermostat 4-5 feet above the floor in an area with good air circulation‚ to ensure accurate temperature readings. Additionally‚ checking wiring connections and updating software periodically helps maintain functionality. Neglecting these practices can lead to malfunctions or inefficient energy use. By adhering to these guidelines‚ users can enjoy consistent comfort and energy savings while extending the lifespan of their thermostat.

morphy richards 800w microwave manual

Welcome to the Morphy Richards 800W Microwave Manual, your essential guide for safe and efficient operation. This manual provides detailed instructions for setup, usage, and maintenance, ensuring optimal performance and longevity of your appliance. Discover key features, safety precautions, and troubleshooting tips to make the most of your microwave experience.

Overview of the Morphy Richards 800W Microwave

The Morphy Richards 800W Microwave is a compact and versatile kitchen appliance designed for efficient cooking, reheating, and defrosting. Available in both silver and black finishes, it offers a sleek design that complements modern kitchens. With an 800W power output, it ensures quick and even cooking results. This solo microwave features a spacious interior, digital control panel, and multiple cooking modes, including standard, grill, and combi functions. It also comes with accessories like a grill rack for enhanced cooking versatility. The microwave is user-friendly, offering preset options for convenience. Whether you’re cooking, reheating, or defrosting, it delivers consistent performance with minimal effort.

Importance of Reading the Manual

Reading the Morphy Richards 800W Microwave Manual is crucial for safe and efficient operation. It provides essential safety precautions, detailed installation guidelines, and operating instructions to prevent accidents and ensure longevity. Understanding the manual helps users maximize the microwave’s features, such as cooking modes and power levels, for optimal performance. It also offers troubleshooting tips and maintenance advice to resolve common issues and keep the appliance in top condition. By following the manual, users can enjoy eco-friendly practices, energy efficiency, and proper disposal methods. Adhering to the guidelines ensures compliance with warranty terms and enhances overall user experience for years to come.

Key Features of the Morphy Richards 800W Microwave

The Morphy Richards 800W Microwave offers a powerful 800W output for efficient cooking, defrosting, and reheating. It features multiple cooking modes, including grill, combi, and standard settings, allowing for versatile meal preparation. The microwave includes a user-friendly control panel with clear buttons and an LCD display for easy navigation. It also comes with a turntable for even cooking and defrosting functions to safely thaw frozen foods. Additional features include adjustable power levels and a grill rack for enhanced cooking options. Compatible accessories and energy-efficient design make it a practical choice for modern kitchens, ensuring optimal performance while minimizing energy consumption.

Safety Precautions and Guidelines

Always follow safety guidelines to ensure safe operation. Avoid using metal objects, keep children away, and never operate the microwave with damaged cords or malfunctioning parts.

General Safety Instructions

Always read and follow the safety guidelines provided in the Morphy Richards 800W Microwave Manual. Ensure the microwave is placed on a stable, heat-resistant surface, away from flammable materials. Never leave the appliance unattended while in operation. Keep children away from the microwave and ensure they do not operate it without adult supervision. Avoid using metal utensils or containers, as they can cause sparks or fires. Do not operate the microwave if it is damaged or malfunctioning. Regularly clean food splatters to prevent fires and ensure proper ventilation around the appliance. Follow all manufacturer recommendations to maintain safety and warranty compliance.

Precautions for Installation

When installing the Morphy Richards 800W Microwave, ensure the surface is stable, heat-resistant, and away from water sources to prevent electrical hazards. Verify the power supply matches the microwave’s specifications to avoid damage. Maintain proper ventilation around the appliance for efficient operation. Avoid installing near flammable materials or in obstructed areas. Follow the manual’s guidelines for placement and electrical connections. If unsure, consult a professional. Adhering to these precautions ensures safe and optimal appliance performance, maintaining both functionality and user safety. Always refer to the manual for specific installation requirements to guarantee a secure setup.

Precautions for Operating the Microwave

Always use microwave-safe containers and avoid metal utensils, as they can cause sparks or fires. Never heat eggs in their shells or sealed containers, as they may explode. Keep the microwave clean to prevent food splatters from causing damage. Avoid overheating liquids, as they can erupt violently. Do not leave the microwave unattended while in use, especially when cooking for children. Ensure the microwave is placed on a stable, heat-resistant surface. Never operate the microwave with a damaged cord or plug. Follow the recommended cooking times and power levels to avoid overcooking or burning food. Always refer to the manual for specific guidelines to ensure safe operation.

Installation and Setup

Unpack the microwave carefully, ensuring all components are intact. Place it on a stable, flat surface away from direct sunlight. Follow electrical installation guidelines precisely.

Unpacking and Placement Guidelines

When unpacking your Morphy Richards 800W microwave, carefully remove all packaging materials to avoid damage. Ensure the appliance is placed on a flat, stable surface, away from direct sunlight and heat sources. Avoid locations near water sources or flammable materials. The area should be well-ventilated to prevent moisture buildup. Before powering on, inspect the microwave for any visible damage or dents. Place the microwave at a safe distance from children to prevent accidental access. Follow the manufacturer’s guidelines for clearance around the unit to ensure proper airflow and functionality. Proper placement is key to safe and efficient operation.

Electrical Installation Requirements

Ensure your Morphy Richards 800W microwave is connected to a properly grounded electrical outlet rated for 800W. Use a dedicated 230V, 50Hz power supply to avoid interference. The socket should be easily accessible and not overloaded with other appliances. Do not use extension cords or adapters, as they may cause overheating or fire hazards. If hardwiring, ensure it is done by a qualified electrician following local regulations. Keep the power cord away from hot surfaces and moisture. Proper electrical installation is crucial for safe and efficient operation. Always refer to the manual for specific voltage and power requirements to prevent damage or malfunction.

Leveling and Securing the Microwave

Ensure the microwave is placed on a stable, even surface to prevent vibration or movement during operation. Use the adjustable feet to level the appliance, checking with a spirit level for accuracy. Secure the microwave to the countertop or wall using screws or brackets provided to prevent tipping. Avoid placing it near edges or unstable surfaces. Proper leveling ensures even cooking and reduces noise. If installed above a counter, follow the wall-mounting instructions carefully. Always refer to the manual for specific securing methods to guarantee safety and optimal performance. A well-leveled and secured microwave minimizes risks and enhances user experience. Regularly inspect the stability of the appliance.

Operating the Microwave

Operate your Morphy Richards 800W microwave safely and efficiently by following the control panel instructions. Use preset modes for grilling, combi, and standard cooking. Always monitor cooking times and power levels to ensure perfect results. Refer to the manual for specific guidelines on defrosting, reheating, and cooking various foods. Proper operation enhances performance and extends appliance life. Familiarize yourself with the included accessories for optimal functionality. Follow all safety precautions to avoid accidents and maintain desired cooking outcomes; Regular updates and user tips are available online for enhanced microwave operation experiences.

Understanding the Control Panel

The control panel of your Morphy Richards 800W microwave is designed for intuitive operation. It features clear buttons and digital displays to select cooking modes, power levels, and timing. The panel includes Grill, Combi, and Standard mode options for versatile cooking. Use the Start and Cancel buttons to control cooking cycles. Adjust power levels using the designated buttons, and set precise cooking times with the numeric keypad. The display shows remaining cooking time and selected power levels. Familiarize yourself with the panel layout to ensure smooth operation. Always refer to the manual for detailed guidance on using specific functions. Proper use of the control panel enhances cooking efficiency and safety. Explore its features to maximize your microwave’s potential. Regular cleaning of the panel is recommended for optimal performance.

Cooking Modes: Grill, Combi, and Standard

Your Morphy Richards 800W microwave offers three versatile cooking modes: Grill, Combi, and Standard. The Grill mode uses high heat for browning and crisping food, perfect for meats and vegetables. Combi mode combines grill and microwave energy for even cooking and faster results. The Standard mode is ideal for reheating, defrosting, and basic cooking. Each mode is designed to cater to different culinary needs, ensuring precise control over your cooking process. Use the control panel to select the desired mode and adjust settings for optimal performance. These modes enhance flexibility, making your microwave a versatile kitchen companion for various recipes and tasks. Explore each mode to achieve professional-quality results effortlessly.

Defrosting and Reheating Guidelines

Defrosting and reheating with your Morphy Richards 800W microwave is efficient and safe when done correctly. Always cover food with a microwave-safe lid or plastic wrap to prevent splatters. Use the defrost setting, adjusting time based on food weight and type. For reheating, set power levels between 30-50% to avoid overheating. Stir food halfway through reheating for even heating. Ensure food reaches a minimum of 75°C (167°F) for safety. Let food stand for 1-2 minutes after reheating to allow heat to distribute evenly. Follow these guidelines to maintain food quality and safety, ensuring optimal results every time. Proper techniques prevent undercooked or overcooked meals. Always refer to the manual for specific time and power recommendations. This ensures consistent and safe defrosting and reheating outcomes. Regular cleaning of the microwave after use is also recommended to prevent food residue buildup. By adhering to these guidelines, you can enjoy perfectly reheated and defrosted meals with ease and convenience.

Setting Power Levels and Cooking Times

Setting power levels and cooking times on your Morphy Richards 800W microwave ensures precise cooking results. Use the control panel to adjust power levels (30%, 50%, 70%, or 100%) based on the type of food. Cooking times vary depending on the quantity and sensitivity of the food. For example, defrosting frozen vegetables may require 3-4 minutes at 30%, while reheating a cooked meal might need 1-2 minutes at 50%. Always refer to the manual for specific guidelines to avoid overcooking or undercooking. Let food stand for 1-2 minutes after cooking to allow heat to distribute evenly. Adjust settings as needed for optimal results. Follow recommended times to ensure food safety and quality. Proper power and time settings prevent overheating and promote even cooking. This ensures your dishes are cooked to perfection every time. Always monitor cooking progress for best outcomes.

Cooking and Defrosting

Cooking and defrosting with the Morphy Richards 800W microwave is efficient and straightforward. Use the defrost function for even thawing and adjust power levels for precise cooking results. Always follow recommended times and guidelines for safe and effective food preparation. Monitor progress to ensure optimal outcomes. This section provides essential tips for achieving perfect cooking and defrosting every time. Ensure food safety and quality by adhering to the manual’s instructions. Proper techniques prevent undercooking or overheating, making meal preparation effortless and reliable. Follow the guide for best results.

Basic Cooking Instructions

For basic cooking, place food in a microwave-safe container and position it centrally on the turntable. Set the desired power level using the control panel, then enter the cooking time. Press start to begin. Ensure the container is covered to retain moisture and promote even cooking. Stir or flip food halfway through if necessary. Always monitor cooking to avoid overheating. Use the provided guidelines for cooking times and power levels specific to your food type. After cooking, allow the food to stand for a few minutes to ensure even heat distribution. Follow these steps for safe and effective cooking results.

Defrosting Frozen Foods Safely

For safe defrosting, place frozen food in a microwave-safe container and position it centrally on the turntable. Use the defrost setting or adjust power levels to 30-40% to prevent overheating. Cover food with a microwave-safe lid or cling wrap to retain moisture and promote even thawing. Defrost in short intervals, checking and flipping food as needed. Avoid overheating, as this can cook the outer layers while leaving the inside frozen. After defrosting, cook the food immediately to ensure food safety. Always follow the defrosting guidelines provided in the manual for specific food types to achieve the best results.

Reheating Leftovers Effectively

Reheat leftovers safely and evenly using your Morphy Richards 800W microwave. Place food in a microwave-safe container, adding a splash of water if needed to maintain moisture. Cover with a lid or microwave-safe cling wrap to prevent drying out. Use the reheat setting or set the power level to 50-70% to avoid overheating. Heat in short intervals, checking and stirring food halfway through. Ensure food reaches a minimum of 74°C (165°F) for food safety. Let it stand for 1-2 minutes before serving to allow heat to distribute evenly; Avoid overheating, as this can alter the texture and flavor of the food.

Cleaning and Maintenance

Regularly clean the microwave to prevent food residue buildup. Wipe spills immediately with a damp cloth. Avoid harsh chemicals; use a mixture of water and vinegar for safe, effective cleaning. Ensure the turntable and accessories are washed thoroughly after use. Always unplug the microwave before deep cleaning. Check for any blockages in vents and ensure proper airflow for optimal performance. Maintenance ensures longevity and efficient operation of your Morphy Richards 800W microwave.

Regular Cleaning Tips

Regular cleaning is essential for maintaining your Morphy Richards 800W microwave’s performance and hygiene. Wipe the interior with a damp cloth after each use to prevent food residue buildup. For tougher stains, mix equal parts water and vinegar in a microwave-safe bowl, heat for 2-3 minutes, then let stand for 5 minutes before wiping clean. Clean the turntable and accessories with warm soapy water. Avoid using abrasive cleaners or metal scourers, as they may damage surfaces. Check and clean the air vents regularly to ensure proper ventilation. For exterior cleaning, use a mild detergent and a soft cloth to maintain the appliance’s appearance.

Deep Cleaning the Interior and Exterior

For a thorough deep clean, mix 1 cup of water with 1 tablespoon of white vinegar in a microwave-safe bowl. Heat on high for 3-4 minutes to create steam, loosening food residue. Let stand for 5 minutes, then wipe the interior with a soft cloth. For tough stains, apply a baking soda paste and let it sit overnight before scrubbing gently. Clean the exterior with a mild detergent and a soft cloth, avoiding harsh chemicals. Remove any stubborn splatters with a damp cloth. Regular deep cleaning ensures optimal performance, prevents odors, and maintains the appliance’s appearance. Always unplug the microwave before cleaning for safety.

Maintaining the Turntable and Accessories

Regularly clean the turntable and accessories to ensure smooth operation and hygiene. Wash the turntable and any removable parts with warm soapy water after each use. For stubborn stains, soak them in a mixture of water and mild detergent. Avoid using abrasive cleaners or scourers, as they may damage the surfaces. Dry thoroughly to prevent water spots. Check the turntable ring and roller for wear and tear; replace if damaged. Store accessories in a dry place to avoid rust or corrosion. Cleaning and maintaining these components prevents bacteria buildup and ensures even cooking performance. Always refer to the manual for specific care instructions.

Troubleshooting Common Issues

Identify and resolve common problems like the microwave not starting or uneven heating. Check power supply, ensure the turntable rotates, and verify cooking times. Consult the manual for solutions or contact customer support for persistent issues.

Identifying and Resolving Common Errors

Common issues with the Morphy Richards 800W Microwave include the appliance not turning on or uneven heating. If the microwave stops working, check the power supply and ensure the door is closed properly. For unusual noises or smells, inspect for food residue or blockages. Refer to the manual for troubleshooting guides or reset the microwave by unplugging it for 30 seconds. Clean the interior regularly to prevent malfunctions. If problems persist, contact Morphy Richards customer support for assistance. Regular maintenance and correct usage can help avoid errors and ensure optimal performance of your microwave.

What to Do if the Microwave Stops Working

If the Morphy Richards 800W Microwave stops working, first check the power supply by ensuring it is properly plugged in. Verify that the door is closed correctly and no blockages prevent it from sealing. Reset the microwave by unplugging it for 30 seconds and plugging it back in. If issues persist, inspect for food debris or obstructions inside. Clean the interior and ensure the turntable rotates smoothly. Refer to the manual for troubleshooting or contact Morphy Richards customer support for professional assistance. Regular maintenance can help prevent such issues and ensure reliable performance.

Addressing Unusual Noises or Smells

If your Morphy Richards 800W Microwave emits unusual noises or smells, start by identifying the source. A noisy turntable may need cleaning or realignment. For smells, check for food residue and clean the interior with a damp cloth and vinegar. Avoid using abrasive cleaners. Ensure the microwave is well-ventilated. If the issue persists, unplug the appliance and contact Morphy Richards customer support. Never ignore burning smells, as they could indicate a malfunction. Regular maintenance and proper usage can prevent such issues, ensuring safe and efficient operation. Always refer to the manual for guidance and address problems promptly to avoid further complications.

Accessories and Additional Features

The Morphy Richards 800W Microwave comes with a grill rack for enhanced cooking options. Explore compatible accessories like turntable rings and cleaning kits for optimal performance and convenience.

Compatible Accessories for the Microwave

The Morphy Richards 800W Microwave supports various accessories to enhance your cooking experience. A grill rack is included for optimal grilling results, while additional items like turntable rings and cleaning kits can be purchased separately. These accessories ensure efficient performance and maintain the microwave’s longevity. For compatibility, always use Morphy Richards-approved products, available on their official website or authorized retailers. Regularly check for updates or new accessories to maximize your microwave’s functionality. Properly using these accessories will help you achieve the best cooking outcomes and keep your appliance in excellent condition for years to come.

Using the Grill Rack and Other Accessories

To maximize your cooking experience with the Morphy Richards 800W Microwave, utilize the provided grill rack for even browning and crisping. Place food items on the rack, ensuring they do not overlap, and position it correctly on the turntable. Clean the rack after each use to prevent food residue buildup. Other accessories, such as microwave-safe containers and covers, can enhance cooking efficiency. Always refer to the manual for specific guidance on using these items safely. Proper use of accessories ensures optimal performance and extends the lifespan of your microwave, making your cooking process convenient and effective.

Understanding Smart Features (if applicable)

The Morphy Richards 800W Microwave may not feature advanced smart capabilities, but it is designed for simplicity and efficiency. While some modern microwaves include smart sensors or Wi-Fi connectivity, this model focuses on essential functions. However, you can still achieve excellent results by using the intuitive control panel and following the manual’s guidelines. For optimal performance, familiarize yourself with the microwave’s settings and explore the various cooking modes. If you’re looking for smart features, consider upgrading to a newer model with advanced capabilities. This section ensures you make the most of your current appliance while understanding its limitations.

FAQs and User Queries

Frequently asked questions about the Morphy Richards 800W Microwave include where to download the manual, basic usage tips, troubleshooting error messages, and contact details for customer support.

Frequently Asked Questions About the Morphy Richards 800W Microwave

Users often inquire about downloading the manual, troubleshooting common errors, and understanding specific features like the grill function. Many ask how to clean the microwave effectively and resolve issues like uneven heating or strange noises. Some seek guidance on defrosting times and power level adjustments. Additionally, queries about compatible accessories and warranty information are frequent. Others wonder about the best practices for eco-friendly usage and proper disposal. These FAQs aim to address these concerns, ensuring users can operate their microwave confidently and efficiently, while also maintaining its performance and longevity. Regular updates are provided to keep users informed about the latest features and solutions.

Addressing Common Concerns and Queries

Common concerns include unusual noises, unpleasant smells, or malfunctioning buttons. Users may also query optimal cooking times and error codes. For noises, check turntable alignment and food placement. Bad smells often result from food residue, requiring deep cleaning. Malfunctioning buttons may need resetting or professional inspection. Cooking times vary by food type and power levels. Error codes should be referenced in the manual for specific solutions. Addressing these issues promptly ensures smooth operation and extends the microwave’s lifespan. Always refer to the manual for tailored guidance and troubleshooting steps to resolve concerns effectively and maintain your appliance in peak condition for years to come.

By following this manual, you’ll ensure safe, efficient, and enjoyable use of your Morphy Richards 800W microwave. Adhere to guidelines for optimal performance and longevity, achieving superior cooking results consistently.

Final Tips for Optimal Use

For the best experience with your Morphy Richards 800W microwave, always follow the guidelines outlined in this manual. Regularly clean the interior to prevent food residue buildup and maintain hygiene. Ensure dishes are placed centrally on the turntable for even cooking. Use microwave-safe containers to avoid damage or hazards. When defrosting, refer to the defrosting chart for accurate times. Adjust power levels according to the type of food to achieve perfect results. Avoid overheating liquids, as they can burst unexpectedly. By adhering to these tips, you’ll maximize efficiency, safety, and the lifespan of your microwave.

Importance of Following the Manual

Adhering to the Morphy Richards 800W microwave manual ensures safe and efficient operation. It provides essential guidelines for installation, usage, and maintenance, helping to prevent accidents and extend the appliance’s lifespan. By following the manual, you can avoid potential hazards, such as improper installation or incorrect cooking practices. It also helps you understand the microwave’s features and optimize cooking results. Proper usage as per the manual safeguards your warranty and ensures customer support availability. Regular maintenance tips in the manual keep your microwave in top condition, ensuring reliability and performance over time. Always refer to the manual for troubleshooting and error resolution.

Warranty and Customer Support Information

Your Morphy Richards 800W microwave comes with a comprehensive warranty, ensuring protection against defects and malfunctions. Refer to the manual for specific warranty details and terms. For any inquiries or issues, Morphy Richards offers dedicated customer support. Contact their team via phone, email, or through the official website for assistance. The manual also provides troubleshooting tips to resolve common problems independently. Remember to register your product to activate warranty benefits and access exclusive support services. Always follow the manual’s guidelines to ensure warranty validity and receive timely help when needed. Utilize these resources to maximize your microwave’s performance and lifespan.

Energy Efficiency and Environmental Considerations

The Morphy Richards 800W microwave is designed with energy efficiency in mind, optimizing power consumption while maintaining performance. Follow eco-friendly practices, such as using the defrost function wisely and recycling packaging responsibly.

Energy Consumption and Efficiency

The Morphy Richards 800W microwave is designed to balance performance with energy efficiency. It operates at 800 watts, ensuring optimal cooking results while managing power consumption. By using the defrost function and shorter cooking times, users can reduce energy usage. The microwave’s energy-efficient design minimizes standby power consumption, making it an eco-friendly choice for daily use. Regular cleaning and proper maintenance also contribute to maintaining its efficiency. Always follow the guidelines for power levels and cooking times to maximize energy savings and extend the appliance’s lifespan. Eco-friendly practices, such as recycling packaging and responsible disposal, further support environmental sustainability.

Eco-Friendly Practices for Microwave Use

Adopting eco-friendly practices with your Morphy Richards 800W microwave enhances sustainability. Use microwave-safe containers to reduce plastic waste and avoid overheating, which saves energy. Defrost food properly to minimize cooking time and energy use. Opt for shorter cooking cycles and lower power levels when possible. Regularly clean the microwave to maintain efficiency and avoid prolonged heating due to food residue. Recycle packaging materials and ensure responsible disposal of the appliance at the end of its lifecycle. By following these practices, you contribute to reducing environmental impact while enjoying efficient and safe microwave usage.

Proper Disposal of the Microwave

Proper disposal of your Morphy Richards 800W microwave is crucial for environmental safety. When the appliance reaches the end of its lifecycle, ensure it is disposed of responsibly. Check local regulations for electronic waste disposal options, as microwaves contain materials that require specialized recycling. Remove any accessories and packaging before disposal. Many communities offer e-waste collection programs or recycling centers that accept microwaves. Avoid landfill disposal to prevent potential harm to the environment. By recycling your microwave, you contribute to sustainable practices and help conserve natural resources. Always follow local guidelines for safe and eco-friendly disposal.

streets of rage 4 trophy guide

Embark on a comprehensive journey to unlock all trophies in Streets of Rage 4. Discover strategies for combat‚ level-specific achievements‚ and tips for co-op play. Master special moves‚ defeat bosses flawlessly‚ and explore hidden secrets to earn the elusive Platinum trophy. This guide provides step-by-step walkthroughs and expert advice to help you conquer every challenge the game offers.

Streets of Rage 4 offers a diverse and rewarding trophy system‚ catering to both casual players and completionists. From combat mastery to level-specific achievements‚ the game provides a variety of challenges to test your skills. Trophies range from breaking objects like wine bottles or cars to defeating bosses without taking damage. Some achievements‚ such as “Maniac” or “Perfect‚” are notoriously difficult‚ requiring precise gameplay and strategy. The trophy list also includes character-specific accomplishments‚ encouraging players to explore different playstyles. Whether you’re aiming for the prestigious Platinum trophy or simply enjoying the game‚ this guide will help you navigate the trophy system and unlock everything Streets of Rage 4 has to offer.

Overview of Trophy Distribution

Streets of Rage 4 features a well-rounded trophy system‚ with achievements distributed across various categories. Many trophies are tied to specific actions‚ such as breaking objects like cars or wine bottles‚ while others reward combat mastery‚ like defeating bosses without taking damage. Some trophies‚ such as “Dude‚ My Car!” and “Wasted Wine‚” are relatively easy to unlock‚ falling under the Common category. However‚ others‚ like “Maniac” or “Perfect‚” are significantly harder‚ classified as Rare or Very Rare. The trophy list encourages exploration of different characters and playstyles‚ with some achievements specific to certain fighters. Overall‚ the distribution balances accessibility for casual players with challenging goals for completionists aiming for the Platinum trophy.

Preparation for Trophy Hunting

Before diving into trophy hunting in Streets of Rage 4‚ it’s essential to understand the game mechanics and trophy requirements; Familiarize yourself with character abilities and level layouts to optimize your progress. For challenging trophies like “Maniac” or “Perfect‚” practice combos and boss battles in lower difficulty modes. Utilize a second controller for co-op achievements‚ as some trophies require two players. Adjusting game settings‚ such as difficulty or timers‚ can also aid in specific trophy unlocks; Lastly‚ consult guides or online resources to avoid missing hidden achievements and ensure a smooth journey toward completing the trophy list.

Platinum Trophy: Streets of Rage 4

Earn the ultimate Platinum Trophy by mastering Streets of Rage 4. Unlock all trophies‚ showcasing skill in combat‚ level completion‚ and secret achievements. A true challenge awaits!

Understanding the Platinum Trophy Requirements

To unlock the Platinum Trophy in Streets of Rage 4‚ you must earn all other trophies in the game. This includes completing levels‚ mastering combat techniques‚ and conquering challenges in both single-player and co-op modes. The Platinum Trophy requires dedication‚ as it involves defeating bosses without taking damage‚ breaking objects in specific levels‚ and achieving high scores. Some trophies‚ like “Maniac” and “Perfect‚” are particularly challenging and demand precise gameplay. Additionally‚ completing Survival Mode and unlocking all character-specific achievements are essential. Patience and skill are key‚ as this trophy represents the ultimate test of your mastery over the game.

Step-by-Step Guide to Earning the Platinum

Earning the Platinum Trophy in Streets of Rage 4 requires a systematic approach. Start by completing the story mode with all playable characters‚ ensuring you unlock character-specific trophies. Next‚ focus on combat-related achievements by mastering special moves and defeating bosses without taking damage. Use weapons effectively and break objects in every level to secure additional trophies. Tackle the challenging “Maniac” and “Perfect” trophies by spamming special moves with a second controller. Finally‚ complete Survival Mode with all characters and achieve high scores. Each step requires patience‚ skill‚ and repetition. By following this guide‚ you’ll efficiently unlock all trophies and claim the coveted Platinum Trophy.

Secret Trophies in Streets of Rage 4

Discover hidden achievements tied to specific actions‚ like breaking objects or using unique moves. Trophies such as “Dude‚ My Car!” and “Wasted Wine” await eagle-eyed players.

Identifying Hidden Trophies

Hidden trophies in Streets of Rage 4 add an extra layer of challenge and fun. These secret achievements often require specific actions or discoveries‚ such as breaking objects‚ defeating bosses without taking damage‚ or using certain weapons effectively. Some trophies‚ like “Maniac” or “100 Yen‚” are notoriously difficult and involve mastering special moves or completing levels under strict conditions. Others‚ such as “Perfect‚” demand flawless gameplay in specific scenarios. Keep an eye out for subtle hints in levels or unusual interactions with enemies and objects. Experimenting with different characters and strategies can also reveal these hidden gems. Stay persistent‚ as some trophies may require multiple attempts to unlock.

How to Unlock Secret Trophies

To unlock secret trophies in Streets of Rage 4‚ focus on specific in-game actions and Easter eggs. For instance‚ breaking a wine bottle or damaging a car in certain levels triggers unique achievements. Utilizing special moves with weapons‚ like performing a super attack with a weapon‚ can also unlock hidden trophies. Additionally‚ achieving a perfect run without taking damage in specific stages or defeating bosses quickly can reveal secret rewards. Experiment with different characters and strategies‚ as some trophies are tied to particular playstyles. Persistence and creativity are key‚ as these trophies often require precise timing and unconventional approaches. Keep exploring and testing new techniques to uncover all the hidden achievements the game has to offer.

Character-Specific Trophies

Earn unique trophies for each character by mastering their abilities. Complete specific challenges and achievements tied to their playstyles. From Axel’s stage clears to Mr. X’s dominance‚ unlock rewards that highlight their strengths.

Trophies for Playing as Axel

Earning trophies as Axel in Streets of Rage 4 requires mastering his unique abilities and completing specific challenges. Clear all stages in single-player mode as Axel to unlock the dedicated trophy. Utilize his powerful special moves‚ such as the Dragon Smash‚ to defeat enemies efficiently. Achieve a perfect run in Arcade mode without taking damage to showcase your skills. Additionally‚ focus on breaking objects and defeating bosses flawlessly to earn additional recognition. Practice his combo sequences and timing to dominate levels and bosses‚ ensuring a smooth path to unlocking all Axel-related trophies. This character-specific focus will test your mastery of Axel’s gameplay style and contribute to your overall trophy collection.

Trophies for Playing as Blaze

Unlocking trophies as Blaze in Streets of Rage 4 requires showcasing her agility and combat prowess. Complete all stages in single-player mode as Blaze to earn her specific trophy. Master her fast-paced moveset‚ including her spinning attacks and grappling skills‚ to dominate enemies. Achieve a perfect run in Arcade mode without taking damage to highlight your mastery. Additionally‚ focus on defeating bosses flawlessly and breaking objects efficiently to secure additional trophies. Blaze’s trophies reward precision‚ speed‚ and strategic combat‚ making her a fun yet challenging character to play. Ensure to practice her combo sequences and special moves to excel in every level and boss encounter.

Trophies for Playing as Adam

Earning trophies as Adam in Streets of Rage 4 focuses on his powerful combat style and strategic gameplay. Complete all stages in single-player mode as Adam to secure his base trophy. Utilize his strength-based attacks and defensive moves to defeat bosses without taking damage‚ a key requirement for one of his trophies. Break objects efficiently in levels to unlock another achievement. Adam’s trophies emphasize brute force and tactical combat‚ making him a rewarding character to master. Practice his special moves and combo sequences to excel in every level and boss encounter‚ ensuring you maximize his potential for trophy success.

Trophies for Playing as Skate

Skate’s trophies in Streets of Rage 4 highlight his agility and unique combat style. Complete all stages as Skate in single-player mode to unlock his primary achievement. Utilize his speed and sliding attacks to defeat bosses flawlessly‚ a requirement for one of his trophies. Break objects efficiently in levels to earn another trophy. Skate’s trophies reward quick reflexes and precise combat‚ making him a fun character to play. Master his special moves and combination attacks to excel in every level and boss fight‚ ensuring you unlock all his achievements with ease.

Trophies for Playing as Zan

Zan is a unique character with distinct abilities that can help unlock specific trophies. To earn trophies as Zan‚ focus on her agility and special moves. Defeat enemies quickly using her rapid combos and aerial attacks to unlock achievements like “Swift Victory.” Master her cyclone kick to take down multiple foes at once‚ which is key for the “Whirlwind Warrior” trophy. Complete levels without taking damage to earn the “Untouchable Zan” achievement. Additionally‚ use her grappling hook strategically to defeat bosses without getting hit‚ contributing to the “Perfect Fighter” trophy. Experiment with her moveset in co-op mode to unlock shared achievements and maximize your trophy collection with Zan.

Trophies for Playing as Shiva

Shiva is a powerful and versatile character in Streets of Rage 4‚ with trophies centered around his combat prowess and unique abilities. To unlock the “Kusanagi” trophy‚ defeat a boss without taking any damage‚ showcasing Shiva’s defensive skills. The “Rising Dragon” trophy requires performing a 20-hit combo‚ highlighting his offensive capabilities. Utilize Shiva’s special moves‚ such as his fireball and uppercut‚ to rack up high scores and unlock the “Flaming Fist” achievement. Additionally‚ complete a level using only special moves to earn the “Master of Martial Arts” trophy. Shiva’s playstyle rewards precision and aggression‚ making him a fun and challenging character to trophy hunt with.

Trophies for Playing as Mr. X

Mr. X‚ the iconic antagonist‚ offers unique trophy opportunities in Streets of Rage 4. The “Final Showdown” trophy is unlocked by defeating all bosses in a single playthrough without continuing. Utilize Mr. X’s powerful grabs and throws to earn the “Brawler Supreme” trophy by defeating 50 enemies with throw attacks. Completing a level without using any weapons rewards the “Unarmed and Dangerous” achievement. Additionally‚ achieving an S-Rank in any stage as Mr. X unlocks the “Dictator of the Streets” trophy‚ showcasing his dominance. Mastering Mr. X’s techniques and playstyle is key to securing these exclusive trophies and enhancing your overall game experience.

Level-Specific Trophies

Earn trophies by completing stages like “The Streets” or “The Factory” without continues. Break objects‚ such as cars or wine bottles‚ to unlock specific achievements.

Trophies for Completing Specific Levels

Earning trophies for completing specific levels in Streets of Rage 4 requires mastering each stage’s unique challenges. For example‚ the “Dude‚ My Car!” trophy is unlocked by breaking a car in The Streets‚ while “Wasted Wine” is achieved by shattering a wine bottle. These trophies often involve specific actions within levels‚ such as defeating bosses without taking damage or finding hidden objects. Completing levels on higher difficulties‚ like Hard or Mania‚ can also grant exclusive trophies. Additionally‚ some trophies are tied to completing levels with certain characters or using specific combat styles. Be sure to explore every nook and cranny‚ as some trophies are hidden behind optional challenges or secret paths.

Trophies for Breaking Objects in Levels

Earning trophies for breaking objects in Streets of Rage 4 adds an extra layer of fun to exploration. Trophies like “Dude‚ My Car!” and “Wasted Wine” reward players for smashing specific objects like cars and wine bottles. To unlock these‚ focus on thoroughly exploring each level and interacting with destructible items. Some trophies require breaking a set number of objects‚ such as 100 objects across the game. Use special moves or weapons to break multiple objects at once‚ saving time. These trophies encourage meticulous gameplay and attention to detail‚ making the experience even more rewarding for completionists aiming to unlock every achievement.

Combat-Specific Trophies

Earn trophies by mastering combat skills‚ such as landing combos‚ using special moves‚ and defeating bosses without taking damage. Perfect your fighting techniques to unlock these achievements.

Trophies for Special Moves and Combos

Mastering special moves and combos is essential for unlocking several trophies in Streets of Rage 4. Perform a variety of combos to earn achievements like “Combo Master” and “Perfect.” Use special moves effectively to defeat enemies without taking damage‚ which is crucial for trophies like “Untouchable.” Practice button inputs to chain attacks seamlessly and maximize your score. Experiment with different characters‚ as each has unique special moves and combo potentials. For example‚ Axel’s spinning kick and Blaze’s uppercut can lead to devastating combo chains. Timing and precision are key to unlocking these achievements. Additionally‚ using weapons in combos can enhance your progress toward certain trophies‚ such as “Weapon Master.”

Trophies for Defeating Bosses Without Taking Damage

Earning trophies for defeating bosses without taking damage requires precision and mastery of enemy patterns. Focus on learning each boss’s attack sequences and exploit their weaknesses. Use special moves strategically to maintain distance and avoid damage. For example‚ Axel’s uppercut can interrupt aerial attacks‚ while Blaze’s spinning kick excels at close-range defense. Practice boss fights repeatedly to perfect your timing and reflexes. Utilize continues wisely to retry challenging encounters without penalty. Trophies like “Untouchable” and “Flawless Victory” reward your skill and patience. Stay calm‚ stay focused‚ and you’ll conquer even the toughest bosses unscathed.

Trophies for Using Weapons Effectively

Mastering weapon usage is key to unlocking trophies like “Armed and Dangerous” and “Weapon Mastery.” Equip weapons such as swords‚ pipes‚ or bats to inflict maximum damage. Throw weapons at enemies entering the screen for an instant knockout. For trophies requiring specific weapon kills‚ focus on using each weapon type strategically. For example‚ the sword’s long range and pipe’s sweeping attacks are ideal for crowd control. Experiment with weapon pickups in levels to discover their unique abilities. Some trophies reward creative use of weapons‚ like killing multiple enemies with one thrown item. Practice timing and positioning to maximize weapon efficiency and unlock these challenging achievements.

DLC Trophies: Mr. X Nightmare

The Mr. X Nightmare DLC introduces challenging trophies like “Maniac” and “Perfect‚” requiring precise strategies. Use a second controller for certain achievements and master difficult combat scenarios to earn the elusive Platinum.

Overview of DLC Trophies

The Mr. X Nightmare DLC introduces a fresh set of challenging trophies to Streets of Rage 4‚ adding depth to the game’s achievement system. These trophies focus on mastering new combat mechanics‚ surviving intense waves in Survival Mode‚ and showcasing exceptional skill with DLC-exclusive characters. Some trophies require precise execution‚ such as defeating bosses without taking damage or achieving high scores in specific modes. The DLC also includes hidden trophies tied to secret boss battles and unique gameplay scenarios. Earning these trophies demands a high level of proficiency and dedication‚ making them a rewarding addition for completionists aiming to enhance their trophy collection and showcase their mastery of the game.

How to Unlock the Hardest DLC Trophies

To unlock the hardest DLC trophies in Streets of Rage 4‚ focus on mastering Survival Mode and perfecting boss battles. For the “Maniac” trophy‚ defeat bosses without taking damage‚ requiring precise timing and patterns memorization. The “Perfect” trophy demands flawless execution‚ so use a second controller to spam special moves and drain your own health. For “100 Yen‚” grind Survival Mode with every character‚ leveraging their unique abilities to maximize scores. Utilize weapons effectively and break objects to gain extra points. Practice consistently‚ as these trophies test your skills and patience‚ ensuring only the most dedicated players achieve them and complete their trophy collection.

Survival Mode Trophies

Survival Mode in Streets of Rage 4 tests endurance and strategy. Progress through waves‚ unlock exclusive trophies‚ and master character abilities. Each trophy rewards skill and persistence.

Understanding Survival Mode Requirements

Survival Mode in Streets of Rage 4 demands skill and persistence‚ requiring players to endure waves of enemies while managing limited health. To unlock trophies‚ mastery of character movesets and strategic use of special attacks are essential. Each character must survive multiple runs‚ with the hardest trophy needing completion with the entire roster. This mode tests endurance‚ timing‚ and adaptability‚ making it the most time-consuming challenge in the game. Players must exploit enemy patterns and optimize weapon usage to succeed. With dedication and practice‚ the rewards for Survival Mode trophies become achievable‚ offering a sense of accomplishment for dedicated players.

Strategies for Earning Survival Mode Trophies

To excel in Survival Mode‚ master your character’s moveset and exploit enemy patterns. Special attacks and weapon usage are crucial for conserving health. For the Perfect trophy‚ use a second controller to spam specials‚ ensuring no damage taken. Optimize weapon picks to maximize enemy takedowns. Stay mobile‚ avoiding unnecessary risks‚ and focus on high-damage combos. Each character requires multiple runs to unlock their Survival trophies. Practice timing and positioning to minimize damage. Higher waves demand precision and patience. With consistent play and strategy‚ you’ll conquer Survival Mode and earn its challenging trophies‚ showcasing your mastery of Streets of Rage 4’s toughest mode.

Co-op Trophies

Co-op trophies reward teamwork and synchronization in Streets of Rage 4. Pair up with a friend to revive partners‚ execute joint specials‚ and conquer challenges together seamlessly.

Trophies for Co-op Play

Co-op trophies in Streets of Rage 4 celebrate teamwork and synchronized gameplay. Earn trophies like “Perfect” by defeating bosses with a second player without taking damage. Use a second controller to spam special moves and unlock achievements quickly. Team up locally or online to tackle challenging levels and boss fights together. Communication and coordination are key to achieving co-op-specific milestones. Some trophies require precise timing and strategy‚ making co-op play a fun and rewarding experience. Explore the game’s cooperative features to unlock all co-op trophies and enhance your Streets of Rage 4 journey with a friend.

How to Earn Co-op Trophies with a Second Player

Earning co-op trophies in Streets of Rage 4 requires a second player and strategic teamwork. Use two controllers to spam special moves‚ making trophy unlocks easier. For the “Perfect” trophy‚ defeat bosses without taking damage by coordinating attacks. Local co-op is ideal for synchronized play‚ but online co-op also works seamlessly. Communicate with your partner to execute precise moves and overcome challenges. Some trophies‚ like defeating bosses flawlessly‚ demand perfect timing and teamwork. Utilize weapons and special abilities together to maximize efficiency. By working together‚ you can unlock all co-op trophies and enjoy the game’s multiplayer features to their fullest potential.

Celebrate your journey through Streets of Rage 4 by mastering every challenge and unlocking all trophies. Savor the satisfaction of your accomplishments and the skills you’ve honed.

Final Tips for Completing the Trophy List

Persistence and practice are key to unlocking every trophy in Streets of Rage 4. Focus on mastering combat mechanics and special moves to tackle challenging achievements. For co-op trophies‚ using a second controller can simplify the process. Prioritize completing levels without taking damage and breaking all objects for hidden rewards. The “Maniac” and “100 Yen” trophies are particularly tough‚ so plan multiple playthroughs. Stay patient and determined‚ celebrating each milestone along the way. With dedication and strategic gameplay‚ you’ll conquer the entire trophy list and earn the prestigious Platinum trophy.

Celebrating Your Trophy Collection

Celebrating your trophy collection is a rewarding way to acknowledge your dedication and skill in Streets of Rage 4. Share your achievements online‚ showcasing your progress to friends and the gaming community. The Platinum trophy is the ultimate badge of honor‚ symbolizing mastery of the game. Take pride in your trophy cabinet‚ especially for challenging achievements like “Maniac” or “Perfect.” Reflect on the journey‚ from defeating bosses flawlessly to mastering survival mode. Each trophy earned is a testament to your perseverance and skill. Embrace the satisfaction of completing the list and enjoy the prestige that comes with it. Congratulations on your gaming triumph!

ge advantium 120 microwave manual

The GE Advantium 120 is a high-tech microwave oven offering SpeedCook, convection, and microwave modes for faster, versatile cooking. Designed for modern kitchens, it combines advanced features with ease of use, making it a superior choice for home cooking.

1.1 Overview of the Appliance

The GE Advantium 120 is a wall oven designed for versatility and efficiency, combining SpeedCook, convection, and microwave cooking modes. It offers advanced features like precision temperature control and high-intensity halogen lighting for even cooking. Available in 27 or 30 inches, it fits seamlessly into modern kitchens. The appliance is part of the GE Profile series, known for its innovative technology and sleek design. With 120-volt or 240-volt configurations, it adapts to various installation needs. Perfect for home cooks seeking faster, high-quality results, the Advantium 120 is a superior choice for modern culinary needs.

1.2 Key Features and Benefits

The GE Advantium 120 boasts SpeedCook technology for up to four times faster cooking. It offers convection baking, broiling, toasting, warming, proofing, and microwaving in one unit. The oven features a digital control panel, precision sensors, and high-intensity halogen lamps for even cooking. With 975 watts of microwave power, it ensures efficient food preparation. Its compact design saves space while providing versatile functionality. The Advantium 120 is energy-efficient and compatible with other GE appliances, making it a practical and powerful addition to any kitchen. Its advanced features enhance cooking convenience and results.

Safety Precautions and Instructions

Always use microwave-safe cookware and avoid metal utensils. Keep the glass tray in place during cooking. Ensure the door closes properly to prevent leaks. Follow installation guidelines to avoid hazards. Regularly clean the oven to maintain performance and safety. Refer to the manual for specific precautions to ensure safe operation.

2.1 General Safety Guidelines

Always follow safety guidelines to ensure safe operation. Use only microwave-safe cookware and avoid metal utensils, as they can cause sparks. Keep the glass tray in place during cooking to prevent food splatter. Never leave the oven unattended while in use. Ensure the door closes properly to maintain microwave energy containment. Avoid storing items on top of the oven; Follow installation instructions carefully to prevent hazards. Regular cleaning is essential to maintain performance and safety. Refer to the manual for detailed precautions to avoid accidents and ensure optimal functionality;

2.2 Microwave-Safe Cookware and Utensils

Only use microwave-safe cookware and utensils to avoid sparks or fires. Glass, ceramic, and plastic containers labeled “microwave-safe” are recommended. Metal cookware, twist-ties, and aluminum foil can cause arcing and should be avoided. Always test utensils by heating them in the microwave for one minute; if they become hot, they may not be safe. Avoid using damaged or chipped dishes, as they can shatter. For SpeedCook mode, use cookware provided with the oven or ensure compatibility. Never use metal accessories like poultry pins.

2.3 Avoiding Common Hazards

To ensure safe operation, avoid using metal cookware or utensils, as they can cause sparks or arcing. Never microwave eggs in their shells or sealed containers, as they may explode. Keep flammable materials like towels or curtains away from the oven. Avoid overheating foods, especially oils or fats, which can ignite. Clean spills immediately to prevent smoke or odors. Always supervise children when the oven is in use. Never leave cooking unattended, especially when using high-power modes like SpeedCook. Keep the oven exterior clear of obstructions to prevent overheating.

Installation Requirements

Ensure the location is well-ventilated and meets electrical requirements (240V, 60Hz). Follow GE guidelines for proper installation, including adherence to local codes and safety standards.

3.1 Pre-Installation Checklist

Before installing your GE Advantium 120, ensure you have a suitable location with adequate ventilation and proper electrical connections (240V, 60Hz). Check that the area is level and clear of obstructions. Verify that all necessary tools and materials, such as mounting hardware and power supply, are available. Review local building codes and manufacturer guidelines for compliance. Ensure the installation site is accessible and safe to avoid any potential hazards during the process; Proper preparation is key for a successful installation;

3.2 Step-by-Step Installation Guide

Begin by preparing the installation site, ensuring it is level and clear of debris. Carefully unpack the appliance and all accessories, verifying no damage. Connect the electrical supply according to the manual, ensuring the power is off during installation. Mount the provided hardware to the surrounding cabinetry or wall for stability. Gently lift and secure the Advantium 120 into place, aligning it with the mounting hardware. Tighten all screws firmly but avoid over-tightening. Double-check all connections and ensure the appliance is level. Finally, test the unit to ensure proper operation. Always follow safety guidelines and manufacturer instructions.

3.3 Compatibility with Other GE Appliances

The GE Advantium 120 is designed to integrate seamlessly with other GE appliances, enhancing kitchen functionality. It can be installed alongside GE Monogram products, such as warming drawers or cooktops, to create a cohesive cooking system. Ensure compatibility by following the installation instructions for each product, as specific configurations may require additional hardware. This integration allows for a streamlined and efficient kitchen setup, maximizing space and performance while maintaining a unified design aesthetic with other GE appliances. Always refer to the installation manual for precise compatibility details.

Operating the GE Advantium 120

The Advantium 120 combines SpeedCook, convection, and microwave modes, offering precise control via its intuitive control panel. Its advanced sensors ensure optimal cooking results with minimal effort.

4.1 Control Panel Overview

The GE Advantium 120 features a user-friendly control panel with an LCD display, providing clear navigation for various cooking modes. It includes touch-sensitive buttons for SpeedCook, convection, and microwave functions; The panel also offers a clock, timer, and child safety lock for added convenience. Intuitive controls allow easy adjustment of cooking time, power levels, and temperature settings. The interface ensures seamless operation, guiding users through sensor-activated cooking and custom settings. This design enhances usability, making it simple to explore the oven’s advanced capabilities effectively.

4.2 Cooking Modes: SpeedCook, Convection, and Microwave

The GE Advantium 120 offers three versatile cooking modes: SpeedCook, Convection, and Microwave. SpeedCook combines halogen lighting and convection heating for up to 4x faster cooking. Convection mode uses circulating air for even baking and roasting. Microwave mode provides 975 watts of power for quick reheating and defrosting. Each mode is tailored for specific cooking needs, ensuring efficient and precise results. This trio of functions makes the Advantium 120 a versatile addition to any kitchen, capable of handling a wide range of recipes with ease.

4.3 Setting Up the Clock and Timer

Setting the clock on the GE Advantium 120 is straightforward using the control panel. Press the Clock button and use the number pads to input the time. The timer function allows you to set cooking durations, with a beep indicating completion. The clock display remains visible during operation, ensuring you stay informed. Always follow the manual’s instructions for proper setup and usage of these features to ensure optimal performance and accuracy in your cooking tasks.

Cooking Modes and Functions

The GE Advantium 120 offers SpeedCook, Convection, and Microwave modes, combining advanced technologies for versatile cooking. It also features toasting, broiling, and proofing functions, enhancing culinary versatility.

5.1 SpeedCook Technology Explained

SpeedCook technology in the GE Advantium 120 combines halogen light, ceramic heating, and convection cooking for faster cooking times. It delivers high-intensity heat, reducing cooking time up to 50%. The upper halogen lamps provide direct heat, while convection ensures even cooking. This mode is ideal for roasting, broiling, and toasting, offering precise results. It allows for crispy textures and caramelized flavors, typically achieved in conventional ovens, but much quicker. This innovative feature makes it a versatile option for various cooking needs, enhancing both speed and quality.

5.2 Convection Cooking Guidelines

Convection cooking in the GE Advantium 120 uses circulating hot air for even heating, ideal for baking, broiling, and toasting. Always use microwave-safe cookware and ensure it’s placed correctly for optimal air circulation. Preheating is recommended for best results. Avoid using metal utensils or twist-ties, as they can cause sparks. For even browning, rotate dishes halfway through cooking. The convection mode is perfect for achieving crispy textures and roasted flavors quickly. Follow the guidelines in the manual to maximize efficiency and ensure safe operation.

5.3 Precision Cooking and Sensor Functions

The GE Advantium 120 features advanced sensor technology for precision cooking. Sensors detect moisture levels and automatically adjust cooking time and power to prevent overcooking. This ensures perfectly cooked dishes every time. The sensor functions are particularly useful for delicate foods like fish or vegetables. Always use microwave-safe cookware to allow sensors to function accurately. For optimal results, follow the manual’s guidelines for sensor cooking. This feature enhances convenience and reduces the need for constant monitoring, delivering consistent and professional-quality outcomes.

Maintenance and Cleaning

Regular cleaning is essential for optimal performance. Wipe the interior with water and mild detergent, avoiding abrasive cleaners. Clean the glass tray and exterior regularly. Always unplug before cleaning for safety. Use a damp cloth for the control panel. For tough spills, mix baking soda and water, let sit, then wipe clean. Never use metal scourers or harsh chemicals, as they may damage surfaces. Refer to the manual for deep cleaning tips and maintaining your appliance’s longevity.

6.1 Daily Cleaning Tips

Regular daily cleaning ensures your GE Advantium 120 operates efficiently and maintains hygiene. After each use, wipe the interior with a damp cloth to remove food residue. For tougher spills, mix baking soda and water, apply to the area, and let it sit before wiping clean. Clean the glass tray and exterior with mild detergent and a soft cloth. Avoid using abrasive cleaners or metal scourers, as they may damage surfaces. Always unplug the appliance before cleaning for safety. Refer to the manual for detailed cleaning instructions and tips to keep your microwave in prime condition.

6;2 Deep Cleaning the Interior and Exterior

For deep cleaning, mix equal parts water and white vinegar in a microwave-safe bowl. Heat on high for 2-3 minutes to create steam, loosening food residue. Wipe the interior with a soft cloth or sponge, paying attention to corners and the ceiling. For the exterior, use a damp microfiber cloth with mild detergent. Avoid harsh chemicals or abrasive cleaners, as they may damage surfaces. Regular deep cleaning prevents grease buildup and keeps your GE Advantium 120 looking like new. Always unplug the appliance before deep cleaning for safety.

6.3 Replacing Parts and Filters

Regularly replace the charcoal filter every 6-12 months or when odor retention is noticeable. Grease filters should be cleaned monthly and replaced every 6 months. To replace parts, ensure the appliance is unplugged. For filters, remove the old ones according to the manual and install new ones securely. For other components, refer to the GE Advantium 120 parts diagram. Always use genuine GE replacement parts for optimal performance and safety. Visit the official GE website or authorized dealers for purchase. Replace any damaged or worn-out parts promptly to maintain efficiency and prevent malfunctions.

Troubleshooting Common Issues

Consult the error code list in the manual for specific solutions. Check door alignment and clips if the oven won’t turn off. Reset the appliance by unplugging it for 30 seconds to resolve power issues. Ensure proper ventilation and clean filters to avoid overheating. Refer to the troubleshooting guide for detailed diagnoses and repair steps to restore functionality quickly and safely.

7.1 Error Codes and Solutions

The GE Advantium 120 displays error codes like E13, E14, and E21 to indicate specific issues. E13 typically points to a door alignment or sensor problem, requiring door adjustment or sensor cleaning. E14 suggests a keypad malfunction, which may need replacing. E21 indicates a faulty moisture sensor, needing professional repair. Always unplug the appliance before attempting repairs. Resetting the microwave by unplugging it for 30 seconds can often resolve temporary glitches. Refer to the manual for detailed solutions and ensure proper maintenance to prevent recurring issues. Regular cleaning of interior sensors and vents is essential for optimal performance.

7.2 Resolving Door and Locking Mechanism Problems

If the door on your GE Advantium 120 doesn’t close properly or the locking mechanism fails, ensure the door alignment is correct and clean the latch area. Broken plastic clips on the door can prevent proper engagement; inspect and replace them if damaged. For persistent issues, check for obstructions or food residue around the latch. If the door won’t lock, reset the microwave by unplugging it for 30 seconds. If problems persist, contact GE customer support for professional assistance. Regular cleaning and inspection can prevent such issues from arising.

7.3 Fixing Power and Heating Issues

If the GE Advantium 120 isn’t turning on or heating, first check the power supply. Ensure the microwave is properly plugged in and the outlet is functioning. Reset the unit by unplugging it for 30 seconds. If heating issues persist, inspect the magnetron or high-voltage capacitor for damage. Ensure all internal components are clean and free of blockages. If the issue remains unresolved, contact GE customer support for professional assistance, as advanced repairs may require specialized tools and expertise. Regular maintenance can help prevent such issues from occurring.

Technical Specifications

The GE Advantium 120 operates at 120 volts, delivering 975 watts of microwave power. It features a 1.2 cubic-foot capacity, with dimensions suitable for standard kitchen installations, ensuring compatibility and efficiency in modern cooking setups.

8.1 Power Requirements and Voltage

The GE Advantium 120 requires a 120-volt electrical supply, ensuring efficient operation without excessive power consumption. It delivers 975 watts of microwave power, providing quick and even cooking results. The appliance is designed to function optimally within standard household voltage parameters, making it suitable for most kitchen setups. Proper installation according to the voltage requirements is essential for safety and performance. Always refer to the user manual for specific electrical connections and guidelines to ensure reliable operation.

8.2 Dimensions and Weight

The GE Advantium 120 microwave oven is available in 27-inch or 30-inch widths, fitting seamlessly into standard kitchen layouts. Weighing approximately 60-80 pounds, it is designed for wall installation, ensuring a balanced and secure fit. The compact design allows for efficient use of space while maintaining functionality. Exact dimensions and weight may vary slightly depending on the model, so always refer to the user manual for precise measurements before installation to ensure compatibility with your kitchen setup.

8.3 Warranty and Support Information

The GE Advantium 120 microwave oven is backed by a limited one-year warranty covering parts and labor. Additional extended warranty options are available for purchase. GE Appliances offers dedicated customer support, accessible through their official website or by phone. Owners can also access online resources, including user manuals, troubleshooting guides, and FAQs. For specific inquiries, registering your product ensures personalized assistance; Always refer to the user manual for detailed warranty terms and conditions, as coverage may vary depending on the model and region.

Cooking Tips and Recipes

Discover the full potential of your GE Advantium 120 with expert tips and recipes. Optimize SpeedCook technology for faster, delicious meals. Explore convection and microwave-specific dishes, ensuring perfect results every time.

9.1 Optimizing SpeedCook Technology

Maximize the GE Advantium 120’s SpeedCook feature by using the glass tray for even cooking. Avoid metal cookware to ensure optimal performance. Preheat the oven briefly before adding food for crisp results. Use the sensor cooking function to automatically adjust times. For delicate dishes, combine SpeedCook with convection for precise results. Always refer to the manual for specific guidelines to achieve the best outcomes. Regularly clean the interior to maintain efficiency and prevent food residue buildup. Experiment with recipes to fully utilize the SpeedCook technology’s potential.

9.2 Best Practices for Microwave Cooking

For optimal results, use microwave-safe cookware and avoid metal utensils or twist-ties. Always place the glass tray inside the oven during cooking. Cover foods to prevent splattering and promote even heating. Stir or rotate dishes halfway through cooking for consistent results. Avoid overheating liquids to prevent boiling over. Test microwave-safe dishes by heating them for one minute—look for warmth without cracks. Follow recommended power levels and times to ensure food safety and quality. Regular cleaning prevents food residue buildup, maintaining efficiency.

9.3 Adapting Recipes for the Advantium 120

When adapting recipes for the Advantium 120, consider its unique SpeedCook technology and multiple cooking modes. Reduce traditional cooking times by up to 75% due to its high-intensity halogen lights and convection heating. Use microwave-safe dishes and avoid metal cookware unless specified. Adjust power levels and cooking times based on food type and quantity. Test dishes for doneness to ensure optimal results. The oven’s precision cooking sensors also help adapt recipes automatically, ensuring even browning and cooking. This versatility makes it ideal for a wide range of culinary creations.

User Manual and Additional Resources

Access the GE Advantium 120 manual online as a PDF for detailed instructions, installation guides, and troubleshooting tips. Contact GE customer support for further assistance.

10.1 Navigating the Digital User Manual

The GE Advantium 120 digital user manual is a comprehensive PDF guide, easily accessible online. It covers installation, operation, and troubleshooting, with detailed sections on SpeedCook, convection, and microwave modes. The manual includes a table of contents for quick navigation, as well as interactive indexes for specific topics. Users can search by keyword or browse through visually structured chapters. Tips for using the search function and bookmarks are provided to enhance readability. Compatible with most devices, the manual ensures easy access to essential information.

10.2 Accessing Technical Service Manuals

The GE Advantium 120 technical service manuals are available for download as PDF files from authorized GE Appliances websites. These manuals provide detailed schematics, repair guides, and troubleshooting steps for technicians. They cover installation, maintenance, and parts replacement, ensuring compatibility with other GE appliances. Users can search by model number, such as PSA1200, to find specific manuals. Additional resources, such as wiring diagrams and error code explanations, are included to aid professionals in servicing the appliance effectively. Always verify the manual’s authenticity to ensure accurate information.

10.3 GE Customer Support Contact Information

For assistance with the GE Advantium 120, customers can contact GE Appliances customer support through various channels. The official GE website provides phone numbers, email options, and live chat services. Support is available to address inquiries, troubleshooting, and maintenance needs. Users can also access a comprehensive FAQ section and technical resources online. Representatives are trained to assist with model-specific issues, ensuring efficient resolution. Visit the GE Appliances website or refer to the user manual for direct contact information and regional support details.

Environmental Considerations

The GE Advantium 120 incorporates energy-efficient technologies, reducing power consumption while maintaining performance. Eco-friendly features help minimize environmental impact, promoting sustainable cooking solutions for eco-conscious households.

11.1 Energy Efficiency Features

The GE Advantium 120 incorporates advanced energy-saving technologies to reduce power consumption while maintaining high performance. Its SpeedCook function combines halogen, convection, and microwave energy for faster cooking, lowering energy usage. The convection mode circulates hot air efficiently, reducing cooking time by up to 70%. Additionally, the oven automatically shuts off after cooking to prevent standby power consumption. These features make the Advantium 120 an eco-friendly choice, aligning with modern energy-efficient standards and promoting sustainable cooking practices. GE prioritizes environmental responsibility through innovative designs.

11.2 Proper Disposal of Packaging and Old Appliances

Proper disposal of packaging and old appliances is crucial for environmental protection. Recycle cardboard, plastic, and other materials whenever possible. For old appliances, check local regulations or recycling centers that accept large electronic devices. Donate working appliances to charities or organizations. Ensure hazardous components, like halogen bulbs or filters, are disposed of safely. GE encourages eco-friendly practices and adheres to sustainability standards. Always follow community guidelines to minimize environmental impact and promote responsible waste management.

Frequently Asked Questions

This section addresses common queries about the GE Advantium 120, covering installation, cooking, safety, and maintenance, ensuring users find quick solutions and clarity on key topics.

12.1 Common Questions About Installation

Q: Can the Advantium 120 be installed with other GE appliances?
A: Yes, it can be installed alongside other GE Monogram appliances, but ensure compatibility and follow installation guidelines.
Q: What are the minimum clearance requirements?
A: Maintain proper clearance as specified in the manual to avoid overheating and ensure safe operation.
Q: Does it require professional installation?
A: Recommended for optimal performance and safety, especially for complex setups or electrical connections.
Q: How do I handle electrical connections?
A: Always use a dedicated 120V circuit and consult a licensed electrician if unsure.
Q: What about venting requirements?
A: Proper venting is crucial; refer to the manual for specific instructions to prevent moisture buildup and ensure efficiency.

12.2 Frequently Asked Cooking and Safety Questions

Q: Can metal cookware be used in the Advantium 120?
A: Metal cookware is not recommended during SpeedCook or microwave modes, except for pans provided with the oven.
Q: How do I test if a dish is microwave-safe?
A: Place the dish in the microwave with a cup of water for 1 minute. If it stays cool, it’s safe.
Q: Why is the glass tray important?
A: The glass tray must always be in place during microwave mode to ensure even cooking and prevent damage.
Q: Can I leave food unattended while cooking?
A: No, always monitor cooking to prevent overheating or burns, especially when using high-power modes like SpeedCook.
Q: Are halogen lamps safe?
A: Yes, but avoid touching them and keep children away, as they get extremely hot during operation.

12.3 Troubleshooting and Maintenance FAQs

Q: Why does the oven not turn off?
A: Check if the door clips are damaged or if the locking mechanism is faulty. Replace broken parts promptly.
Q: How often should I clean the interior?
A: Clean spills immediately and deep clean monthly to prevent food buildup and odors.
Q: Why is the microwave not heating?
A: Ensure the glass tray is in place and verify that cookware is microwave-safe. Check for blockages in the waveguide.
Q: Can I replace the halogen lamps myself?
A: Yes, but only with GE-approved replacements to ensure safety and performance.
Q: How do I reset the oven?
A: Unplug it for 30 seconds, then plug it back in to reset the system.
Q: Why is the filter dirty light on?
A: Clean or replace the filters as indicated to maintain proper ventilation and efficiency.

rego service manual

The RegO Service Manual is a comprehensive guide for technicians working with LP-Gas systems‚ providing detailed procedures for installation‚ maintenance‚ and repair. It ensures compliance with industry standards and safety protocols‚ serving as an essential reference for field service work. The manual is designed to enhance product longevity and operational efficiency while prioritizing user safety. It covers a wide range of topics‚ from troubleshooting common issues to understanding regulatory requirements. This resource is indispensable for professionals aiming to deliver high-quality service and maintain system integrity effectively.

1.1 Overview of the RegO Service Manual

The RegO Service Manual is a detailed resource designed to guide technicians through the installation‚ maintenance‚ and repair of LP-Gas systems and components. It provides comprehensive instructions‚ safety protocols‚ and technical specifications to ensure proper handling and operation of RegO products. The manual covers essential topics such as system setup‚ troubleshooting‚ and regulatory compliance‚ making it an invaluable tool for field service work. Its clear‚ organized structure allows users to quickly locate information‚ enhancing efficiency and accuracy. By adhering to the manual’s guidelines‚ technicians can ensure safe‚ reliable‚ and efficient system performance‚ aligning with industry standards and best practices.

1.2 Importance of the Service Manual for Technicians

The RegO Service Manual is a critical resource for technicians‚ ensuring they can safely and effectively install‚ maintain‚ and repair LP-Gas systems. It provides detailed procedures‚ safety guidelines‚ and troubleshooting strategies‚ enabling technicians to work efficiently and accurately. The manual also ensures compliance with industry standards and regulatory requirements‚ minimizing risks and potential liabilities. By following the manual‚ technicians can extend the lifespan of RegO products‚ reduce downtime‚ and deliver reliable service. Its comprehensive guidance empowers technicians to handle complex tasks with confidence‚ making it an indispensable tool for achieving optimal system performance and ensuring user safety in all operational scenarios.

Safety Instructions and Precautions

Always read the RegO Service Manual before use to ensure safety and proper operation. Follow all safety guidelines to prevent hazards and prolong product life. Compliance with industry standards is essential for safe handling and installation. Regularly inspect equipment for damage before use. Adhere to all safety protocols to minimize risks and ensure reliable system performance. Proper safety measures are critical for protecting both the technician and the end-user. Failure to comply may result in serious injury or system failure. Safety should never be compromised during any service or maintenance procedure.

2.1 General Safety Guidelines

Always read the RegO Service Manual thoroughly before performing any service or maintenance tasks. Follow all safety guidelines to ensure safe operation and prevent potential hazards. Inspect equipment for damage or wear before use and replace any faulty components immediately. Wear appropriate personal protective equipment (PPE) such as gloves and safety glasses when handling products. Ensure proper ventilation in work areas to avoid gas accumulation. Avoid open flames or sparks near LP-Gas systems. Familiarize yourself with emergency procedures and shutdown protocols. Never bypass safety features or ignore warning signs. Compliance with these guidelines is crucial for protecting personnel‚ equipment‚ and the environment. Adhere strictly to all safety recommendations.

2.2 Handling and Storage Precautions

Proper handling and storage of RegO products are essential to ensure safety and maintain product integrity. Store products in a cool‚ dry‚ well-ventilated area‚ away from direct sunlight and extreme temperatures. Avoid exposing equipment to chemicals‚ moisture‚ or physical impact. Always handle products with care to prevent damage‚ and use protective equipment like gloves and goggles during handling. Ensure products are stored in an upright position to prevent leakage or contamination. Follow the manufacturer’s guidelines for stacking and securing products during transportation. Regularly inspect stored items for signs of damage or wear. Proper storage and handling practices minimize risks and ensure compliance with safety standards. Always refer to the RegO Service Manual for specific instructions.

Installation and Maintenance

The RegO Service Manual provides detailed procedures for the installation and maintenance of LP-Gas systems‚ ensuring compliance with safety standards and optimal performance. Proper installation‚ regular inspections‚ and scheduled maintenance are crucial for system reliability and longevity. Always follow the manual’s guidelines for pre-installation checks‚ installation steps‚ and routine servicing to ensure safe and efficient operation. Adhering to these practices minimizes risks and extends the service life of RegO products. Refer to the manual for specific instructions tailored to your equipment and application needs.

3.1 Pre-Installation Checks

Before installing RegO products‚ conduct thorough pre-installation checks to ensure system compatibility and safety. Inspect all components for damage or defects‚ and verify that they meet specifications. Review the system requirements and ensure all necessary tools and materials are available. Familiarize yourself with the RegO Service Manual and relevant safety guidelines. Test excess flow check valves and other safety devices for proper operation. Ensure compliance with Engineered Controls International instructions and industry standards. Proper installation is essential for safe and efficient operation‚ so double-check all connections and settings before proceeding. Refer to the manual for detailed procedures and recommendations to avoid potential issues during installation. Always prioritize safety and adherence to guidelines.

3.2 Installation Procedures

Follow the RegO Service Manual for precise installation procedures to ensure system functionality and safety. Begin by positioning components according to the system design and manufacturer guidelines. Connect piping and fittings securely‚ ensuring all connections are leak-free and properly sealed. Install regulators and valves in the correct orientation‚ as specified in the manual. After installation‚ test all connections under operating pressure to verify integrity. Activate safety devices‚ such as excess flow check valves‚ and ensure they function correctly. Refer to the manual for specific torque values and tightening sequences. Proper installation is critical for safe operation‚ so adhere strictly to the provided instructions and safety protocols.

3.3 Routine Maintenance Requirements

Regular maintenance is crucial for ensuring the optimal performance and longevity of RegO products. Technicians should inspect all components periodically‚ including regulators‚ valves‚ and connections‚ to identify potential issues early. Cleaning or replacing worn or damaged parts according to the manual’s guidelines is essential. Check safety devices‚ such as excess flow valves‚ to ensure they function properly. Follow the recommended maintenance schedules outlined in the RegO Service Manual to prevent system malfunctions. Properly document all maintenance activities for future reference. Adhering to these routines helps maintain system integrity‚ ensures compliance with safety standards‚ and prolongs the service life of RegO equipment. Always refer to the manual for specific procedures and guidelines.

Troubleshooting and Repair

Troubleshooting and repair of RegO products involve identifying issues‚ diagnosing root causes‚ and applying corrective actions as per the manual’s guidelines to ensure safe and effective resolution.

4.1 Common Issues and Solutions

Common issues with RegO products include malfunctioning excess flow valves and regulator imbalances. These often stem from improper installation or wear over time. According to the RegO Service Manual‚ technicians should first inspect connections and ensure all components are securely fastened. For excess flow valves‚ testing operation prior to service is crucial. If valves fail to function correctly‚ replacement is necessary. Regulator imbalances can typically be resolved by recalibrating according to the manual’s specifications. Additionally‚ regular maintenance‚ such as cleaning and replacing worn seals‚ can prevent many issues from arising. Always refer to the manual for precise troubleshooting steps to ensure safety and efficiency.

4.2 Repair Procedures for RegO Products

Repairing RegO products requires adherence to detailed procedures outlined in the service manual; Technicians must ensure systems are depressurized before starting any repair. For components like the MultiBonnet‚ disassembly and inspection are critical to identify worn or damaged parts. Replacement of faulty elements‚ such as seals or springs‚ should only be done with genuine RegO parts to maintain performance. After reassembly‚ thorough testing‚ including leak checks and operational assessments‚ is essential. The manual also provides specific torque specifications and alignment guidelines for valves and regulators. Proper documentation of repairs ensures traceability and compliance with safety standards. Always refer to the manual for exact steps to avoid complications.

Regulatory Compliance and Standards

RegO products must comply with industry standards like ANSI K61.1 and NPGA guidelines‚ ensuring safety and system integrity. Adherence to these regulations is non-negotiable for proper installation and operation.

5.1 Industry Standards for LP-Gas Systems

LP-Gas systems must adhere to strict industry standards‚ such as ANSI K61.1 and NPGA guidelines‚ to ensure safety and efficiency. These standards outline specifications for equipment design‚ installation‚ and maintenance. Compliance with these regulations is crucial for the safe operation of LP-Gas systems‚ minimizing risks and ensuring reliability. RegO products are designed to meet these standards‚ providing a trusted solution for technicians. Following these guidelines ensures that systems function optimally while maintaining the highest safety levels for users and the environment.

5.2 Compliance with Safety Regulations

Compliance with safety regulations is paramount for the safe operation of LP-Gas systems. RegO products are designed to meet rigorous safety standards‚ including ANSI K61.1 and NPGA guidelines. Proper installation‚ maintenance‚ and repair procedures‚ as outlined in the RegO Service Manual‚ ensure adherence to these regulations. Testing protocols‚ such as excess flow valve checks‚ must be followed to guarantee system integrity. Non-compliance can lead to safety hazards and liability issues. Technicians must strictly follow safety bulletins and regulatory updates to ensure all systems operate within legal and safety parameters. Regular inspections and adherence to local codes further reinforce compliance‚ safeguarding both users and the environment.

Product Catalog and Selection Guide

The RegO Product Catalog offers a comprehensive range of LP-Gas system components‚ including regulators‚ valves‚ and accessories. It provides detailed product specifications‚ features‚ and applications. The selection guide helps users identify the most suitable regulator for their specific needs‚ ensuring optimal performance and compatibility. With clear categorization and comparison charts‚ the catalog simplifies the decision-making process. It also includes technical drawings and schematics for easier installation and maintenance planning. By referencing the catalog‚ technicians can streamline their workflows‚ ensuring they select the right products for efficient and safe system operation. This resource is essential for professionals working with LP-Gas systems.

6.1 Overview of RegO Product Catalog

The RegO Product Catalog is a detailed resource showcasing a wide range of LP-Gas system components‚ including regulators‚ valves‚ and accessories. It provides comprehensive product specifications‚ features‚ and applications‚ helping users understand the capabilities of each item. The catalog is organized to simplify product selection‚ with clear descriptions and technical details. It serves as a go-to reference for technicians and professionals‚ ensuring they can identify the right components for their specific needs. By offering a thorough overview of RegO’s offerings‚ the catalog supports efficient system design‚ installation‚ and maintenance‚ ensuring compatibility and optimal performance in various LP-Gas applications.

6.2 Selecting the Right Regulator for Your Needs

Selecting the right regulator is crucial for optimal performance and safety in LP-Gas systems. Consider factors like application type‚ flow rate‚ and pressure requirements. Two-stage regulation is often recommended for tank manifold installations due to its stability and efficiency. Ensure the regulator meets industry standards‚ such as ANSI K61.1‚ for compliance and reliability. Refer to the RegO Product Catalog for detailed specifications and compatibility information. Utilize the RegO App or selection guides to streamline the process. Proper selection ensures system safety‚ efficiency‚ and longevity‚ making it essential to align the regulator with specific operational demands and environmental conditions. Always consult the RegO Service Manual for guidance on regulator compatibility and installation.

Training and Certification

Proper training is essential for safe and effective work with RegO products. Structured programs and certification ensure technicians meet industry standards and maintain system integrity. Certification is required.

7.1 Training Programs for Service Technicians

The RegO Service Manual emphasizes the importance of training programs for service technicians to ensure proficiency in handling LP-Gas systems. These programs are designed to provide in-depth knowledge and practical skills‚ covering installation‚ maintenance‚ and safety protocols. Technicians learn to use resources like the RegO Service Manual and the RegO App‚ which includes the manual and a Propane Regulator Selector tool. Training focuses on proper procedures to ensure system safety and efficiency. By completing these programs‚ technicians can obtain necessary certifications‚ demonstrating their competence in servicing RegO products effectively.

7.2 Certification Requirements

Certification is essential for service technicians to demonstrate their expertise and compliance with industry standards. The RegO Service Manual outlines specific certification requirements to ensure proper installation‚ maintenance‚ and repair of LP-Gas systems. These certifications are designed to verify a technician’s understanding of safety protocols‚ regulatory compliance‚ and technical proficiency. Typically‚ certifications are issued by authorized bodies‚ such as Engineered Controls International‚ LLC‚ after completing training programs and passing assessments. Proper certification ensures that technicians can safely and effectively service RegO products‚ maintaining system integrity and performance. This process is critical for upholding industry standards and protecting both technicians and end-users.

The RegO Service Manual is a comprehensive guide ensuring safety‚ compliance‚ and efficiency in LP-Gas system maintenance. It aids technicians in adhering to industry standards.

8.1 Summary of Key Points

The RegO Service Manual is an essential resource for technicians‚ emphasizing safety‚ compliance‚ and efficiency in LP-Gas system maintenance. It provides detailed installation‚ troubleshooting‚ and repair procedures‚ ensuring adherence to industry standards. The manual highlights the importance of proper training and certification for technicians‚ underscoring safety protocols and regulatory requirements. By following its guidelines‚ users can enhance product longevity and operational reliability. This comprehensive guide serves as a critical reference for field service work‚ aiding professionals in delivering high-quality outcomes while maintaining system integrity and safety. Its structured approach ensures clarity and accessibility‚ making it invaluable for both experienced technicians and newcomers in the field.

8.2 Final Thoughts on the RegO Service Manual

The RegO Service Manual stands as a vital resource for LP-Gas system professionals‚ offering a detailed and structured approach to installation‚ maintenance‚ and repair. Its emphasis on safety‚ compliance‚ and efficiency ensures that technicians can perform their tasks with confidence and precision. The manual’s comprehensive coverage of industry standards and best practices makes it an indispensable tool for maintaining system integrity and ensuring operational reliability. By adhering to its guidelines‚ users can enhance product longevity and deliver high-quality service. Ultimately‚ the RegO Service Manual is a testament to the importance of proper training and adherence to safety protocols in the LP-Gas industry.