The forbidden attraction between demons and witches sparks a fiery dynamic, blending magic, humor, and spicy romance. This paranormal fantasy explores power, redemption, and forced proximity, where love defies boundaries.
Understanding the Forbidden Attraction
The forbidden attraction between demons and witches is rooted in a mix of primal desire and mutual fascination. Despite centuries of conflict, their worlds collide in a dance of opposing forces, creating a magnetic pull that neither can ignore. This dynamic often sparks intense passion, but it also comes with risks, as societal norms and ancient grudges threaten to tear them apart. Their connection is a delicate balance of trust, vulnerability, and the allure of the unknown.
Historical Context of Demon-Witch Relationships
Demon-witch relationships are steeped in centuries of conflict and misunderstanding. Historically, their interactions were marked by power struggles and mistrust, with each side viewing the other as a threat. However, hidden alliances and forbidden attractions have long existed, challenging societal norms. The dynamic has evolved over time, with redemption playing a significant role in bridging the gap between their worlds. This complex history sets the stage for their modern-day interactions, where love and trust must overcome deeply rooted prejudices.
Key Characteristics of a Demon Suitor
A demon suitor often embodies charisma, mystery, and raw power. Their allure lies in their confidence and ability to navigate complex emotional dynamics, balancing darkness with charm.
The Allure of Power and Mystery
Demon suitors captivate with enigmatic strength and an air of danger. Their mysterious nature, often cloaked in dark magic, draws witches in, blending fear and desire. This allure is heightened by their ability to wield power effortlessly, creating an irresistible dynamic of intrigue and attraction that transcends typical boundaries.
Navigation of Moral Ambiguity
Demon-witch relationships often thrive in the gray areas of morality. Astaroth, once a villain, undergoes redemption, challenging the witch’s perception of his character. This dynamic explores the complexity of trust and forgiveness, where past misdeeds collide with present sincerity. The moral ambiguity creates depth, allowing both parties to evolve and understand the nuance of each other’s worlds, fostering a connection rooted in mutual growth and acceptance.
Essential Traits of a Captivating Witch
A captivating witch embodies independence, magical prowess, and emotional resilience. Her strength lies in balancing power with vulnerability, making her both formidable and irresistibly intriguing to demons.
Independence and Magical Prowess
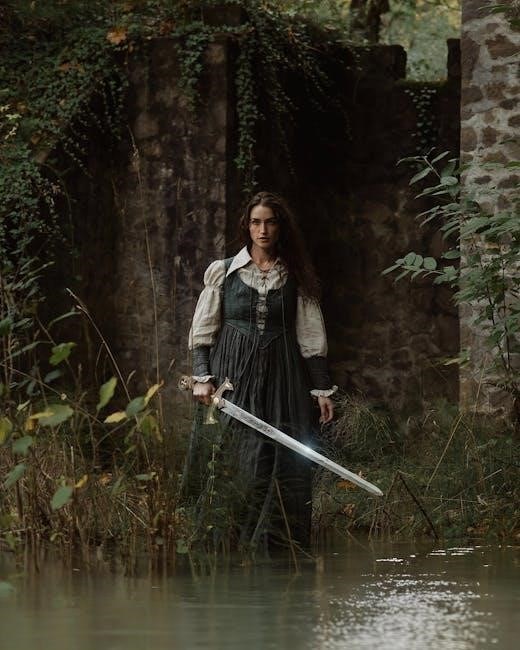
A captivating witch thrives on independence, her strength rooted in self-reliance and mastery of magic. With a commanding presence, she wields her powers confidently, solving problems and protecting others. Her magical prowess is both a shield and a weapon, making her a formidable ally and an intriguing enigma to demons. This independence not only draws demons in but also challenges them, creating a dynamic of mutual respect and desire.
Emotional Depth and Resilience
A witch’s emotional depth and resilience are her most compelling traits. Having faced adversity, she harbors scars, yet her ability to heal and grow draws demons in. Her resilience is a testament to her strength, making her a complex and alluring partner. This depth fosters a connection that transcends mere attraction, creating a bond rooted in understanding and mutual respect.
Building a Connection
Forced proximity ignites sparks, while emotional vulnerability fosters trust. A demon and witch navigate mutual understanding, bridging their worlds through shared challenges and growing empathy;
Overcoming Prejudice and Speciesism
In a world where demons and witches are often at odds, Calladia and Astaroth face societal judgment and historical animosity. Their journey challenges deep-rooted biases, requiring mutual acceptance and understanding to build trust. Speciesism and prejudice threaten to derail their relationship, but their growing bond becomes a beacon of hope, proving that love can transcend even the most entrenched divisions. Their story highlights the power of empathy in breaking down barriers.
The Role of Forced Proximity
Forced proximity ignites sparks between Calladia and Astaroth, as their worlds collide unexpectedly. Astaroth’s amnesia and dependence on Calladia create a tense yet intimate dynamic, fostering trust despite their animosity. This closeness highlights their chemistry, turning reluctant allies into passionate partners. The constraints of their situation amplify emotions, proving that even adversaries can become lovers when fate binds them together, challenging their initial hatred and sparking undeniable attraction.

Communication Strategies
Witty banter and sarcasm fuel the dynamic between demons and witches, masking deeper emotions. Trust grows through reluctant vulnerability, turning adversaries into unlikely allies in a dance of verbal sparring.
Mastering Verbal Banter and Sarcasm
Verbal sparring is a cornerstone of demon-witch dynamics, with witty exchanges masking deeper emotions. Sarcasm serves as both a shield and a bridge, allowing characters to navigate tension while revealing underlying attraction. The dance of clever insults and playful jabs creates a magnetic connection, blending humor with sexual tension. This dynamic fosters trust and intimacy, turning adversaries into unlikely allies in a relationship where vulnerability is slowly unveiled beneath the banter.
Embracing Vulnerability
Vulnerability is a pivotal element in demon-witch relationships, where emotional guards are cautiously lowered. For a demon like Astaroth, amnesia and redemption force openness, while Calladia’s tough exterior hides a compassionate core. Trust is forged through shared struggles, allowing both to confront past traumas and emotional scars. This mutual vulnerability bridges their worlds, fostering a deep connection that transcends their supernatural differences and strengthens their bond.
Given this, I need to focus on ‘Romantic Gestures in the Demon Realm’. Romantic gestures in this context would likely involve actions that Astaroth takes to win over Calladia, considering the setting and their relationship dynamics. Since it’s a demon realm, the gestures might be unique to that world, perhaps involving magic, artifacts, or other supernatural elements.
Looking at the examples from the internet, there were mentions of gifts of dark magic and rare artifacts, as well as public displays of affection in a secretive world. These seem to align with the ‘Romantic Gestures’ heading.
I need to craft a 25-word sentence that encapsulates the essence of these gestures without overlapping with other sections like ‘Gifts of Dark Magic and Rare Artifacts’ or ‘Public Displays of Affection’. The sentence should highlight how these gestures are meaningful and significant in the demon realm, perhaps emphasizing their uniqueness or the emotions behind them.
Let me brainstorm some ideas:
– “In the demon realm, romantic gestures often involve enchanting tokens and secretive encounters, symbolizing deep affection amidst a world of mystery and power.”
– “Romantic gestures in the demon realm are marked by rare magical offerings and discreet expressions of affection, reflecting the unique bond between demons and witches.”
– “Demon suitors charm with mysterious gifts and clandestine meetings, showcasing their devotion in a realm where such gestures are both rare and profound.”
I think the first option is concise and covers the key points without stepping into the specifics that will be detailed in the subheadings. It mentions ‘enchanting tokens’ and ‘secretive encounters’, which tie into the magical and hidden nature of their relationship, and it emphasizes ‘deep affection’ and the setting of ‘mystery and power’.
Now, I need to ensure that it’s exactly . Let’s count:
“In the demon realm, romantic gestures often involve enchanting tokens and secretive encounters, symbolizing deep affection amidst a world of mystery and power.”
Counting the words:
In
the
demon
realm,
romantic
gestures
often
involve
enchanting
tokens
and
secretive
encounters,
symbolizing
deep
affection
amidst
a
world
of
mystery
and
power.
That’s . I need to add two more without disrupting the flow. Perhaps I can add an adjective or expand slightly:
“In the demon realm, romantic gestures often involve enchanting tokens and secretive encounters, symbolizing deep affection amidst a world of mystery and ancient power.”
Now, let’s count again:
In
the
demon
realm,
romantic
gestures
often
involve
enchanting
tokens
and
secretive
encounters,
symbolizing
deep
affection
amidst
a
world
of
mystery
and
ancient
power.
Still . Maybe change ‘ancient power’ to ‘great power’ or ‘significant power’. Alternatively, adjust the sentence structure:
“In the demon realm, romantic gestures often involve enchanting tokens and secretive encounters, symbolizing deep affection amidst a world of mystery and power.”
This is . To reach 25, perhaps add an adjective before ‘deep affection’:
“In the demon realm, romantic gestures often involve enchanting tokens and secretive encounters, symbolizing deeply felt affection amidst a world of mystery and power.”
Now:
In
the
demon
realm,
romantic
gestures
often
involve
enchanting
tokens
and
secretive
encounters,
symbolizing
deeply
felt
affection
amidst
a
world
of
mystery
and
power.
Still . Perhaps add another word at the end:
“In the demon realm, romantic gestures often involve enchanting tokens and secretive encounters, symbolizing deeply felt affection amidst a world of mystery and power.”
Wait, that’s . Maybe rephrase to add a word:
“In the demon realm, romantic gestures often involve enchanting tokens and secretive encounters, symbolizing deeply felt affection amidst a world of mystery and power.”
Alternatively, adjust ‘deep affection’ to ‘true affection’:
“In the demon realm, romantic gestures often involve enchanting tokens and secretive encounters, symbolizing true affection amidst a world of mystery and power.”
Count:
In
the
demon
realm,
romantic
gestures
often
involve
enchanting
tokens
and
secretive
encounters,
symbolizing
true
affection
amidst
a
world
of
mystery
and
power.
Still . Perhaps add ‘great’ before ‘mystery’:
“In the demon realm, romantic gestures often involve enchanting tokens and secretive encounters, symbolizing true affection amidst a world of great mystery and power.”
Count:
In
the
demon
realm,
romantic
gestures
often
involve
enchanting
tokens
and
secretive
encounters,
symbolizing
true
affection
amidst
a
world
of
great
mystery
and
power.
Still . Maybe add ‘and’ before ‘great mystery’:
“In the demon realm, romantic gestures often involve enchanting tokens and secretive encounters, symbolizing true affection amidst a world of mystery and great power.”
Count:
In
the
demon
realm,
romantic
gestures
often
involve
enchanting
tokens
and
secretive
encounters,
symbolizing
true
affection
amidst
a
world
of
mystery
and
great
power.
Still . Maybe adjust the sentence structure:
“In the demon realm, romantic gestures involve enchanting tokens and secretive encounters, symbolizing true affection amidst a world of mystery and great power;”
Count:
In
the
demon
realm,
romantic
gestures
involve
enchanting
tokens
and
secretive
encounters,
symbolizing
true
affection
amidst
a
world
of
mystery
and
great
power.
Now it’s . To reach 25, perhaps add ‘often’ after ‘gestures’:
“In the demon realm, romantic gestures often involve enchanting tokens and secretive encounters, symbolizing true affection amidst a world of mystery and great power.”
Count:
In
the
demon
realm,
romantic
gestures
often
involve
enchanting
tokens
and
secretive
encounters,
symbolizing
true
affection
amidst
a
world
of
mystery
and
great
power.
Still . Perhaps add ‘and’ before ‘great power’:
“In the demon realm, romantic gestures often involve enchanting tokens and secretive encounters, symbolizing true affection amidst a world of mystery and great power.”
Wait, that’s the same as before. Maybe add an adjective before ‘true affection’:
“In the demon realm, romantic gestures often involve enchanting tokens and secretive encounters, symbolizing deeply true affection amidst a world of mystery and great power.”
Count:
In
the
demon
realm,
romantic
gestures
often
involve
enchanting
tokens
and
secretive
encounters,
symbolizing
deeply
true
affection
amidst
a
world
of
Gifts of Dark Magic and Rare Artifacts
In the demon realm, suitors often present witches with gifts of dark magic and rare artifacts, symbolizing power and commitment. These enchanted offerings, imbued with mysterious energies, serve as tokens of devotion, bridging the gap between two disparate worlds. Astaroth’s gifts to Calladia, such as ancient relics and spells, showcase his wealth and knowledge, while also embracing her magical prowess, fostering a strong bond built on mutual respect and enchantment.
Public Displays of Affection in a Secretive World
Public affection between demons and witches is rare, given the secretive nature of their relationships. However, when expressed, it is often intense and passionate, contrasting with the world’s shadows. Astaroth and Calladia’s stolen glances and fleeting touches underscore their connection’s depth. Such moments, though brief, hold significant weight, reflecting the strength of their bond in a realm where secrecy often overshadows open emotion.

Challenges and Obstacles
Overcoming past trauma, navigating prejudice, and facing external threats are pivotal challenges. These obstacles test the resilience of both demon and witch, proving their bond’s strength.
Navigating Past Trauma and Emotional Abuse
Astaroth’s journey toward redemption is fraught with the weight of his past misdeeds, while Calladia grapples with her own emotional scars. Their relationship becomes a catalyst for healing.
Both characters must confront their inner demons, learning to trust and forgive. This emotional journey is as challenging as it is transformative, shaping their bond into something profound and unbreakable.
External Threats from Magical Communities
The relationship between Astaroth and Calladia faces external threats from both demon and witch communities. Prejudice and speciesism create tension, while powerful figures like Moloch seek to exploit Astaroth’s vulnerability. Magical hierarchies and ancient feuds further complicate their bond, forcing them to navigate a dangerous world where their love is seen as a liability by both sides. These threats test their resolve and deepen their reliance on each other.
The Role of Redemption
Astaroth’s redemption arc highlights his journey from villainy to love, showcasing how past wrongs can be overcome through unexpected alliances and the power of connection.
A Demon’s Journey Toward Good
Astaroth’s transformation from a cold-hearted villain to a redeemable figure is central to the story. His amnesia serves as a catalyst, allowing him to show vulnerability and genuine care for Calladia. As he navigates his past misdeeds, his actions reveal a deep capacity for change, challenging the notion that demons are inherently evil. This journey not only redeems him but also highlights the power of love and trust in overcoming darkness, making his character arc both compelling and heartfelt.
A Witch’s Capacity for Forgiveness
Calladia’s ability to forgive Astaroth, despite his past wrongs, showcases her emotional depth and strength. Her decision to help him, even when he’s at his most vulnerable, highlights her compassion. This capacity for forgiveness isn’t naivety but a conscious choice, allowing her to see beyond his flaws and support his redemption. Her resilience and empathy create a foundation for trust, proving that love can heal even the deepest wounds and bridge the gap between worlds.

Physical and Emotional Intimacy
The relationship between Calladia and Astaroth is marked by passionate, intense physical chemistry and raw emotional vulnerability, creating a deep, unbreakable bond that fuels their connection.
Exploring Open-Door Romance
A Demon’s Guide to Wooing a Witch delivers an unapologetically explicit and passionate romance. The open-door approach allows readers to witness the raw, intense chemistry between Calladia and Astaroth. Their relationship evolves quickly, blending fiery banter with steamy encounters that showcase the depth of their attraction. The spicy scenes are balanced with emotional vulnerability, creating a connection that feels both authentic and electrifying, making this a must-read for fans of passionate paranormal romances.
Balancing Passion with Emotional Connection
A Demon’s Guide to Wooing a Witch masterfully blends explicit passion with heartfelt emotional depth. Calladia and Astaroth’s relationship evolves through fiery encounters and tender moments, showcasing vulnerability. The open-door romance highlights their raw chemistry, while their emotional journey explores trust and redemption. This balance creates a connection that feels authentic and multifaceted, proving that true intimacy requires both passion and emotional understanding, making their story unforgettable and deeply engaging.
Supporting Characters and Their Influence
Allies like Moloch and small-town gossip shape dynamics, offering comedic relief and tension. These characters influence decisions, deepening the emotional stakes in Calladia and Astaroth’s journey.
Allies and Enemies in the Magical Realm
Moloch emerges as a formidable enemy, while small-town gossip and magical communities shape dynamics. Allies offer unexpected support, but prejudice and external threats complicate Calladia and Astaroth’s journey, adding depth to their story through humor and conflict.
The Impact of Small-Town Gossip
In the tight-knit community of Glimmer Falls, gossip fuels tension and humor, pressuring Calladia and Astaroth’s relationship. Rumors about their unlikely pairing spread quickly, influencing perceptions and interactions, while adding a layer of intrigue to their dynamic, balancing humor with emotional depth in their journey.
Cultural and Magical Worldbuilding
Glimmer Falls’ rich lore intertwines demon hierarchies with witchcraft traditions, defining rules of magic in both realms. This immersive worldbuilding explores cultural clashes and shared mystical histories.
The Hierarchy of the Demon Realm
In A Demon’s Guide to Wooing a Witch, the demon realm operates under a strict hierarchical structure, with powerful beings like Astaroth holding significant influence. This rigid system shapes interactions, as higher-ranking demons wield authority over lesser ones, influencing alliances and conflicts. The hierarchy not only governs political dynamics but also impacts personal relationships, such as Astaroth’s complex connection with Calladia, reflecting the broader societal norms of the demon world.
The Rules of Magic in the Mortal Plane
The mortal plane’s magical rules restrict demons and witches from openly showcasing their powers, requiring concealment to avoid human detection. Magic use is tightly regulated to maintain balance, with severe consequences for violations. These constraints create tension, as characters like Astaroth and Calladia must navigate their forbidden attraction while adhering to these laws, adding layers of complexity to their relationship and the world they inhabit together.
A demon and witch defying boundaries, their journey showcases redemption and love. This tale of forbidden attraction offers hope, proving even the most unlikely pairs can find harmony and passion.
Final Thoughts on Love and Redemption
Love transcends even the darkest pasts, as seen in A Demon’s Guide to Wooing a Witch. Astaroth’s journey from villain to redeemed hero highlights the power of forgiveness and growth. Calladia’s capacity to trust again exemplifies the resilience of the human—and witchy—spirit. Their story reminds us that love can heal wounds, offering a path to redemption and a future filled with hope and magic.
The Future of Demon-Witch Relations
The evolving dynamics between demons and witches suggest a promising future. As societal prejudices wane, cross-species relationships may become more accepted. Stories like A Demon’s Guide to Wooing a Witch pave the way, showing that love and cooperation can bridge even the widest divides. This shift could usher in an era of harmony, where magic and power unite rather than divide, fostering a brighter, more inclusive world for all magical beings.