Product Overview
The Aroma ARC-914D is a versatile digital rice cooker and food steamer, designed for cooking white and brown rice, quinoa, and other grains. It features a steam tray for simultaneous cooking, a delay timer, and a cool-touch exterior for safety. Perfect for healthy, one-pot meals, it combines convenience and functionality.
1.1 Model Details and Specifications
The Aroma ARC-914D is an 8-cup digital rice cooker and food steamer, designed for versatile cooking. It features a stainless steel inner pot, cool-touch exterior, and programmable controls for white and brown rice. The cooker includes a steam tray for simultaneous cooking of rice and vegetables or proteins. Additional features include a delay timer, automatic shut-off, and a keep-warm function. The package comes with a measuring cup, rice paddle, and steam tray. This model is ideal for preparing a variety of grains, including quinoa, barley, and more, while also offering healthy steaming options. Its compact design and user-friendly interface make it a practical addition to any kitchen.
1.2 Key Features of the Aroma ARC-914D
The Aroma ARC-914D boasts a digital control panel with preset functions for white and brown rice, quinoa, and grains. It includes a delay timer, allowing meal preparation up to 15 hours in advance. The cooker features a steam tray for simultaneous rice cooking and steaming of vegetables or proteins. Automatic keep-warm functionality ensures food stays ready to serve. Accessories include a measuring cup and serving spatula. The cooker’s cool-touch exterior enhances safety, while its compact design suits small kitchens. With an 8-cup cooked rice capacity, it’s ideal for families or meal prep. The stainless steel inner pot ensures durable and even cooking performance.

Safety Precautions
Ensure safe usage by avoiding hot surfaces, keeping children away, and using the cooker on a stable, dry surface. Never submerge the appliance in water.
2.1 Handling the Appliance Safely
To ensure safe handling of the Aroma ARC-914D, always use the cooker’s handles or knobs when moving or adjusting it, as the surfaces may become hot during operation. Avoid touching the inner pot or steam tray without oven mitts or tongs. Keep the appliance out of reach of children and pets to prevent accidental burns or damage. Never submerge the cooker in water or expose electrical components to moisture, as this could cause electrical hazards. Always place the cooker on a stable, level, and heat-resistant surface to avoid tipping or uneven heating. Proper handling ensures safe and efficient cooking.
2.2 Placement and Storage Guidelines
For optimal performance and safety, place the Aroma ARC-914D on a stable, flat, and heat-resistant surface away from flammable materials. Ensure the area around the cooker is clear to avoid accidental knocks. When not in use, store the appliance in a cool, dry place, away from direct sunlight. Detach the power cord and clean the cooker before storing it to prevent dust buildup. Store the accessories separately to maintain their quality. Proper placement and storage extend the lifespan of the cooker and ensure it remains in good working condition for future use.
2.3 Electrical Safety Tips
Always plug the Aroma ARC-914D into a grounded 120V AC electrical outlet to prevent shocks. Avoid using extension cords or overloaded circuits. Keep the power cord away from hot surfaces and water to prevent damage or electrical hazards. Never submerge the cooker in water or expose it to excessive moisture. If the cord is damaged, discontinue use and contact customer support. Ensure the appliance is switched off and unplugged before cleaning or storing. Follow these electrical safety tips to ensure safe and reliable operation of your Aroma rice cooker and steamer.

Understanding the Control Panel
The control panel features intuitive buttons for White Rice, Brown Rice, and Steam functions, along with a delay timer for convenient meal planning and a digital display for easy navigation.
3.1 Components of the Control Panel
The control panel of the Aroma ARC-914D features a digital display and a set of buttons for easy operation. Key components include the White Rice, Brown Rice, and Steam buttons, allowing users to select specific cooking modes. The Delay Timer button enables scheduling meals in advance, while the Start/Stop button provides control over the cooking process. Additional indicators show the current status of the cooker, such as whether it is actively cooking or keeping food warm. The panel also includes a power button and a digital interface to monitor cooking progress. These components are designed for intuitive navigation, making it easy to achieve perfectly cooked meals and steamed dishes.
3.2 Operating Modes and Functions
The Aroma ARC-914D offers multiple operating modes to cater to various cooking needs. It includes settings for White Rice, Brown Rice, and Steam, allowing users to prepare different types of grains and steamed dishes. The Delay Timer function enables scheduling meals up to 24 hours in advance, ensuring convenience. Additionally, the cooker features a Keep Warm mode to maintain food at the ideal temperature after cooking. The digital interface provides clear feedback on the selected mode and cooking progress. These functions make it easy to cook a variety of meals, from fluffy white rice to hearty brown rice and perfectly steamed vegetables, all in one versatile appliance.
Preparing Ingredients
Measure rice and liquid using the provided cup for accuracy. Rinse rice thoroughly before cooking. Portion limits vary when combining rice and steaming for optimal results.
4.1 Measuring Rice and Liquid
Accurate measurement is crucial for perfect cooking. Use the provided measuring cup to ensure the right proportions. For white rice, use a 1:1.5 ratio of rice to water. For brown rice or other grains, increase the water ratio to 1:2. Always rinse rice before cooking to remove excess starch. When steaming, measure liquids carefully to avoid overflow. The cooker allows up to 2 cups of uncooked rice when combined with steaming. Refer to the grain and water measurement table in the manual for specific guidelines. Proper measurement ensures fluffy rice and evenly cooked grains every time.
4.2 Rinsing and Preparing Rice
Rinsing rice before cooking is essential to remove excess starch and impurities, ensuring fluffy and separate grains. Rinse the rice under cold water for 30 seconds to 1 minute until the water runs clear. After rinsing, gently shake out excess water or pat dry with a clean cloth to remove moisture. For brown rice or other grains, rinsing is equally important to enhance texture and flavor. Avoid over-rinsing, as it may strip away nutrients. Proper preparation ensures the rice cooks evenly and achieves the desired consistency. This step is crucial for optimal performance of the Aroma ARC-914D rice cooker.
4.3 Portion Limits for Combined Cooking
When cooking rice and steaming food simultaneously, adhere to portion limits to ensure optimal performance. Do not exceed 2 cups of uncooked rice in the inner pot, as this may affect cooking efficiency. For combined cooking, use a maximum of 2 cups of uncooked rice and 2.5 cups of water. The steam tray should hold no more than 2 cups of food to prevent overcrowding. Place the steam tray into the rice cooker once the rice has started cooking, ideally during the last 10-15 minutes of the rice cooking cycle. This ensures both the rice and steamed food finish cooking at the same time. Proper portioning guarantees even cooking and prevents overflow.
Cooking Instructions
Cook white rice, brown rice, or other grains effortlessly. Use the delay timer for convenient meal prep. Simply add measured rice and water, then select the desired mode for perfectly cooked results every time.
5.1 Cooking White Rice
Cooking white rice with the Aroma ARC-914D is straightforward. First, rinse the rice thoroughly and measure it using the provided cup. Add water in a 1:1.2 ratio to the inner pot. Place the pot in the cooker, close the lid, and press the White Rice button. The cooker will automatically adjust cooking time and temperature for fluffy results. Ensure the cooker is on a flat, dry surface and plugged into a 120V outlet. Avoid opening the lid during cooking to maintain steam. Once done, let it sit for 5 minutes before serving for optimal texture. This ensures perfectly cooked white rice every time.
5;2 Cooking Brown Rice and Other Grains
Cooking brown rice and other grains with the Aroma ARC-914D is simple and customizable. For brown rice, use a 1:1.5 water-to-rice ratio and press the Brown Rice button. The cooker adjusts temperature and time for a tender texture. For quinoa, barley, or farro, follow the grain-to-water chart provided in the manual. Rinse grains thoroughly before cooking. Place them in the inner pot, add water, and select the appropriate setting. Avoid opening the lid during cooking to ensure even results; Once done, let the grains sit for 5 minutes before fluffing with a spatula. This ensures perfectly cooked, flavorful grains every time.
5.3 Synchronization of Rice and Steaming
The Aroma ARC-914D allows seamless synchronization of rice cooking and steaming, enabling you to prepare a complete meal in one pot. Place food in the steam tray and insert it into the rice cooker during the last 10-15 minutes of the rice cooking cycle. This ensures both the rice and steamed food finish cooking at the same time. For optimal results, add water according to the grain type and steam function. Use the delay timer to schedule cooking, making meal prep effortless. The steam tray fits directly over the rice, allowing flavors to mingle while maintaining texture and moisture. This feature is perfect for healthy, balanced meals.

Steaming Instructions
6.1 Preparing Food for Steaming
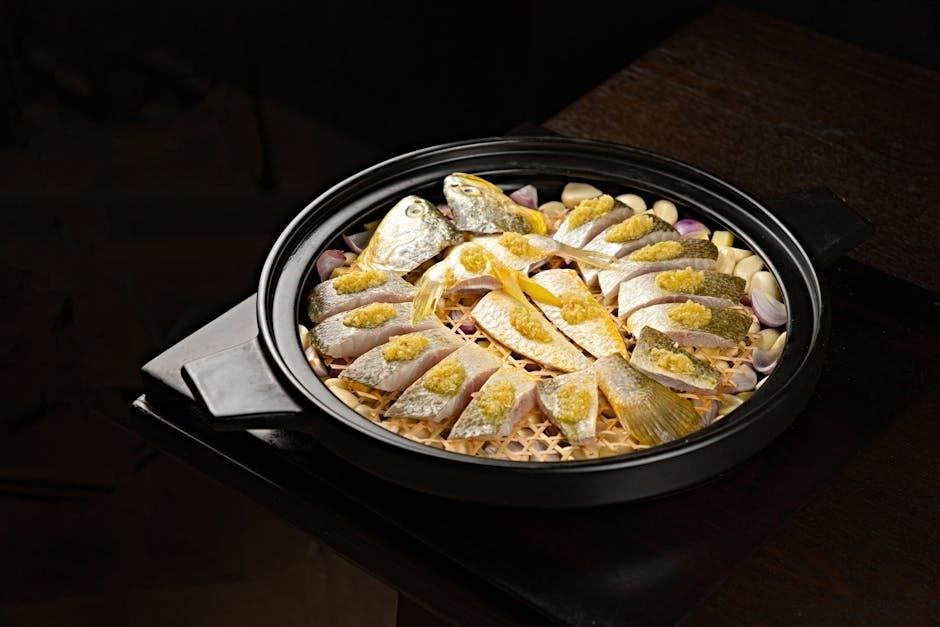
Preparing food for steaming in the Aroma ARC-914D is straightforward. Wash and cut vegetables, meats, or fish into bite-sized portions. Season lightly with herbs or spices if desired. Place the prepared food on the steam tray, ensuring it is evenly distributed. Avoid overcrowding to allow steam to circulate. Secure the lid tightly to trap steam and promote even cooking. For optimal results, start steaming toward the end of the rice cooking cycle to synchronize completion times. This method ensures tender, flavorful, and nutrient-rich dishes every time.
6;2 Timing Guidelines for Steaming
The Aroma ARC-914D allows for precise steaming with adjustable timing based on food type. Vegetables typically steam for 10-15 minutes, while meats may require 15-25 minutes. Seafood generally cooks in 8-12 minutes. These times are approximate and may vary depending on portion size and desired tenderness. For best results, refer to the included timing chart in the manual for specific guidelines. Adjust the cooking time as needed to achieve your preferred texture. Ensure the lid is secure to maintain steam and promote even cooking. Start steaming toward the end of the rice cooking cycle to synchronize completion times.
6.3 Combining Steaming with Rice Cooking
The Aroma ARC-914D allows you to steam food while cooking rice simultaneously, ensuring both are ready at the same time. Place the steam tray with your food over the rice, and close the lid securely. Start steaming toward the end of the rice cooking cycle to synchronize completion. Use the delay timer to coordinate cooking times for perfect results. Ensure the water level in the inner pot is sufficient to generate steam without drying out the rice. This feature is ideal for preparing healthy, balanced meals with minimal effort. Always monitor steam release to avoid overcooking. Adjust timing based on food type for optimal texture and flavor.

Maintenance and Cleaning
Regularly clean the inner pot and steam tray with mild soap and warm water. Wipe the exterior with a damp cloth to prevent staining. Descale periodically to maintain efficiency.
7.1 After Use Cleaning Routine
After each use, unplug the Aroma ARC-914D and let it cool slightly. Wash the inner pot, steam tray, and accessories with mild soap and warm water. Rinse thoroughly and dry with a clean towel to prevent moisture buildup. Wipe the exterior with a damp cloth to remove splatters. Avoid using abrasive cleaners or scrubbers, as they may damage the surfaces. Regularly check and clean the cooker’s crevices to eliminate food residue. This routine ensures hygiene, prevents odors, and maintains the appliance’s performance. Always dry all parts thoroughly before storing to avoid rust or mold growth.
7.2 Deep Cleaning Techniques
For a deeper clean, mix equal parts water and white vinegar in the inner pot. Bring the mixture to a boil using the steam function, then let it simmer for 10 minutes. This helps remove stubborn stains and mineral deposits. Scrub the pot with a non-abrasive sponge and rinse thoroughly. Soak the steam tray and accessories in warm, soapy water for 30 minutes before cleaning; For tough residue, apply baking soda paste and let it sit overnight; Regular deep cleaning ensures optimal performance and prevents limescale buildup, keeping your Aroma ARC-914D in excellent condition for consistent cooking results.
7.3 Descaling for Optimal Performance
Descaling your Aroma ARC-914D is essential to remove mineral buildup from water, which can affect performance. Mix 1 cup of white vinegar with 2 cups of water in the inner pot. Turn on the steam function and let the solution run for 10-15 minutes to break down limescale. Rinse the pot thoroughly with clean water. For severe mineral deposits, soak the pot in a baking soda solution overnight before rinsing. Regular descaling ensures the cooker heats evenly, maintains pressure, and prevents clogs. This simple maintenance step will keep your appliance in top condition and extend its lifespan.
Troubleshooting Common Issues
Address issues like overcooking or undercooking by adjusting water ratios or timing. Check error codes in the manual for specific solutions. Ensure proper lid sealing and clean filters regularly to maintain performance and avoid clogs.
8.1 Addressing Overcooking or Undercooking
Overcooking or undercooking can often be resolved by adjusting the water-to-rice ratio or monitoring the cooking cycle; For undercooked rice, add a small amount of water and resume cooking. For overcooked rice, reduce water in future batches. Ensure the lid is sealed properly during cooking to maintain steam. If issues persist, check the power cord connection and verify the cooker is on the correct setting. Regularly cleaning the inner pot and steam tray can also improve performance. Refer to the measurement chart in the manual for precise guidelines. If problems continue, consult the troubleshooting section or contact customer support for assistance.
8.2 Identifying and Solving Error Codes
If your Aroma ARC-914D displays an error code, refer to the manual for specific explanations. Common codes like “E1” or “E2” often indicate issues such as overheating or sensor malfunctions. Ensure the cooker is on a level surface and the lid is properly sealed. Unplug the unit, wait a few minutes, and restart it to reset the system. If the error persists, check for blockages in the steam vent or excess scale buildup. Cleaning the cooker thoroughly may resolve the issue. For unresolved errors, consult the troubleshooting guide or contact Aroma’s customer support for professional assistance. Always follow the manual’s guidance for error code resolution.

Additional Features and Accessories
The Aroma ARC-914D includes a delay timer, measuring cup, and serving spatula. Accessories like the steam tray enhance its versatility for simultaneous cooking of rice and steamed dishes.
9.1 Using the Delay Timer Effectively
The delay timer on the Aroma ARC-914D allows you to schedule cooking in advance, ensuring your meal is ready when you need it. Simply program the timer up to 24 hours beforehand, and the cooker will automatically start at the set time. This feature is ideal for busy schedules, enabling you to prepare ingredients in the morning and come home to a perfectly cooked meal. For optimal results, ensure the inner pot is properly placed and filled with the recommended water and grain ratios before setting the timer. This function works seamlessly with both rice and steaming modes, making meal planning effortless and convenient.
9.2 Exploring Included Accessories
The Aroma ARC-914D comes with several useful accessories to enhance your cooking experience. A steam tray is included for convenient steaming of vegetables, meats, or seafood while rice cooks below. A measuring cup ensures accurate water-to-grain ratios, helping you achieve perfect results. A serving spatula is also provided for easy serving and portioning. Additionally, the inner cooking pot is designed for even heat distribution and easy cleanup. These accessories are designed to work seamlessly with the cooker, making meal preparation and cleanup efficient. Familiarize yourself with each item to maximize the versatility of your Aroma ARC-914D and enjoy a variety of delicious meals.
Tips for Perfect Cooking
- Measure liquids accurately for consistent results.
- Avoid overfilling the cooker for optimal performance.
- Rinse rice thoroughly before cooking for better texture.
- Use the delay timer to plan meals in advance.
10.1 Enhancing Flavor in Rice
To enhance the flavor of your rice, try adding aromatic spices like saffron, cardamom, or cinnamon during cooking. Use broth instead of water for extra richness. For a savory twist, sauté onions, garlic, or herbs in the cooker before adding rice. A tablespoon of olive oil or butter can also elevate the taste. Experiment with coconut milk for a creamy texture, or mix in fresh herbs like parsley or cilantro after cooking; For a smoky flavor, add a splash of soy sauce or sesame oil. These simple additions can transform plain rice into a flavorful dish, complementing any meal perfectly.
10.2 Budget-Friendly Meal Ideas
Using the Aroma ARC-914D, create affordable and delicious meals by combining rice with proteins and vegetables. Try one-pot dishes like chicken and vegetable stir-fry or lentil soup. Steam fish with lemon and herbs for a healthy, low-cost option. Use leftovers creatively, such as turning last night’s roast into a fried rice dish. For a hearty meal, cook beans or eggs with rice and spices. The delay timer allows for meal prep, saving time and reducing food waste. Experiment with grains like quinoa or barley for variety. These meals are cost-effective, nutritious, and easy to make, perfect for families or individuals on a budget.
Warranty and Customer Support
The Aroma ARC-914D comes with a 1-year manufacturer warranty. For support, visit www.AromaCo.com/Support or call 1-800-276-6286 for assistance with your rice cooker and steamer.
11.1 Understanding the Warranty Offered
The Aroma ARC-914D is backed by a 1-year limited warranty, covering defects in materials and workmanship under normal use. This warranty ensures repairs or replacements are provided free of charge for any faulty parts or manufacturing issues. It’s essential to retain the original purchase receipt as proof of ownership when filing a warranty claim. The warranty does not cover damage caused by misuse, improper maintenance, or external factors. For detailed terms and conditions, refer to the warranty section in the instruction manual or visit the Aroma website.
11.2 Reaching Customer Support
For assistance with the Aroma ARC-914D, customers can contact Aroma’s customer service team through their official website at www.AromaCo.com/Support or by calling 1-800-276-6286. The support team is available to address questions, concerns, or issues related to the product. Additionally, the website offers a comprehensive support section with FAQs, troubleshooting guides, and downloadable resources. When reaching out, it’s recommended to have the product model number (ARC-914D) and purchase details on hand for efficient assistance. This ensures a smooth and timely resolution to any inquiries or problems you may encounter with your rice cooker and food steamer.
The Aroma ARC-914D offers a convenient and efficient cooking experience, perfect for preparing rice, grains, and steamed dishes. Its user-friendly design and versatile features make it a valuable addition to any kitchen, ensuring delicious and healthy meals with minimal effort.
12.1 Summary of Benefits
The Aroma ARC-914D offers a wide range of benefits, making it a versatile and essential kitchen appliance; It simplifies meal preparation by allowing users to cook rice, grains, and steam vegetables simultaneously. The digital controls provide easy operation, and the delay timer enables convenient meal planning. The cooker’s compact design and cool-touch exterior ensure safety and space efficiency. Additionally, it comes with accessories like a measuring cup and spatula, enhancing the overall cooking experience. With its ability to handle various grains and steam foods, the ARC-914D promotes healthy, one-pot meals while delivering consistent results. Its user-friendly interface and multiple functions make it a valuable addition to any home kitchen.
12.2 Encouragement to Explore Capabilities
Take full advantage of the Aroma ARC-914D’s versatile features to elevate your cooking experience. Experiment with various grains like quinoa, barley, and brown rice, and explore the convenience of steaming vegetables or proteins alongside your rice. The delay timer allows for meal prep flexibility, ensuring your dishes are ready when you are. Don’t hesitate to try new recipes or adjust settings to suit your preferences. The cooker’s user-friendly design and multiple functions make it ideal for both beginners and experienced cooks. By exploring its capabilities, you can unlock a world of flavors and simplify your kitchen routine with healthy, delicious meals.